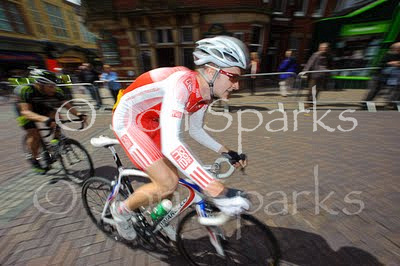
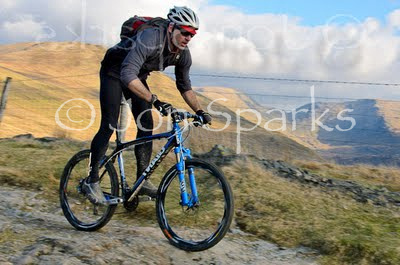
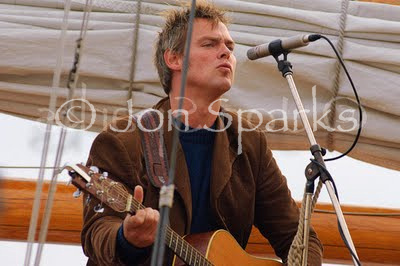
I’m sure many people never really think about this. The camera focuses automatically and that’s enough. However, as enthusiasts know, sometimes you want to focus on a subject and then just stay focused on that point. You may even want to focus on a subject and then hold focus while you reframe the image with that subject near the edge of the frame (i.e. outside the area covered by the focus points) – this is called focus lock.
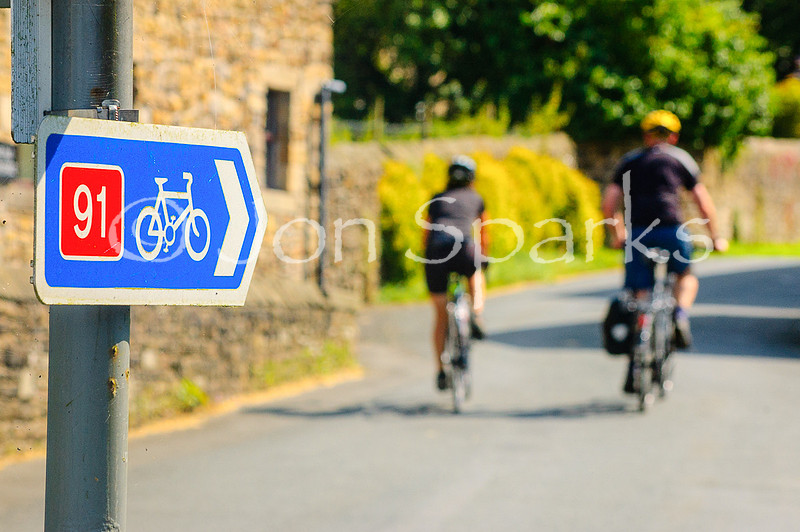
Off centre-subject
At other times you want the camera to keep adjusting focus because you’re dealing with a moving subject; whether it’s moving across the frame, directly towards (or away from) you, or following some more complex trajectory, you want the camera to keep track of it and maintain focus on your chosen subject.
Single and Continuous
More sophisticated cameras, including DSLRs and the majority of mirrorless cameras, allow you to switch between single-shot and continuous autofocus modes. Single-shot modes work for static subjects – our first scenarios, a couple of paragraphs back. After all, if neither the subject nor the camera move, you only need to focus once. Continuous modes allow the camera to keep adjusting focus to deal with moving subjects.
Nikon (whose cameras I know best) badges these modes AF-S and SF-C respectively. That’s understandable; it probably becomes less clear when you see that the official full names of these modes are Single-servo AF and Continuous-servo AF. Hands up if ‘servo’ means anything at all to you...
Other camera-makers may use different jargon, but the basic single/continuous distinction still applies. For example, Canon’s equivalents (in most cameras, anyway) are One Shot AF, which is clear enough, and AI Servo AF, which is arguably even more obscure than Nikon’s terminology.
There’s also an auto option (AF-A, or AI-Focus in Canonspeak), in which the camera decides whether AF-S or AF-C should be employed. If it detects a moving subject it will use continuous AF to track it. However, I’m sure we can all imagine scenarios where there’s movement in the scene but the actual subject we want to capture is stationary. Or we may simply want to make our own decisions about when to use AF-S or AF-C.
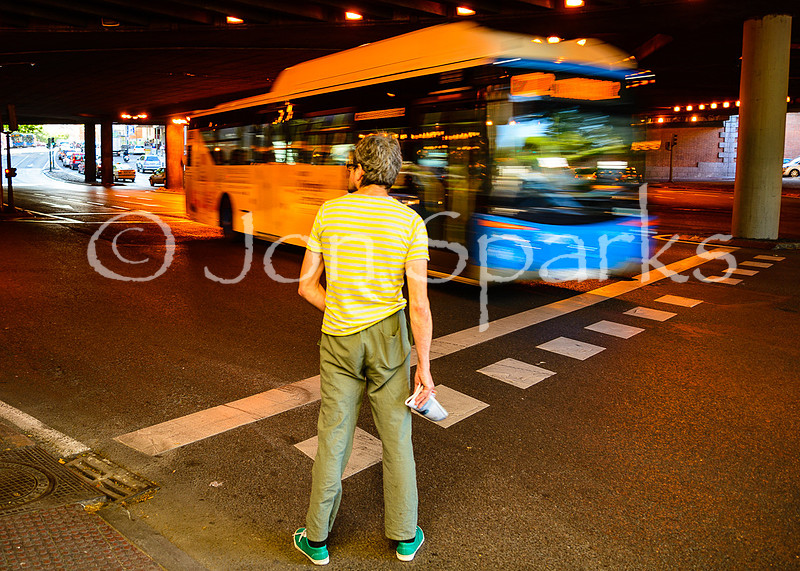
‘There’s movement in the scene but the actual subject we want to capture is stationary.’
Normally, you switch between AF-S and AF-C using a separate control. On recent Nikon DSLRs, for instance, you hold the centre of the focus selector switch and turn the command dial (main command dial on cameras with two dials). It’s simpler than it sounds, but it takes practise to be able to do this without taking the camera from your eye, and it isn’t instant.
What if there was a way to switch from single to continuous AF at any time, with no delay, and without looking at any of the controls? Well, there is, and it’s called back-button AF.
Some cameras have a dedicated button on the rear which you can use for this. On Nikons it’s labelled AF-ON, but it’s only found on high-end models like the Df, D810 and D4s.
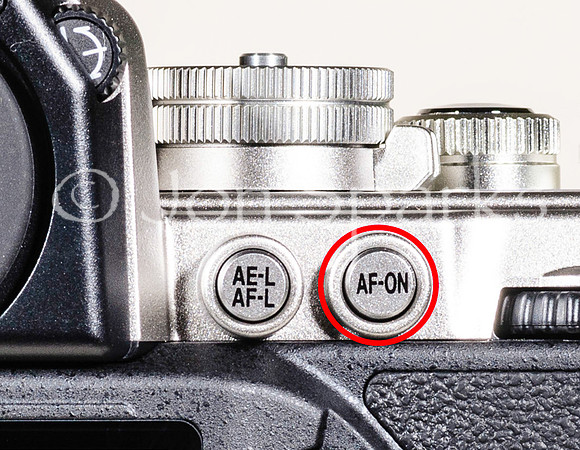
Separate AF-ON button on a Nikon Df
However, if like me you use something a bit more ordinary, do not despair. Almost every other Nikon DSLR has a button which you can set up to do the same job. It’s marked AE-L/AF-L. By default, if you hold down this button, both exposure and focus are locked, but you can change its function with a visit to the Custom Setting Menu. The only exceptions are the D3300 and its predecessors, which don’t have a Custom Setting Menu.
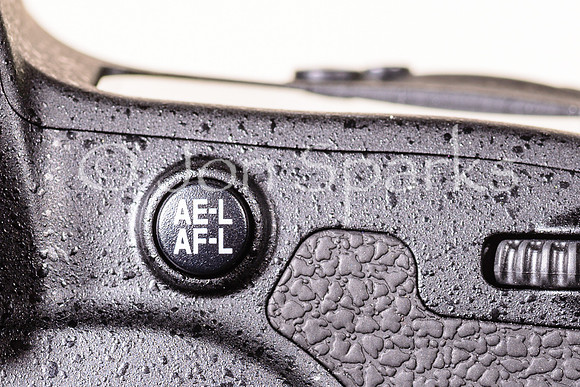
AE-L/AF-L button on a Nikon D750
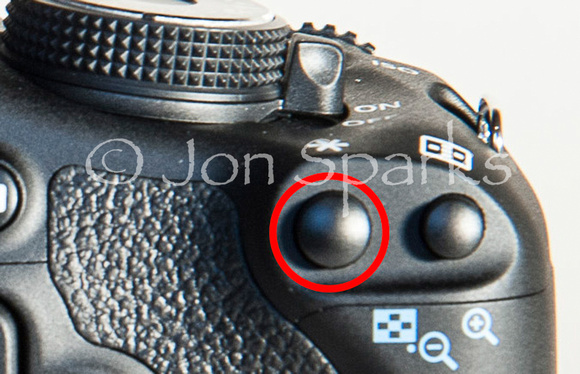
Equivalent to the AE-L/AF-L button, marked with a star, on a Canon EOS 600D
With other models, you need to find the menu item called Assign AE-L/AF-L button, and change the setting there to AF-ON. Having done this, the other step you need to take is to make sure that autofocus is set to Continuous (AF-C). Do this once, and you’ll never need to change the AF mode again, because you’ll be able to shift between AF-S and AF-C at will.
Black magic?
This might sound like black magic, but it isn’t. Changing the function of the AE-L/AF-L button to AF-ON also stops the shutter-release button from activating autofocus. Now, only the AE-L/AF-L button can do this. And, because it has no other function, there’s no confusion. If you press it and then release when the camera focuses, focus then remains set at that distance – it functions as Single-servo AF and focus lock rolled into one. Press the button and keep it pressed, on the other hand, and Continuous AF remains active.
If you have a camera with an AF-ON button, you do have to ‘turn off’ the autofocus function of the shutter-release button; do this by changing the AF activation item in the Custom Setting Menu from Shutter/AF-ON to AF-ON only. Having done this, the AF-ON button then functions in the same way described for the AE-L/AF-L button in the previous paragraph.
No doubt this all sounds complicated. It did to me when I first started experimenting with back-button AF. But once I’d got used to using my right thumb to activate focus rather than my index finger, I soon realised things had actually become simpler. Not only can you switch between single and continuous AF at any instant, you also have no more worries about whether pressing the shutter-release button will cause the camera to refocus if you don’t want it to.
It took me a few hours to get used to it but soon it became second nature and now I wouldn’t have it any other way. I now set up this option on any camera that I’m using. Try it – give it a fair chance and you may find you never go back.
Mind you, it’s not entirely without pitfalls. It caused a little confusion last week when I lent my D600 to another photographer and next day he emailed to ask if knew that autofocus wasn’t working? I’d forgotten to tell him that pressing the shutter-release button wouldn’t actuate AF. Fortunately, that was quickly resolved. It’s something to remember if you share the camera with someone else – though that could be what User Settings are for. But that’s another story...
Back-button AF lets you jump from Single to Continuous AF instantly
]]>
A couple more credits: as second guide Tom brought along Jay Mulvey from MudTrek Mountain Bike Breaks, another excellent rider and good companion on the trails. And none of it would have been possible without our minibus and driver, Graham Draper of BikeBus Adventures (that’s a Facebook link as the website appears to be currently under reconstruction). Graham is also a skilled rider although it wasn’t possible for him to ride with us every day as drop-off and pick-up points were sometimes widely separated.
And thanks to the rest of the group too: Nik, Paul, Jeroen, Mark, Becky, Fiona and Anne. There was a range of skill and fitness levels but everyone was very supportive of each other. And as a photographer I was very glad that I could at least keep pace with most people – the whole essence of mountain bike photography is having to get ahead of people to shoot as they ride past, and then chase, catch up and do it all again.
On magazine assignments or commercial shoots, all the riders are effectively there as models and have a job to do. If the photographer needs them to ride a section of trail several times, or needs some people to hold flashguns while someone else rides, that’s part of the deal. They may help with carrying extra bits of kit, too.
In this case, however, seven people had paid to come on this trip as a holiday. That, and the fact that several of the days turned out to be pretty long anyway, meant that I needed, most of the time, to get my shots without disruption or delay to other riders. At most I might leave a snack/lunch stop a few moments ahead of the rest, or ask someone just to hang on a few seconds while I got sorted, but there was very little in the way of actually setting up shots or asking anyone to ‘do that bit again’.
Kit choices
With the foregoing in mind, I didn’t need to carry a vast amount of gear, and with some big days on the bike I was very glad not to have to. And I really don’t think I missed much by not having a fisheye lens or a 300mm. I’m a believer in keeping it simple anyway; I think when you look at the subject and the setting should speak for themselves. I’m turned off by images where the first impression you get is ‘oh, look, remote flash’ or ‘monster lens’.
I took two DSLRs with me, but only ever carried one at a time. I had my trusty Nikon D600 – perhaps not the most ‘pro-spec’ of Nikon’s FX (full-frame) cameras but nice and light, with a 24–85mm lens as standard. I also had a D7200, as I was in process of writing an Expanded Guide. This is currently Nikon’s top DX-format camera; I paired it with a Sigma 18–125mm lens. This doesn’t give quite such a wide view as the 24mm on the D600, but there’s over double the reach at the longer end. I also had a couple of extra lenses – a 14mm Sigma and 70–200mm f.4 NIkon. In the end I never toted the Nikon tele on a day out but I did take the 14mm with me a couple of times. Changing lenses is another thing that takes up time but in those majestic Scottish landscapes the wide-angle was really needed at times. I also had some remote flash kit which I used a couple of times.
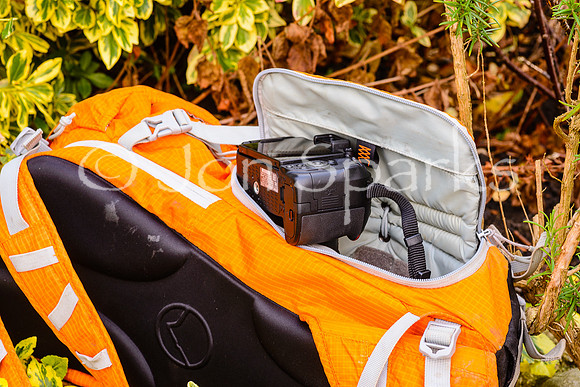
To carry camera and any additional gizmos, as well as general riding kit, food, drink, etc, I used my LowePro Photo Sport 200 AW, which has a handy side-access compartment for the camera. See photo above (in this case with a Nikon D5300). This pack has been in the LowePro range for years – I’ve had mine at least six. ‘If it ain’t broke, don’t fix it’, would seem to apply here.
As to actual photography, one of the most important aspects of shooting in places you haven't been before is maintaining a kind of continual appraisal of the picture opportunities. This includes having eyes in the back of your head! Clearly on more technical sections of trail the focus has to narrow, but of course technical sections make for interesting riding shots so the appraisal still goes on even if it’s as a background process.
Anyway, here are just a few of my favourite shots from the trip, with brief thoughts on each.
Becky Nokes on the descent into Glen Tilt, Day 2
Nikon D600, 52mm, ISO 400, 1/400, f/5.6
There wasn't much sun to be seen on the first couple of days but on this long (near enough 50km) and remote ride I thought the misty conditions enhanced the epic feel. What caught my eye here was the way the trail pointed into the valley we were heading for. I stopped and let Becky go ahead and took several shots, but this one, where she's right at the intersection of the lines, stood out. I really like using tiny figures in big landscapes but the placement has to be just right.
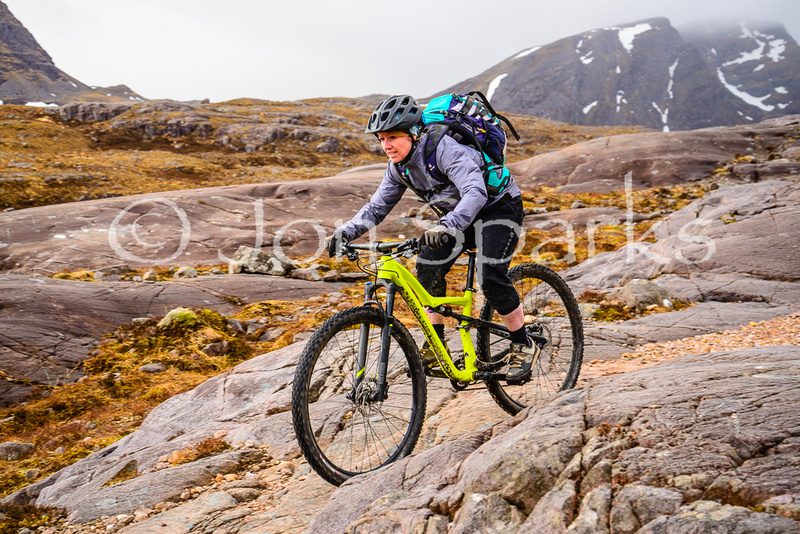
Becky Nokes starting the descent to Achnashellach, Day 4
Nikon D600, 52mm, ISO 200, 1/500, f/5.6
This was, by general agreement, a superb descent. For me it was the best of the week and one of the best I’ve ever done – continually pushing the limits of the comfort zone without throwing up too many horrors. But this shot is more about the general feeling and atmosphere than any particular technical difficulty. In terms of photographic technicality, it’s pretty much nailed, with a wideish aperture for shallow depth of field so the background is slightly soft while the rider is pin-sharp. But I think what really makes it is Becky's complete focus on the trail ahead.
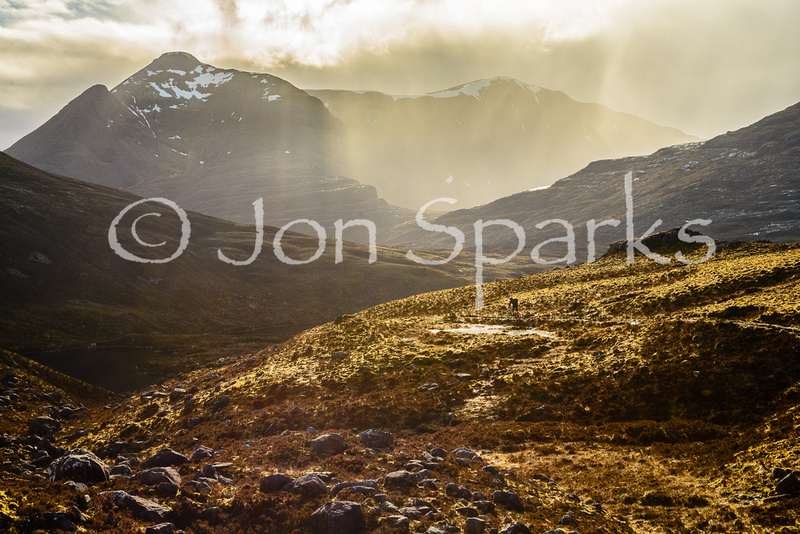
Jeroen Hoek on the descent from Bealach na Lice, Day 4; Beinn Damh behind
Nikon D600, 66mm, ISO 200, 1/320, f/11
This is an exception to the general rule that there were no set-up shots. While we were re-assembling the team and having a rest at the bealach, this superb light was calling to me and superfit Dutchman Jeroen was happy to ride down the first section of the descent and back up. It takes some processing in Lightroom to bring out the tones in such contrasty lighting and I may yet have another play with this image.
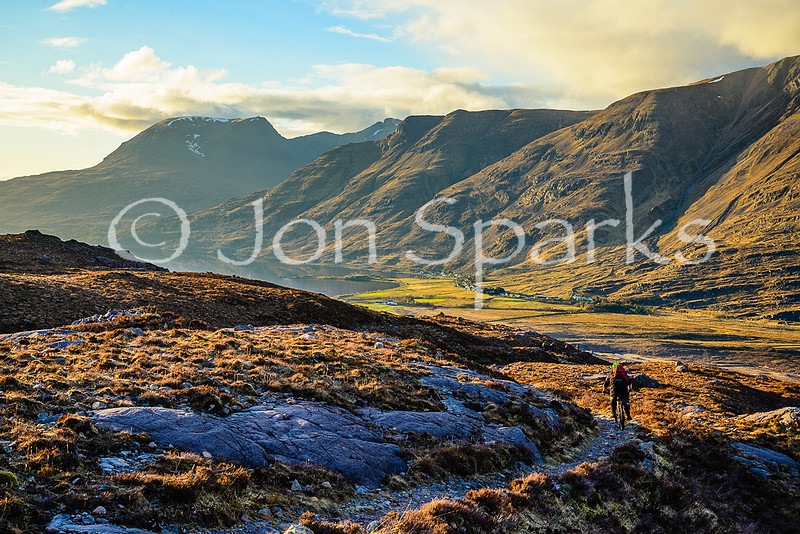
Paul Collins on the final descent to Torridon, Day 4; Beinn Alligin in the distance
Nikon D600, 46mm, ISO 200, 1/200, f/8
It’s getting well on into the evening here (about 6.30pm) and the descent isn’t done yet. This may not have been quite how Tom planned the day but it certainly played into my hands as far as photos were concerned. The light was just gorgeous. Paul’s green helmet certainly stood out in the shots!
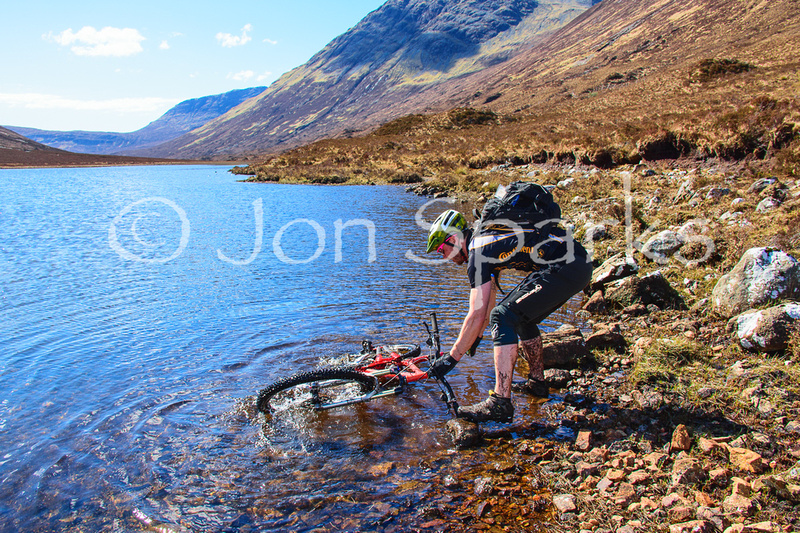
Jeroen Hoek, Lochain Stratha Mhoir, Skye, Day 6
Nikon D7200, 20mm, ISO 200, 1/250, f/8
Our last day didn’t start particularly promisingly, with repeated pushes through peaty hollows breaking up any rhythm in the riding. When Jeroen decided to give his bike an impromptu wash, I saw the chance for a shot that would say something a bit different about the trip and about the nature of riding in wilder parts of Scotland. “This is not a trail centre,” as people said more than once.
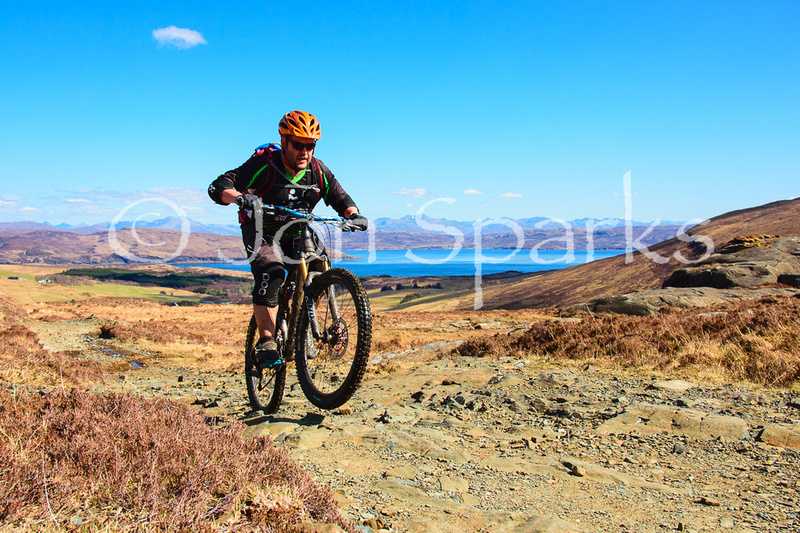
Nik Wadge, above Kilmarie, Skye, Day 6
Nikon D7200, 24mm, ISO 200, 1/800, f/7.1
There isn’t anything particularly remarkable about this shot – nice background, fast shutter-speed to freeze the movement, and so on. One point I would make is that I got fairly low, sitting in the heather – a low viewpoint makes the rider more prominent as they appear against the sky. And it was very helpful of Nik to pop his front wheel up just here!
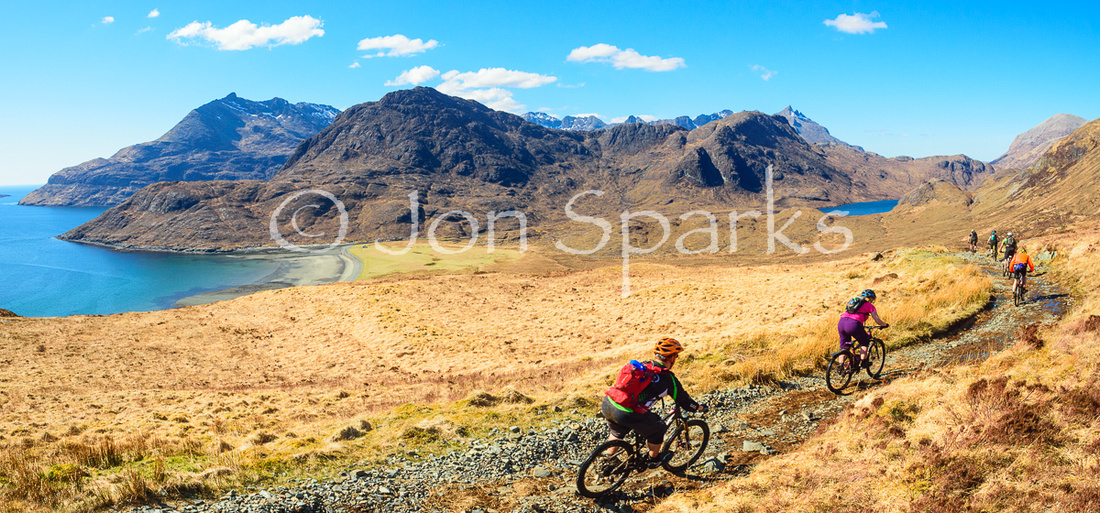
Nik Wadge, Anne Strafford, Mark Bale, Jay Mulvey, Fiona Vaughan, Jeroen Hoek,
descending to Camasunary, Skye, Day 6
Nikon D7200, 14mm, ISO 200, 1/500, f/8
This view, encompassing the entire Cuillin Ridge as well as Marsco on the far right, certainly wasn’t be missed. If I’d had the D600 as well as the 14mm lens, I might have been able to take it all in in a single shot, but that day I’d chosen to take the D7200 with its tighter crop factor. So I took several shots thinking I might be able to make a merged panorama later – and within a few days of getting home a new release of Lightroom gave me the chance to do that without even loading Photoshop. There are actually three frames in this merge, but all the riders were captured in a single shot.
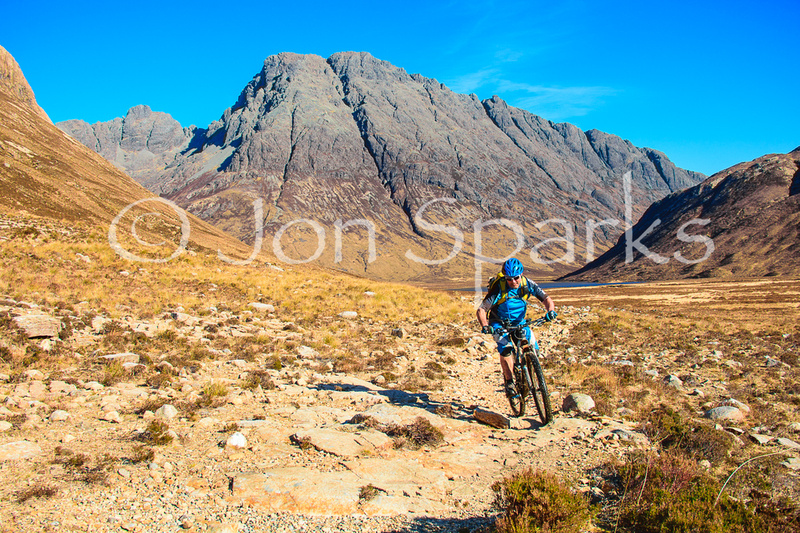
Tom Hutton, Strath na Creitheach, Skye, Day 6; Bla Bheinn behind
Nikon D7200, 22mm, ISO 200, 1/320, f/6.3
I’m struck by the almost desert-like appearance of this shot – is it Utah maybe? No, it’s the Misty Isle of Skye in rainy Scotland. Technically the shot is straightforward, but I like the way that Tom’s helmet and riding kit match the colour of the sky, while everything else in shot is in a complementary palette.
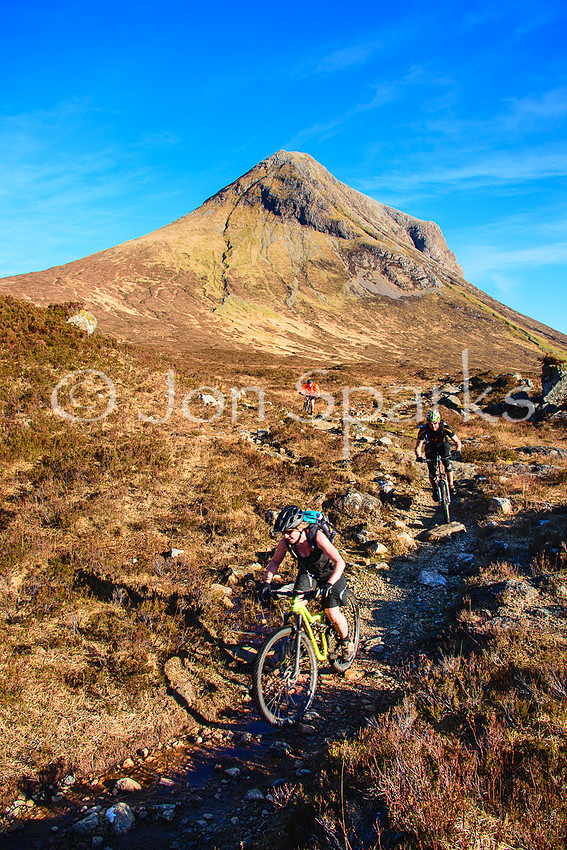
Becky Nokes, Jeroen Hoek, Mark Bale, Gleann Sligachan, Skye, Day 6; Marsco behind
Nikon D7200, 18mm, ISO 100, 1/250, f/6.3
Just a couple of kilometres from the end, not just of the day but of an awesome week’s riding. I’m not sure why I dropped the ISO to 100 and could perhaps wish I hadn’t. The relatively slow shutter speed means that Becky, nearest the camera, is somewhat motion-blurred. Whether or not it spoils the shot is a matter of taste, I guess. I tend to prefer riders to be sharp unless I’m deliberately going for a panning shot or other impressionistic blur. This was another ‘set-up’ shot, as these three back-tracked and re-rode the visible section of trail while we waited for a couple of stragglers.
It's a nice camera in many ways and capable of excellent results, but in most respects not radically different from its predecessors. The headline feature on this camera is undoubtedly the introduction of a touch-screen.
This is the first time I've used a DSLR with a touch-screen but I’ve been working intensively with this one for a few weeks and I thought I’d share my initial thoughts about it.
I’ve always been somewhat sceptical about the benefits of touch-screens, at least on cameras which are fundamentally designed to be used at eye-level. Has the D5500 changed my views? Read on...
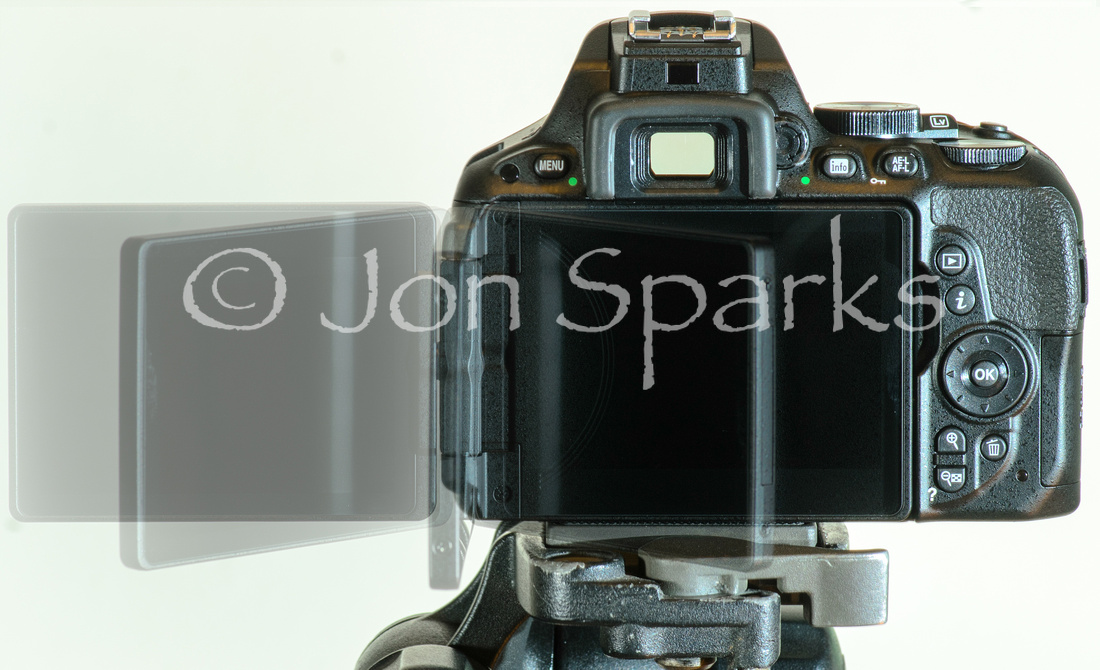 It’s worth saying at the outset that when I’m working on an Expanded Guide I do all sorts of things with a camera that I generally wouldn’t do in my regular shooting. This is obviously necessary in order to be properly familiar with all the modes and functions. And it isn’t a bad thing for me personally as it does mean that I don’t get totally set in my ways. I do regularly get a fresh perspective on my habitual ways of working and this does occasionally lead to changing the way I do things.
A quick example: I was pretty sceptical about Live View when it first appeared. A DSLR is an eye-level camera, isn’t it? Well, it is, and the viewfinder will always be my first choice for most shooting, but Live View does have an advantage when focusing is super-critical, e.g. shooting with very long lenses or in macro. It’s very accurate and you can zoom in on any part of the image to check focusing even more precisely. My default setting for macro shooting is now tripod + Live View zoom + manual focus. I’d probably have figured that out sooner or later but because working on the Guides obliged me to explore Live View, it happened sooner.
But back to the touch-screen. Let’s look at how it works in four main areas: normal shooting (i.e. using the viewfinder); Live View (and movies); menu navigation; and playback.
 Normal shooting
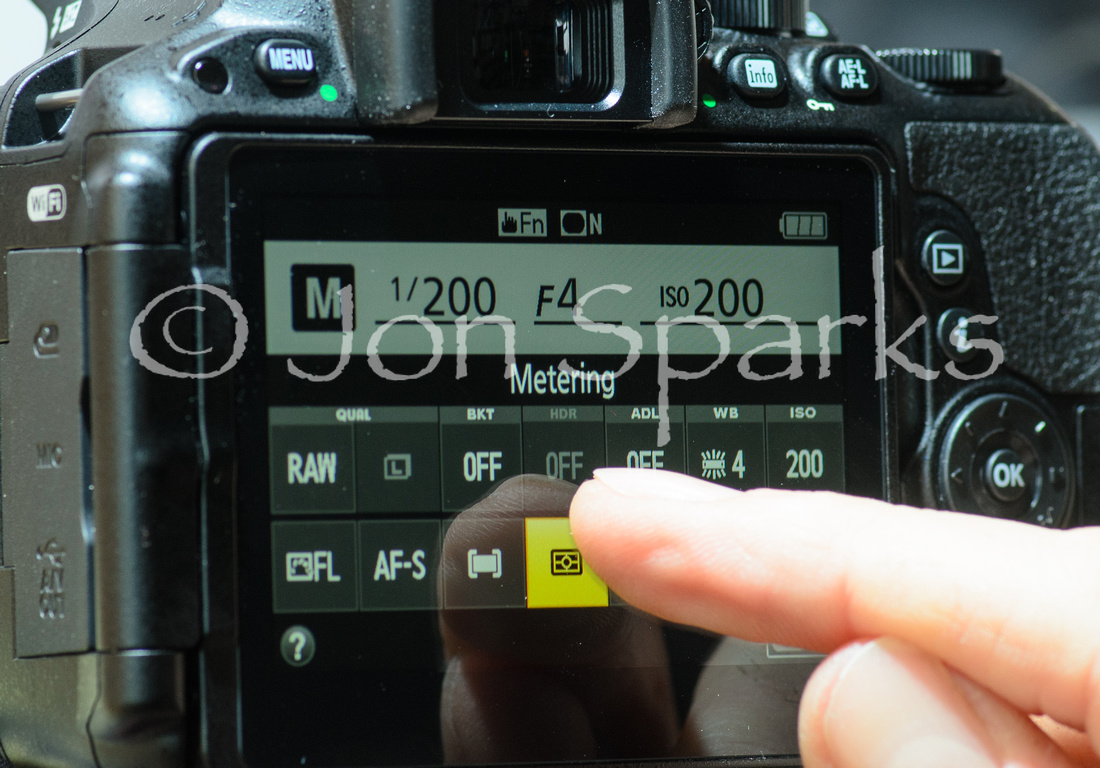
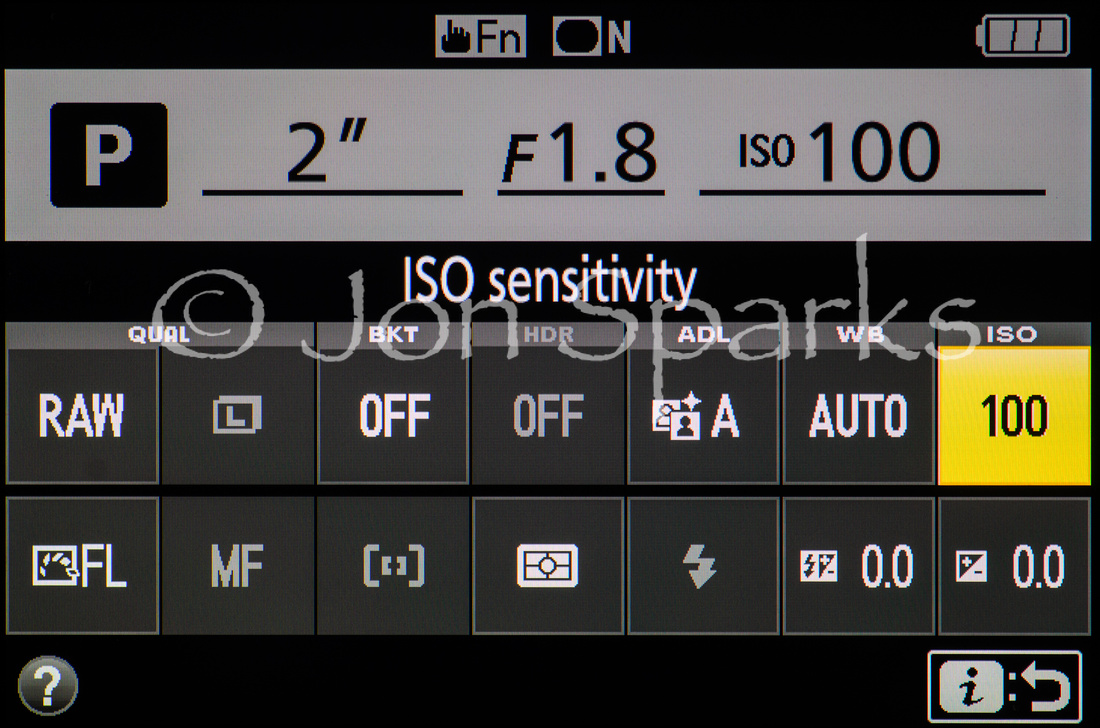
Again, working on a Guide is not like my regular everyday photography. It involves a lot of playing around with different modes and different settings. And for a lot of this, using the touchscreen probably is significantly quicker than using more traditional methods. For many operations on the D5500 you have to highlight a setting using the multi-selector (most other cameras have an equivalent control), then press OK to activate it. With the touchscreen a simple tap turns two steps into one. Not only is this quicker, this soon feels intuitive too.
However, some of these comparisons would pan out differently on other cameras which have a few more dedicated buttons. In fact, all the SLRs ‘above’ the D5500 in the Nikon range also have a separate control panel on the top-plate and it’s easy to change key settings like image quality, white balance and so on using this: just hold the appropriate button and turn the main command dial (or sometimes the sub-command dial for further options). This is quicker than activating the touchscreen and then making a change in settings – but only once you’re familiar with the location of the buttons. I can see that many photographers new to DSLRs – especially if they’re familiar with other touch devices like a smartphone or tablet – will now never learn where the buttons are, and so will miss out on what can be the quickest way to change many settings.
I also am fairly sure, though I don’t have hard evidence, that using the control panel is less draining on the battery than using the touchscreen. This is probably of no practical significance unless you (a) change settings an awful lot and (b) are on a long trip without a spare battery or chance to recharge. But still...
There’s one area where the touchscreen is clearly much slower – and it’s a pretty basic one. This is in setting aperture or shutter speed. First you have to activate the display then tap on-screen arrows – and each tap only changes the setting by 1/3 Ev. It’s far quicker to use the command dial. On the D5500, which only has one command dial, you have to hold the exposure compensation button and turn the dial to set aperture in manual mode, but it’s still loads quicker.
What's more, you can change shutter speed and aperture without taking the camera from your eye as they are shown in the viewfinder. This is particularly important if you’re shooting sports or other action. And the same applies to ISO setting, too, which of course is the third point of the ‘exposure triangle’ and really, on a digital camera, should come into play just as much as the other two. On the D5500, you hold the Fn button (assuming you haven’t changed its default function) and turn the dial to do this. You do need to change a Custom setting (b2, since you asked) to get ISO shown in the finder, but this is a one-time action and honestly it’s a no-brainer. Do it.
In my everyday shooting, I’ll probably never touch most of the settings (Image quality, Picture Control, White Balance, etc) from one end of the day to the other. The things that I do adjust all the time are shutter speed, aperture, and ISO. The touch-screen is a hindrance for these, so I’ll make little or no use of it in normal shooting.
 Live View
In Live View, of course, things are a bit different. The screen is already active and you’re using it to frame shots anyway, so there’s much less time lost in transferring your attention to the touch-screen. For most settings, especially the ones you can access quickly by pressing the i button (see footnote), it’s probably quicker to use the touch-screen. It’s still way quicker to use the dial for shutter-speed and aperture, however, and it’s probably a score-draw when it comes to ISO.
But the touch-screen does bring something new to Live View; the ability to tap a point on screen to make the camera focus there. This is much, much quicker than laboriously moving the focus point with the multi-selector and then pressing another button to make the camera focus on it. A big win for the touch-screen here, I’d say.
However, I should add that this only speeds up your half of the focusing process – the bit where you tell the camera where to focus. Actual focusing (the camera’s part of the process) in Live View is still a bit slow and certainly not much good for shooting action. (Surprising that Nikon’s DSLRs aren’t better at this, when the focusing in the Nikon 1 mirrorless cameras is so good).
Personally, when I’m using Live View, I’m also using manual focus much of the time. And what would speed this up is if I could zoom in on the key area with a gesture, or even press the zoom button and then drag a finger to see a different area in the magnified view. Without this, zooming to view a particular area means you have to position the focus point over it first and then use the zoom button. It’s a let-down, and doubly so because you can gesture-zoom in playback (see below).
There’s one other aspect that I haven’t mentioned, which is the ‘touch-shutter’. You have to enable this by tapping an icon on the screen. Once you’ve done this, if you tap a point on the screen the camera will focus there – and when you lift your finger it will take a shot.
I’m really not convinced there’s any advantage to this. Yes, if you’re interacting with the camera solely through the screen, it may seem logical to have this option. But every time you focus on A and then decide you don’t want to take that shot and want to focus on B instead, the camera will take a picture anyway. Of course you can delete the unwanted shot(s) afterwards but still, a function that takes pictures you don’t want is not a very smart function. Needless to say, I quickly disabled the touch shutter and don’t envisage ever using it again.
 Menu navigation
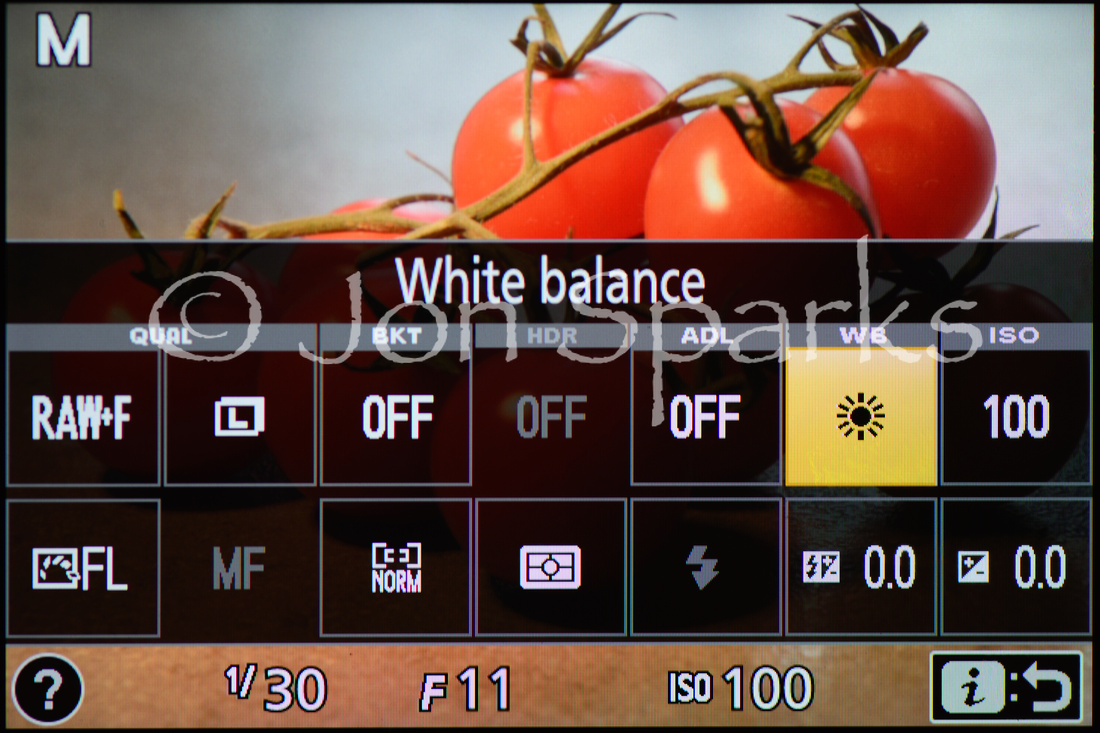
On the face of it, the touch-screen speeds up menu navigation enormously. Instead of scrolling to an item to highlight it, and then pressing OK to accept or move to the next step, you can just tap the item. It cuts the time taken by at least 50% and often much more.
However, the downside for me is that every now and then I tap on the wrong item. You do need to be quite precise as the target areas are quite small (just over 4mm deep). Or maybe it’s just my clumsy fat fingers. And when you do tap in the wrong place it often means having to undo the setting you didn’t mean to change before going back and redoing the one you did.
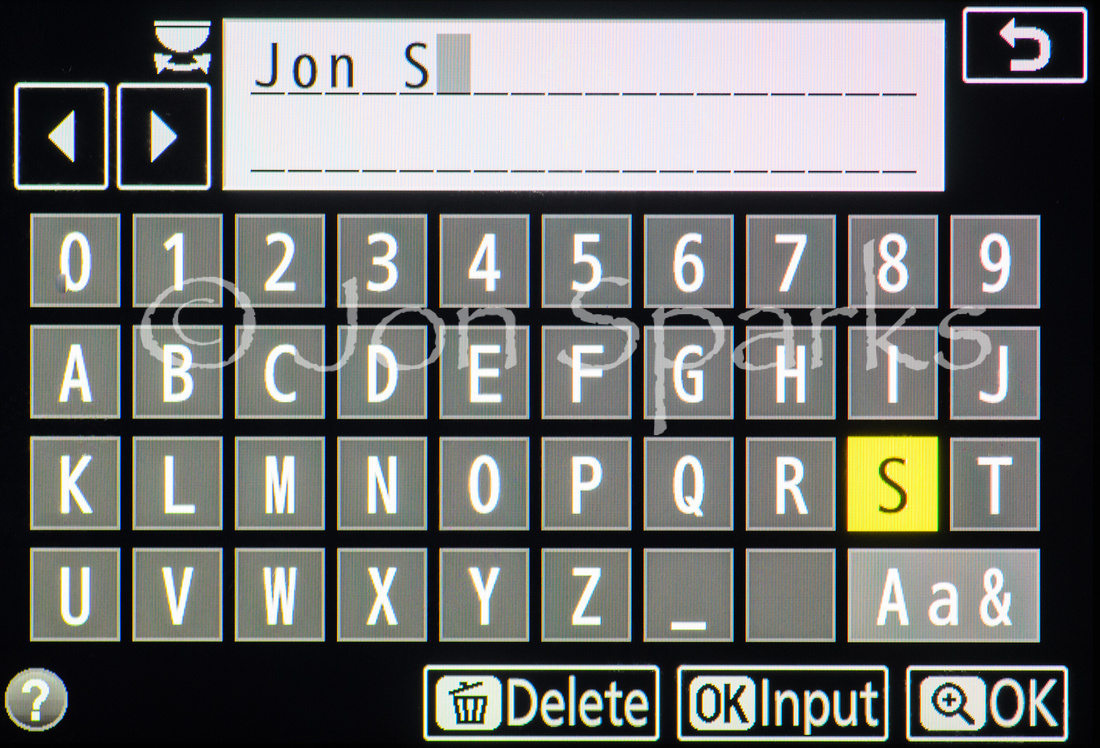
Still, on balance, it’s a notable improvement. And in one area – text entry – it’s absolutely streets ahead of the older way. I might even use features like Image comment more often now that entering text has become easy, instead of painfully tedious.
 Playback
On the whole I think playback is where the touch-screen really shines. It is natural and easy to swipe left or right to scroll through pictures, and to stretch or pinch to zoom in or out. The improvement is even more noticeable when you hand the camera to someone else who wants to look through your pictures; they’re far more likely to be used to this way of doing things than using the multi-selector.
There’s one blemish, though. You can scroll left or right by touch but you can’t scroll up/down through the different info screens for each image (highlights, histogram, metadata and so on). I use these a lot, especially the histogram, which any serious photographer should refer to regularly. You still have to use the multi-selector for this, and it feels more awkward to do so when you’re switching to it from intuitive gesture-navigation. If Nikon can fix this for future iterations it will be a real benefit.
In general
Of course some of these comments are determined by the specific way Nikon has implemented the touch-screen on the D5500 and some of the shortcomings I’ve mentioned could easily be addressed. Even so, there are clearly some areas where using the touch-screen is easier and faster than other methods and as long as I’m using the D5500 (though it’ll be going back in a few weeks), I’ll happily make use of them, probably more so in Live View than in normal shooting. Nikon’s implementation for Live View does leave a little to be desired, but it undoubtedly speeds up certain operations.
At the same time, I do still have a few reservations. The first is one I’ve already mentioned – that photographers new to DSLRs may get suckered into using the touch-screen for everything, even those areas where it clearly isn’t superior. An SLR is still first and foremost an eye-level camera. You should be able easily to adjust crucial settings without taking the camera away from your eye – and you can.
I also wonder about the durability of the touch-screen, which of course now gets much more hammer than non-touch-enabled screens. After the first day or two playing with the camera, the screen was already seriously in need of cleaning. Nikon doesn’t provide any sort of screen protector but if I were going to keep this camera I’d certainly be looking for one. And as an outdoor photographer, sometimes shooting under time pressure in challenging conditions, I’m a bit concerned about the ruggedness of fold-out screens more generally, too.
As an outdoor photographer I’m also very conscious of how cameras handle when you’re wearing gloves, and clearly touch-screens and gloves don’t play nicely together. (I’m aware there are gloves which claim to work with touch screens but you still lose some of the precision which is definitely needed to use this one). Clearly I’m not going to be pulling off my right glove every time I want to adjust something, so it is important that control through buttons and dials remains available and straightforward. Any camera that only lets you do things through a touch screen is a non-starter for me (one reason why I don’t see the iPhone as a serious full-time camera).
Bottom line
I guess I half-expected to find that a touch-screen on a DSLR was a pointless gimmick. It’s not. It’s genuinely useful and beneficial for some things. But it’s not a panacea and some operations are still best done by other means.
In future if I have a camera with a touch-screen in my hands I’ll use it for the tasks it’s good at. But the presence or absence of a touch-screen is going to be fairly low on my list of priorities next time I go looking to buy a camera for myself. I like it more than I expected to but I can still live without it.
Footnote: Settings you can access quickly in Live View by pressing the i button:
Image quality, Image size, Bracketing, HDR, Active D-Lighting, White balance, ISO, Set Picture Control, AF mode, AF-area mode, Metering pattern, Flash mode, Flash compensation, Exposure compensation
Out of these, ISO, Flash compensation, and Exposure compensation are more easily accessed by button and dial.
I think Metering pattern is a waste of space here. I never shift out of matrix in normal shooting: for critical exposure assessment I rely on a test shot and looking at the histogram. I’d like to bet that upwards of 95% of owners of a camera like this will use matrix all the time too, or depart from it once in a blue moon. I’d far rather see Release mode on this list. There is a dedicated Release mode button on the D5500, but it’s in a rotten place – a rare fail for Nikon, who usually do a damn good job with their camera ergonomics.
]]>The person responsible for the image in question proclaimed that whether I like it or not is irrelevant to him – though this, of course, begs the question of why he bothered to respond at all. He then referred to my ‘cursory dismissal’ of his image. He also used the word ‘art’ in reference to his own work, but let’s not even go there.
I might have been inclined (and might have been wiser) to leave it at that point but the phrase ‘cursory dismissal’ got my back up. My response wasn’t a spur-of-the-moment thing and I can prove it – as we’ll shortly see.
I also observed with interest that some people had commented approvingly on the image without, apparently, realising that it was not a straight photograph. You’ll have noticed that I have not referred to the picture in question as a photograph but only as an image. The originator did (though only after being called out) admit that it was a composite of two photos.
Now I don’t have his permission to reproduce it here, and I’m not asking for it, as I don’t want this to become any more personal than it already has. I did, at the start, say I hated ‘this sort of thing’, rather than his photo specifically.
So what ‘sort of thing’ are we talking about anyway? Well, the image in question showed a field of flowers (oilseed rape I think) and a tree, under a deep red sky. There’s no doubt in my mind that the colour of the sky owed much to either a red graduated filter at time of shooting or to some heavy post-processing. If the sky had been that red in reality there would surely have been a distinct shift in the colour of the flowers too.
So already we have an image that has been altered well beyond what would actually have been visible at the time of shooting. But that’s not all. Floating in that red sky was a huge full moon.
Now to me it was instantly obvious that this image could never have been created as a straight photograph. There are at least two reasons why it’s impossible; I’ll explain more fully shortly. But let me just go back to that glib accusation of ‘cursory dismissal’. This is not the first time I’ve seen this kind of image. In fact I wrote something about it as far back as 2002, in which I specifically referred to ‘impossible shots created by double exposure, like a telephoto moon hovering over a wide-angle landscape.’ To which I added, ‘These make me almost queasy.’ 13 years later, they still do. (That original piece is reproduced at the end of this blog post).
Of course, that is a personal reaction, and if other people like this sort of thing, that’s fine. At least up to a point... I do genuinely think, after considerable reflection, that there are reasons to be, at least, very wary about this sort of thing. Most of all, we do need to be very clear about what is or isn’t a constructed fantasy image.
Anyway, as I’ve already mentioned, it struck me that some people didn’t seem to realise that the image was a fantasy and that it was both optically and astronomically impossible for it to be a straight photo. So let’s just dissect this a bit.
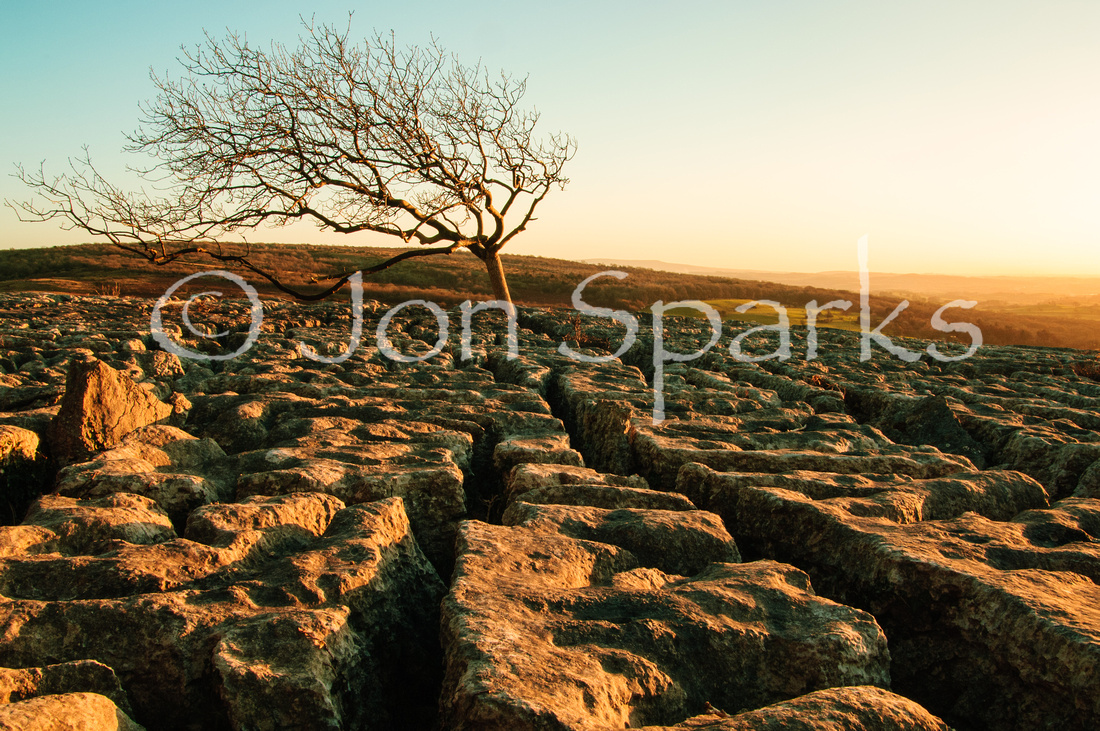
Here’s an example. I know it’s very rough and not in any sense convincing. To do a better job I’d need a clearer image of the moon and I’d need to do a much better job of masking around the branches of the tree. But I’m not interested in spending that much time on what would still be a counterfeit image. All I need this image to do is illustrate the two main reasons why nothing like this could ever be seen with the human eye, or captured in a single photograph.
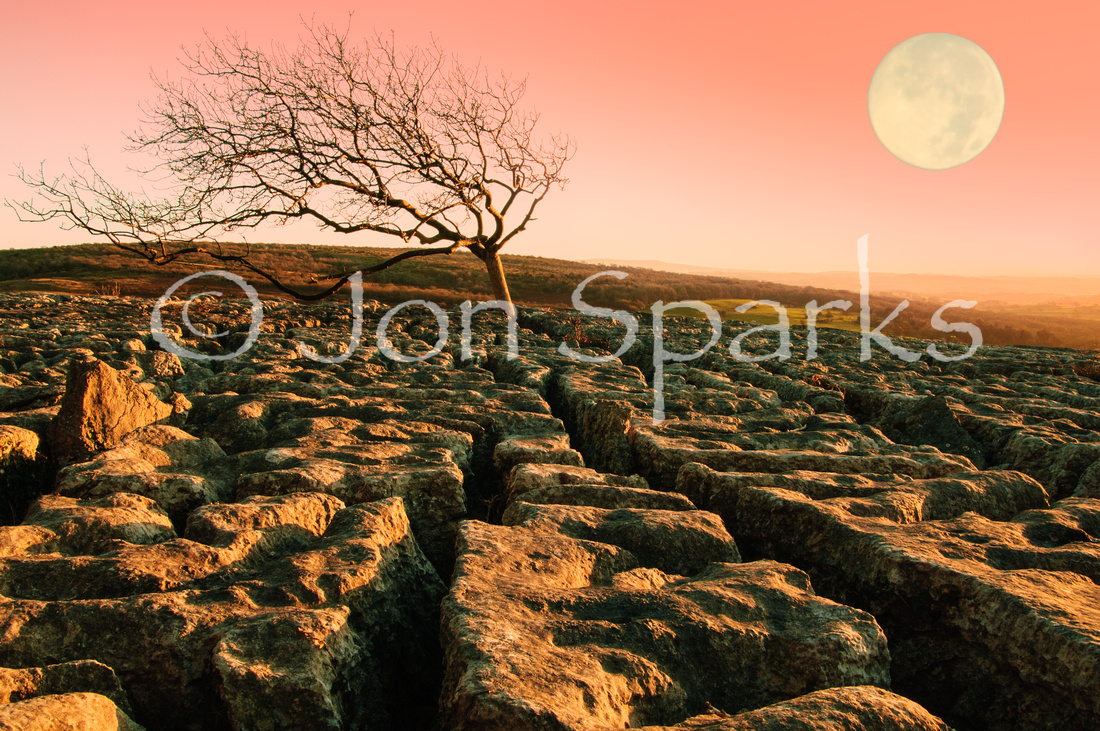 First reason: the moon is too big.
Second reason; the moon is in an impossible place.
Just to help explain all this, here are the two original images, un-meddled with.This image was shot on Farleton Fell in Cumbria, a favourite spot of mine, late in the afternoon of 23 November 2007, using a Nikon D2x. The focal length was 18mm – equivalent to 27mm on 35mm/full-frame: in other words, a moderate wide-angle lens.
 The moon image was shot about 20 minutes later, and not very far away, so in one sense the two shots are related. However, there are two crucial differences.
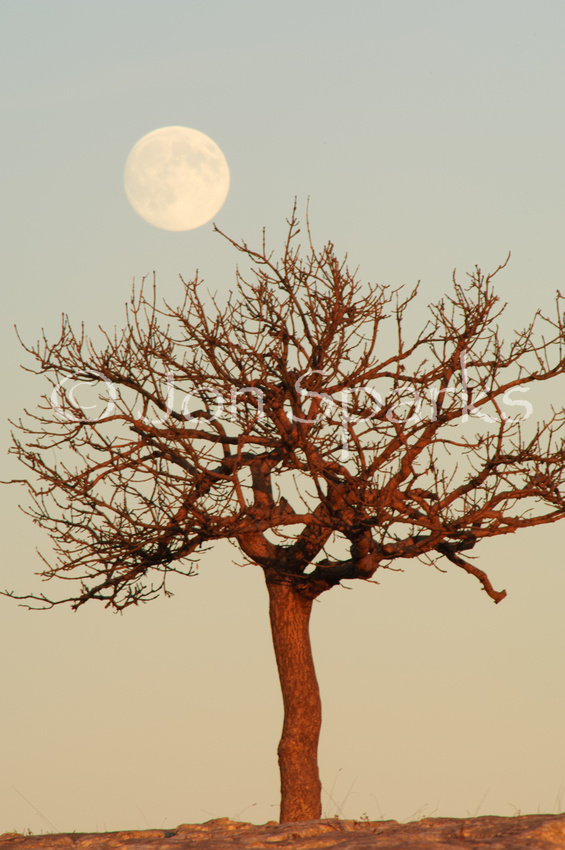 First, it’s taken with a 300mm lens (450mm equivalent). This means that the moon appears almost 17 times larger than it would if I’d shot it with the same focal length as the previous. Second, for this shot I’m looking in a completely different direction.
Size
As far as the size of the moon is concerned, placing an oversize, telephoto, moon into a wide-angle landscape plays havoc with normal perspective. Perspective is a vital element of how we judge scale and distance and make sense of the world. It’s been well understood by scientists and artists at least since the Renaissance, and I would have thought that an intuitive grasp of perspective is established in most people at a very early age.
Of course artists like Escher have played very deliberately with perspective to create visions of impossible structures. There’s nothing wrong with that. And there’s nothing wrong with fantasy images as such – but even fantasy needs some level of internal consistency.
In fact the moon was once much closer to earth, and it’s still drawing slowly further away at a rate of about 3.8cm a year. This has been measured with great precision, as the Apollo astronauts placed reflectors on the lunar surface and scientists can bounce laser beams off these to determine the distance.
Therefore there was a stage in the very distant past when the moon did look as large as this, though there were no humans around to observe it (let alone cameras) and both moon and earth would then have looked very different. Tidal forces were much more extreme and the length of a day on earth was much shorter.
It is possible to imagine a world with either a much larger moon than our own, or a similar sized one that’s much closer. In fact, to appear as large as this while remaining at the same distance as our own moon is today, the ‘moon’ would have to be around four times the Earth’s diameter. It would be the planet and Earth would be the satellite. But four times the diameter implies 64 times the volume, so even if the planet were much less dense than our own Earth or moon, it would be much more massive. The implications go on and on...
Direction
The second reason why the image is impossible is that it places a full moon in roughly the same direction as the (in this case) setting sun. It doesn't matter whether it’s sunset or sunrise as the full moon will always appear in the opposite direction to the sun. You can easily verify this for yourself. A full moon will rise in the east in the late afternoon or early evening, when the sun is sinking in the west. For sunrise/moonset, the same applies but the directions are reversed – sun east, moon west. The reason for this is very simple; the moon is lit by the sun. When the moon is between us and the sun, the side facing us is in shadow – we call this a new moon. (And on the rare occasions when they line up exactly, we get an eclipse).
The only way that you could see a fully illuminated moon in the same part of the sky as a rising or setting sun would be if we were on a planet in a binary star system. In other words, there would need to be two suns. And even then, if there were such a big and bright moon, wouldn’t it dilute the red glow of the setting second sun? And wouldn’t a moon as bright as that cast shadows of its own?
I hope I’ve done enough to show that images like this are impossible. That is to say, nothing like this will ever be seen on Earth by the naked eye, nor can it ever be captured in a single exposure by any camera. But does it matter?
Well, if such images are clearly recognised as fantasy constructs, maybe not. I enjoy fantasy and I could enjoy the vision of a world with a huge moon, or imagine living in a binary system. But, as I said earlier, even fantasy needs some level of internal consistency. And a 17-times-too-big moon in the skies over a normal landscape raises all sorts of unanswered questions – never mind the second issue of ‘what’s making it shine?’.
Some people may be able to view such images without asking such questions but I can’t, and I think failing to grasp what’s ‘wrong’ with such images implies a lack of understanding of some fairly basic facts about the world.
Still, most of us would probably say that there’s no harm in fantasy as long as we all know that it’s fantasy. My worry is that if we aren’t clear about the nature of constructed images, we devalue genuine photography. If we can’t tell what’s real and what isn’t, where’s the sense of wonder in a real photo of the Milky Way or the Aurora?
After The Two Towers:
Fantasy, Reality and Photography
This was originally written at the end of 2002 and appeared in a long-gone online magazine. I’m repeating it exactly as written, complete with references to other articles that I can’t now trace. At this point I hadn’t acquired my first digital camera (that was in 2004) and was still shooting slide film.
The Two Towers, the second part of Peter Jackson’s Lord of the Rings trilogy, is currently packing ‘em in at cinemas across the country. Don’t miss it: it’s probably the greatest fantasy movie ever made. It’s also worth seeing simply to admire the seamless blend of conventional film and digital images. The character Gollum is a brilliant creation, but there are also many amazing partly or wholly digital landscapes.
As a fantasy film, pure and simple, it’s a masterpiece. However, we also know that the real footage was shot on location in New Zealand. New Zealand is now Lord of the Rings country, and frenetically selling itself as such. Well, on one level, good luck to it. But there is a problem. The New Zealand Tourist Authority would no doubt like us to think that the landscape we see on the big screen is what we’ll see when we go there. But how, with so much digital content, can we be sure? How, indeed, can we be sure of anything we see?
This has been most discussed in relation to news and documentary images, but it concerns all photographers. The Nature Group of the RPS, for example, in its Nature Photographer’s Code of Practice, states that: ‘a nature photograph should convey the essential truth of what the photographer saw at the time it was taken’. A similar stipulation is built into the rules of the BG Wildlife Photographer of the Year Competition.
As a landscape and travel photographer, I have been concerned with these issues for some years. The Two Towers just kept the pot simmering. What really stirred it up was the January issue of In Focus, with the fortunate, if not fortuitous, juxtaposition of two fascinating articles: Niall Benvie’s Seeking Ecological Asylum and Mike Busselle’s Decisions. If you haven’t already read them, one of the beauties of a webzine is that you can do so now. But to summarise, Benvie’s article is a powerful meditation on our relationship with nature and landscape, and what it means to us as photographers. Busselle’s explores some of the possibilities offered by digital imaging.
I’m not a digital Luddite. I’m not concerned whether an image is initially captured on silver halide crystals or on a CCD. Nor do I have a blanket aversion to ‘manipulation’. Mike Busselle’s first two examples illustrate a powerful argument in favour of digital capture: the potential to control local tonal values more subtly and more precisely than would ever be possible with a filter. As Mike says, ‘I’ve always considered the neutral graduate to be one of the most useful filters but, in truth, it offers a fairly crude and limited degree of control...’ And these aren’t the only limitations, as I’m well aware, having recently had a neutral grad snatched from my hands by a strong wind on Helvellyn!
So I’m happy to embrace digital technology, whether in initial capture or later manipulation, as a way of fine-tuning the image: improving shadow detail, removing unwanted colour casts, and of course getting rid of dust and scratches. However, when manipulation alters the actual content of the image, it’s a different matter. I would argue that, just like a nature photograph, ‘a landscape or travel photograph should convey the essential truth of what the photographer saw at the time it was taken’. In the context of a fantasy like The Two Towers the only limit is the human imagination. But in, say, a New Zealand tourist brochure, an image should be - at the very least - a reasonable guide to what one could expect to see at that location.
This conviction has developed during my own career. Over ten years ago, when digital technology was a lot less familiar, I was commissioned to photograph a local church which, for historical reasons, flies the Stars and Stripes on July 4th each year. On the day the light was good and there were no parked cars in the way, but there wasn’t quite enough wind. Lancaster Tourism asked me if they could blend in a flag shot by another photographer, and I agreed. I hadn’t anticipated that they would tell everyone about this when they launched the resulting greetings card.
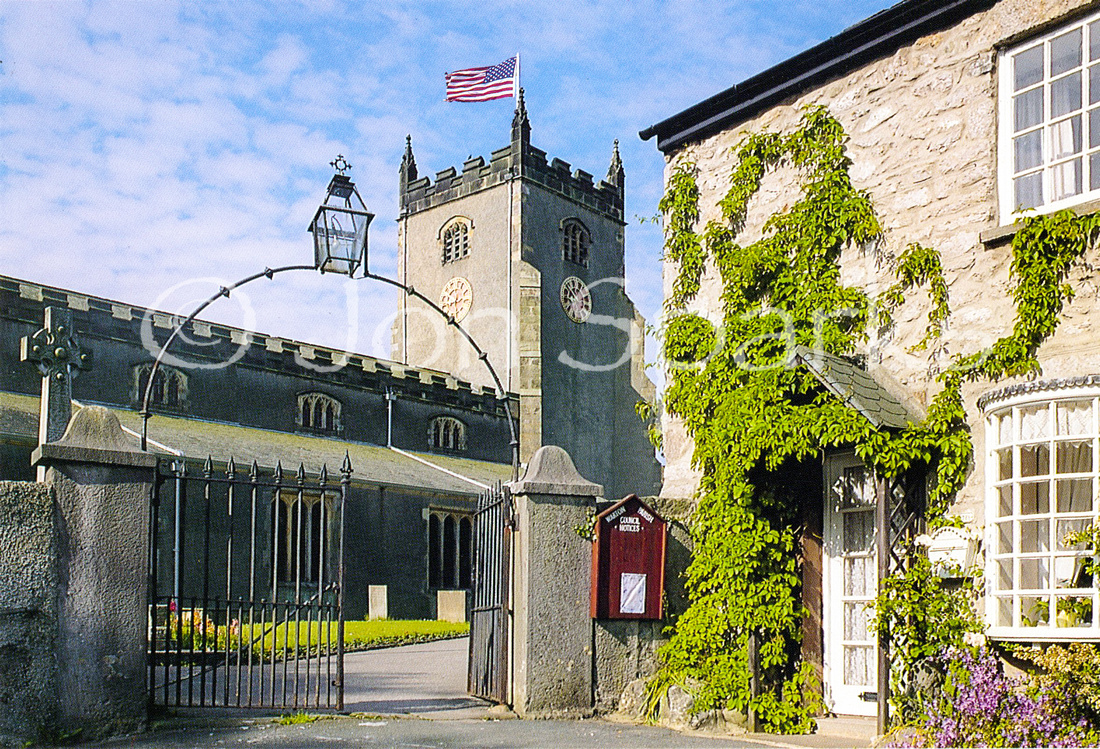
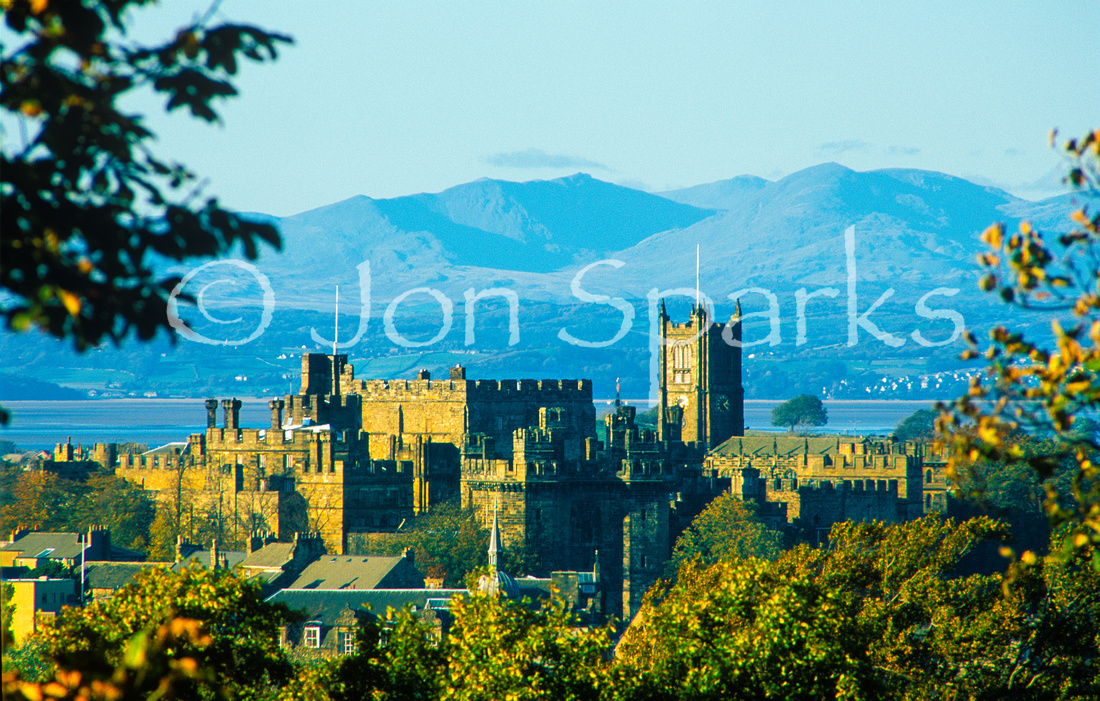
This image isn’t really misleading: you might see it just like this on another July 4th. Still, it returned to haunt me a few years later. After some detective work I’d found a spot where I could get a view of Lancaster Castle with the Lakeland fells behind. A ‘window’ in the trees framed the shot perfectly.
This has become my most reproduced shot, appearing on greetings cards, posters, calendars and in magazines and tourist brochures. It has also attracted much comment locally, because most people weren’t familiar with this view. Many have asked me how it was done: some have simply branded it a ‘fake’ - citing the Stars and Stripes image as evidence that I manipulate images.
Having been quietly proud of how I’d found the viewpoint, these comments stung. It felt like an attack on the truth of the image - and, by implication on my own honesty. And it led to a decision. I started putting the following on invoices and delivery notes: Substantive manipulation of these images is not permitted, except in special circumstances and by prior agreement.
What I mean by ‘substantive manipulation’ of an image is simply anything that changes the substance: taking out something that was there or adding in something that wasn’t. Tweaking the contrast or colour of an image is a matter of interpretation, at least up to a point,: colouring the Taj Mahal bright green would surely be a substantive change!
When you make changes like this, or allow someone else to do so, you are no longer just interpreting the scene, you are materially altering it. And when that image is presented, explicitly or implicitly, as a representation of a real place, it becomes a falsehood. Which, if you are in the business of travel or landscape photography, is a serious matter.
Of course parked cars and power-lines can be an irritating distraction. Cars come and go, and sometimes you can ‘lose’ a power-line just by choosing a different viewpoint. But if you can never see a scene without parked cars, that’s the reality. (Maybe the answer is to campaign for more yellow lines.) If there’s no way to see the view without power lines, that too is the reality.
These issues are not new. Manipulation is as old as photography itself. Combination printing, air-brushing and retouching, double-exposures and slide sandwiching have all been used. We’ve all seen impossible shots created by double exposure, like a telephoto moon hovering over a wide-angle landscape. (These make me almost queasy). What is alarming about the digital aspect is the utterly casual way in which images are manipulated without a second thought. But a falsehood is a falsehood, whether or not it’s created digitally. And I think it’s wrong to tell lies.
My resolve on this point was tested again more recently, when a book publisher wanted to ‘remove’ a rock from a potential cover image. However, having declared in the book that none of the images had been manipulated, I really had to stick to my guns. Fortunately we were able to agree on an alternative shot.
What’s the harm? Was that rock really important? Maybe not: I could easily have taken a shot without it, just by moving along the beach a few metres. But as the sun came up on that particular morning, that was the shot I felt I wanted to take.
I can’t say that removing the rock would significantly mislead anyone about the location. But it would mean that the image was no longer the shot that I took. It would no longer be the embodiment of what I saw and what I felt.
What this illustrates is that there’s another side to this debate: it is not solely a simple question of honesty. It also has something to do with what it means to be a photographer. For me, it comes back to why I became a photographer in the first place, why photography still excites me9, why it will never be just a job.
For me, being a photographer is about being there. It’s about the whole experience of a place and the effort to capture an image that says this is what it was like. It’s why the time spent walking around, looking, touching, listening, even smelling, are as important as time spent looking through the viewfinder. And ultimately, photography is about those moments when everything comes together: when the light and the weather conspire to make magic.
Moments. Decisive Moments. ‘Being there’ is not only about place; is is also about time. In the studio you may be able to repeat a shot exactly. In the natural world every moment is unique. Clouds move, the light shifts. Over longer time-scales, streams alter their courses; trees grow and fall. So do mountains, if you wait long enough.
‘It may seem paradoxical that a still photograph can capture this dynamism - but there’s no doubt that it can, just as it can capture the dynamism of an athlete or gymnast. And the process of landscape photography - the actual doing of it - means tuning in to the dynamism of land, light and weather. It means developing a relationship with the landscape - which is, at least partly, what Niall Benvie discussed last month. It doesn't make it easy, but it does make it endlessly rewarding.
I’m more than happy with anything that helps me to express what I saw and felt. Some forms of manipulation - be they filters, traditional darkroom techniques or Photoshop’s Curves dialog - can help to sharpen that sense of being there. But deleting a rock, or importing a ‘better’ sky from another time or place, destroys it. It negates everything that makes me want to be a landscape photographer.
The problem with manipulation, then, is not just about the literal truth of an image or whether it creates a false picture of reality - though this is in itself a very serious issue. It is also about something of more personal concern to all of us: it is about what it means to be a photographer.
]]>This has irritated lots of professionals, like me. I’ve licensed images to OS for map covers in the past and been paid for it. You can hardly expect pros to be thrilled when yet another once paying client decides to try and get all the images it needs for free.
However, if you’re an amateur photographer, you might think this isn’t your problem. Seeing your photo on the cover of an OS map sounds quite exciting, doesn’t it? What’s more, if your photo is one of the ones selected, you get a free copy of the map in question and a year's subscription to OS Getamap. The overall winner gets £750 of holiday vouchers and the junior winner gets an iPad mini. And if you don’t win, well, what have you got to lose?
Well, potentially quite a bit, but maybe not so much as you would have if people like me hadn’t kicked up a stink. Overnight, and without much fanfare, they have changed the terms of the competition.
Yesterday Clause 58 read:
"By entering the Competition you grant to OS (and Ordnance Survey Leisure Limited) a non- exclusive, royalty free, worldwide, perpetual licence to ... (b) include your photo in our library of images and use it commercially, including but without limitation in our calendars, electonic wallpaper, on the OS website, and in promotional materials, (and sub-licence its use to others for their personal use accordingly). Subject to Clause 59 below, we will not always publish your name and you waive your moral rights in this respect."
Effectively this would allow them to take any photo that was entered and do whatever they liked with it, including selling it on, and without any obligation to credit the photographer.
Today, I decided I'd do a blog entry about it and went back to the competition website. And look:
Clause 58 now says “By entering the Competition you grant to OS (and Ordnance Survey Leisure Limited), a non- exclusive, royalty free, worldwide, perpetual licence to publish your photo(s) on the OS Photofit website, our corporate website and social media websites (such as Facebook and Twitter), and otherwise use the photo, in connection with this Competition”. In other words, whether your photo ends up as one of the winners or not, they can make widespread use of it as long as it has some link to the competition.
And a new Clause 59 says “In the event that your photo is one of the Competition winners, you further grant to OS and Ordnance Survey Leisure Limited a non-exclusive, royalty free, worldwide and perpetual licence to publish the photo(s) on the cover of any of its paper maps, on the OS website, in promotional materials and otherwise use the photo in connection with the business of OS. If your photo is appearing on one of our map covers, we assume that you will want your name to appear on the map cover to indicate that you are the photographer/copyright owner and by entering the Competition you agree that we can do this."
I wouldn't say this is brilliant even now but it does seem like a significant concession, presumably in response to the very strong social media reaction.
Here's a photo that still won't be appearing on any OS map covers any time soon.
]]>
If you look through the list of current Nikon cameras, some things start to stand out. First, Nikon doesn’t automatically withdraw older models when an upgrade or replacement comes along. The Nikon UK website currently lists not only the D7100 but the D7000 and even the D90, which is arguably the direct precursor of the D7000. The D5300, D5200 and D5100 are all there, as are the D3300, D3200 and D3100. With the lower-end models in particular, the product cycle is now little more than 12 months, many of the upgrades from one model to the next are incremental at best, and buying a slightly older model can be one way to get a real bargain. (If you don’t need onboard WiFi, for example, there;’s not a lot to set the D5300 apart from the D5200, apart from £150 or so).
However, one model sits rather forlornly on its own; the D300s. This appeared back in 2009. The ‘s’ suffix seems to imply that it was itself a modest upgrade to the D300 rather than a totally new camera, but that’s a bit misleading. Nikon’s model-numbering policy is opaque at best, but I think it’s fair to say that the difference between, say the D3200 and D3300 is considerably less than between D300 and D300s.
The D300, for instance, could not shoot movies; the D300s could, even if its movie mode looks pretty basic alongside current models like the D750. The D300s also added a second card slot (definitely a must for pro use) and a faster maximum shooting rate. It retained most of the other features including a very high standard of ruggedness and weather-sealing. Its control layout and interface was also very much in line with professional expectations – there are no Scene or Effects modes, for instance, just the four key exposure modes; (P) Program, (A) Aperture-priority, (S) Shutter-priority, and (M) Manual. (For a comparison of the D300s with the D7100, see this article).
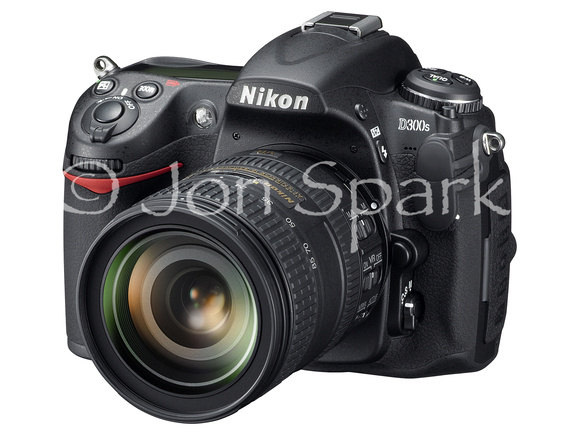
Just look at what else was in Nikon’s range at the time: D3 and D3x, D700, D90, D5000 and D3000. Every one of those models has been upgraded several times. I’ve already mentioned the other DX models. In the FX range, the D3 gave way to the D3s, then the D4 and D4s. The D700 was never upgraded, but we now have D810, D750, D610 and Df, so that we now have more models in the FX family than in DX.
All this activity, and yet the D300s soldiers on, more than five years after launch, albeit now with limited availability. You can still pick one up from Jessops, for example, for £879.
This raises, the question, of course – what is Nikon playing at here? They’ve never said that they won’t produce a new professional DX model (whatever it might be called – we’ll use the tag ‘D400’ from here on), but then again, neither have they ever said that they will. This has kept the rumour sites active for years.
I can’t read the minds of the decision-makers at Nikon, and I don’t have any other kind of insider access, but it does appear that part of Nikon’s strategy is to encourage high-end users, whether enthusiast or pro, to migrate to FX. The DX models don’t just compete with other APS-format DSLRs – which basically means Canon and Pentax – but with other formats, notably mirrorless or compact system cameras (CSCs). The full-frame marketplace may be smaller but it’s also a lot less crowded.
Still, the rumour mill seems to suggest there is substantial latent demand for a professional DX SLR. Nikon may have calculated that this actually represents a very small, but very vocal, group that won’t count for very much in terms of sales. I wonder – because it seems to me that I could definitely be a potential customer for a D400 – but there are some serious provisos.
As regular readers know, I spend a good deal of my time shooting well away from any road, mostly either on foot or on a mountain bike. Naturally, I’m interested in lightening the load on my back whenever possible, but as several previous posts have discussed, I don’t want to compromise on image quality or the ability to capture fast-moving action.
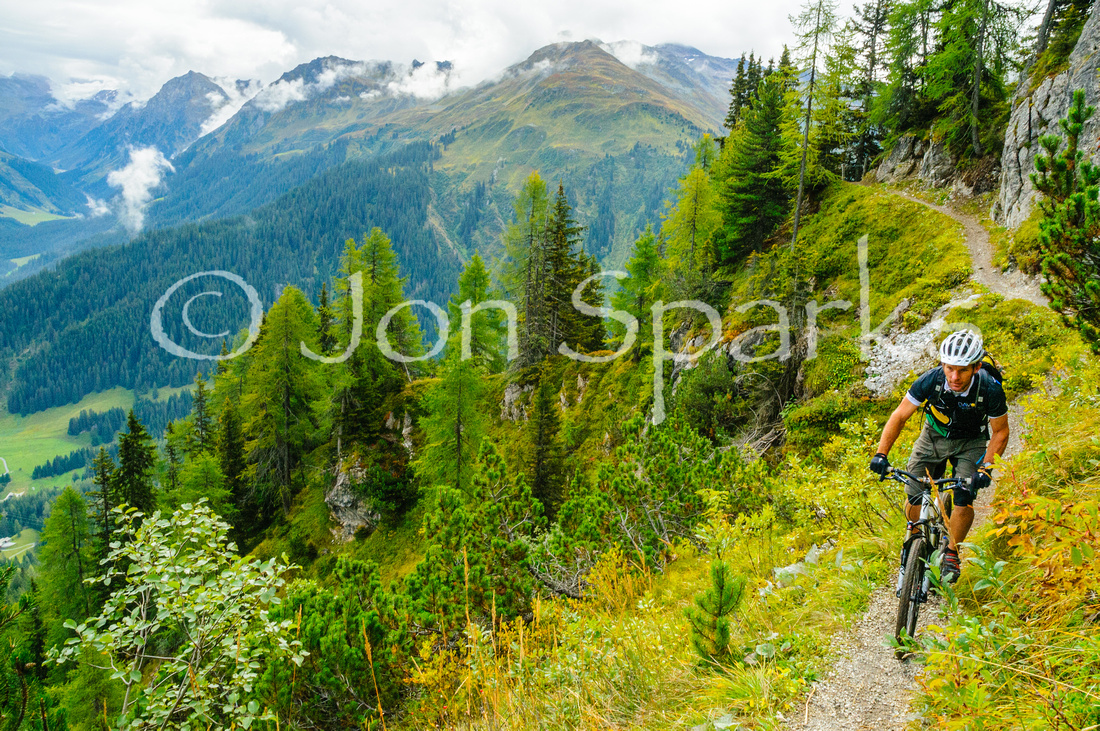 Shot on a D300s above Davos, Switzerland
In fact, there isn’t necessarily a massive difference between DX and FX in terms of body-weight. I’m currently shooting with a D600 and a D7000, and there’s very little between them in size or weight. Of course the D810, which does have a more rugged spec and better spread of AF points than the D600, is a couple of hundred grams heavier – but what really makes the difference is when you are carrying several lenses.
To cover the larger sensor, lenses for FX cameras need to be larger and heavier than their DX equivalents. You can use DX lenses on an FX camera, but the image needs to be cropped; you can also use FX lenses on a DX body, but there’s a penalty in weight and bulk. And Nikon’s DX lens range is notably lacking in what we could call ‘pro’ lenses – primes, or zooms with a constant, fast, maximum aperture.
Now there are lenses from other makers (e.g. Sigma, Tokina, Tamron), which plug at least some of these gaps, but it might not be a smart move by Nikon to bring out a camera body which encourages users to buy other makers’ lenses.
From my own point of view, most of the lenses I have are full-frame. This is partly because I need to be able to use them with FX cameras; as well as my own D600, FX cameras pass through my hands regularly for Expanded Guide purposes. And even if I had bottomless funds (which I most definitely don’t), I couldn’t assemble two full outfits because there simply is no DX equivalent for some of the lenses I use, like my 70–200mm f/4 or 300m f/4.
Without at least a core range of professional DX lenses, the appeal of a professional DX body is strictly limited. At least to me, and I suspect that’s how many others will see it too. If it saves me 200g over a D810 but I’m still carrying the same lenses, the benefit is much less than if it enables me to carry a different set of lenses and save a kilo or more.
And I also suspect that it’s the cost of introducing such lenses, not that of developing a new camera body, which has deterred Nikon from launching a D400.
I don’t underestimate the cost of developing or tooling up a new camera body, but it’s clear that there is a high degree of modularity, so that the most recent camera, the D750, shares many features with other models in the range; the sensor is similar to that in the D610 while the autofocus module is similar to the D810. It also inherits its onboard WiFi from the D5200. There’s no technical reason why Nikon could not produce a D400 body fairly quickly. But producing the right lenses to give it full system backup would be a longer and more costly task.
In addition, for users who are really concerned about weight and bulk, a D400 would emerge into a much more competitive marketplace than the D300s did five years ago. Mirrorless cameras like the Olympus OM-D series, Fujifilm X-T1 and Sony A7 models all produce excellent image quality. I’ve looked long and hard at some of these, but none of them yet fully measure up to the focusing speed of a good DSLR. Still, this is another factor which chips away at the potential market for a D400.
And there’s another strand which is keeping the rumour mills busy – the prospect that Nikon is working on a mirrorless camera, possibly a full-frame model. This may be another reason why the D400 is on the back-burner, and may never come to the front..
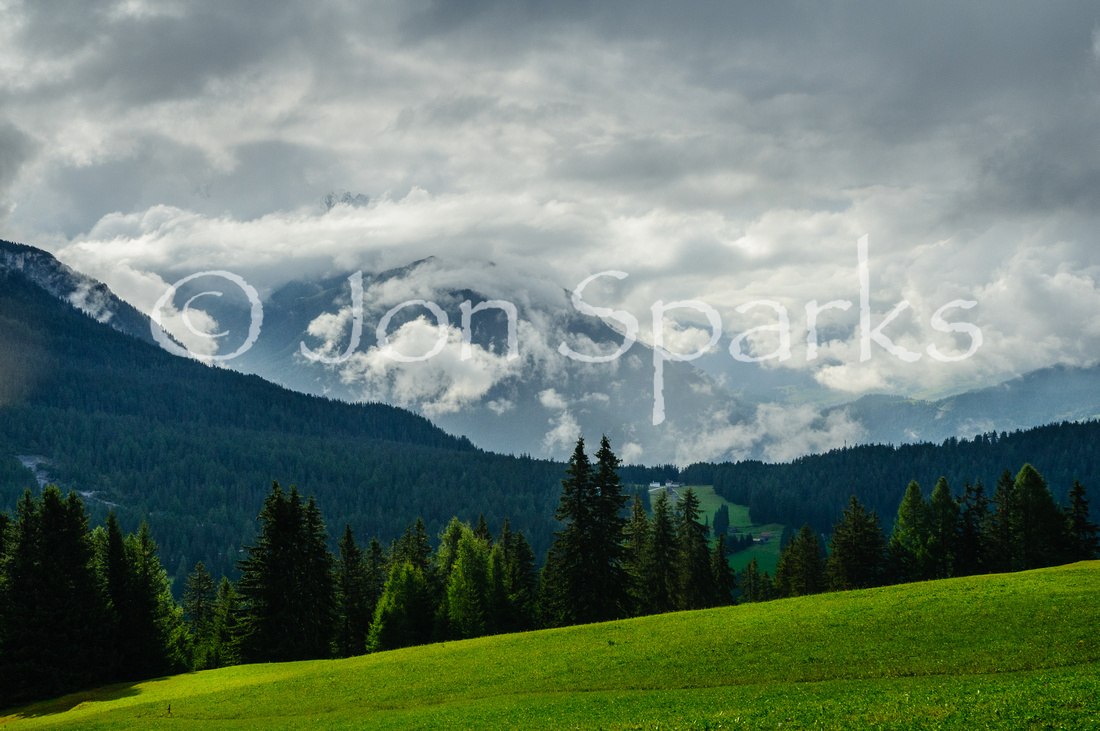
Shot on a D300s above Davos, Switzerland
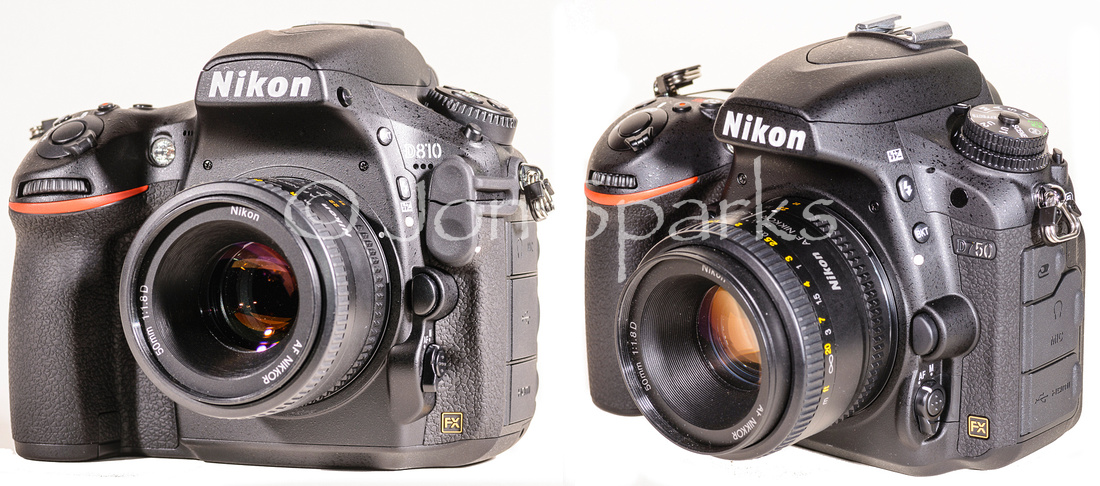
This is not going to be a detailed review of either camera. There’s dpreview for that – see their thoughts on the D810 and the D750. You can also get a view on their image quality from DxoMark. What follows is simply my personal impressions of both cameras, based on fairly short but intense periods shooting with them.
Image Quality
Quite simply, I have no complaints abut the image quality of either camera. The obvious difference is that the D810 has 50% more megapixels, but that’s of little practical benefit to me most of the time. It doesn’t produce visibly better results in any of my regular outlets, even a magazine double-page spread.
It’s perhaps worth saying that I used images from a range of cameras for my cycling photo exhibition, currently on view at Wheelbase at Staveley in Cumbria (if you want to see it, get there before the end of the year). The prints are 30 x 20 inches, which is pretty big by most standards. The cameras used range from 6 to 24 megapixels and, though you might, on very close inspection, be able to identify the ones from the 6mp camera (Nikon D70), I’d defy anyone to reliably distinguish between those from 12, 16 or 24mp cameras.
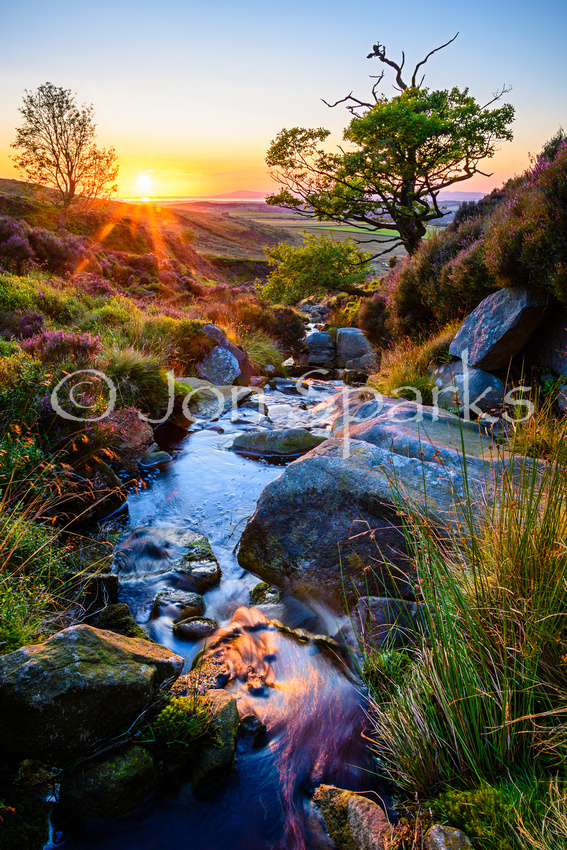
Catshaw Greave, Forest of Bowland
The D810 handles extended dynamic range superbly well (this is from a single RAW file) – but the D750 is darn near as good
For my work, and for the vast majority of what most photographers do, there’s only one possible advantage in 36 megapixels, and that’s the additional scope to crop images severely. I recognise this but it’s not massively important to me as I always try to frame images in-camera. I’m not doctrinaire about it and will crop when necessary but always prefer the final image to reflect what I saw in the viewfinder.
On the other hand, the difference between 36mp (D810) and 24mp (D750) is very apparent in the extra demands on memory card and hard disk capacity, and in slower processing when working with images in Lightroom. These negatives actually outweigh, for me, the occasional crop-ability benefits of the D810.
It’s also worth saying that the massive resolution of the D810/D810 is wasted unless it’s matched by excellent lenses and impeccable technique. And not all the photography I do allows me to set up a sturdy tripod for every single shot...
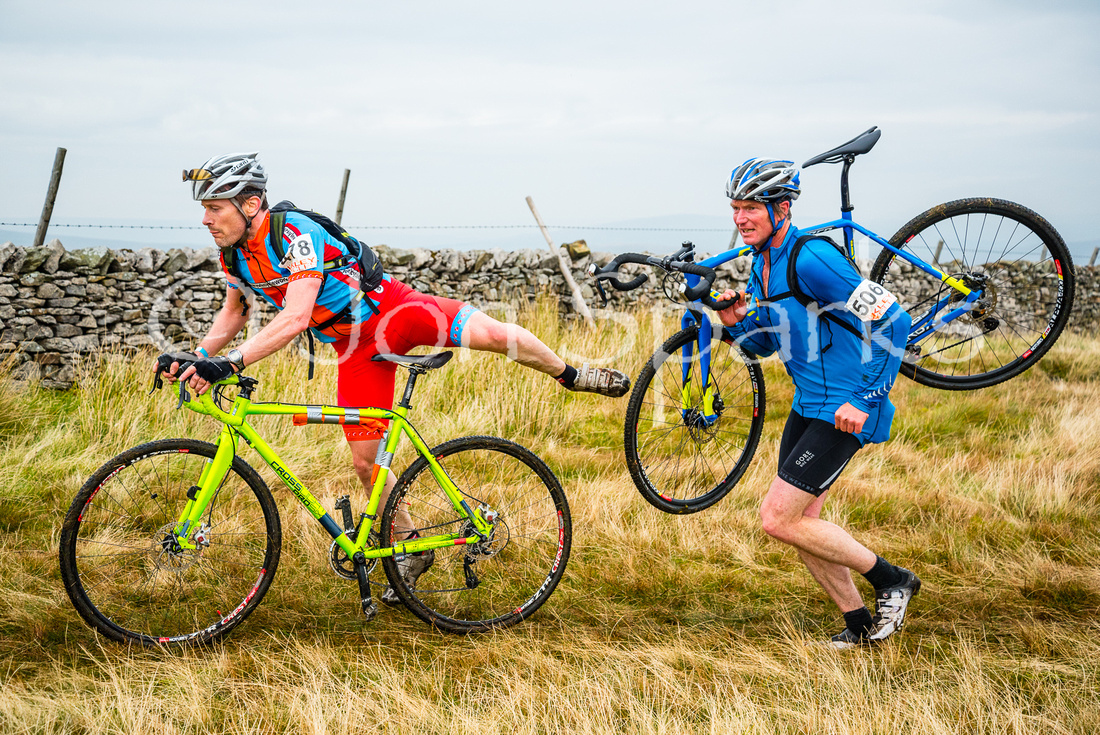
No time to set up a tripod here!
Three Peaks cyclo-cross, shooting for Outdoor Fitness magazine near the summit of Ingleborough (and I carried both cameras, a range of lenses, and a flashgun... they aren't THAT heavy!)
On every other measure of image quality, i.e. really important things like dynamic range, there’s little to choose between them and both are excellent.
Build and handling
There’s no doubt that the D810 has a slightly more rugged feel to it, and has a higher level of weather-sealing. This is significant, but when I need to shoot in really foul conditions I have a ThinkTank Hydrophobia ‘rain jacket’ which I’ll use anyway. And the D750 is hardly fragile – it compares well with the D600 and D7000 which I’ve used regularly in all sorts of conditions. The D7000 is four years old now and still going strong.
On the other hand the D750 is noticeably lighter and smaller – in fact, Df apart, it’s Nikon’s lightest full-frame DSLR to date. As a hiking and biking photographer this does count for quite a bit.
The other obvious difference between the two is that the D810 has a fixed screen while the D750’s folds out. I don’t normally use the screen for shooting stills and I don’t shoot a lot of video (though maybe I should do more...), so this is not a massive deal for me, but there are times, mostly when using a tripod, that the folding screen does have its advantages, such as when shooting at very low angles. On the other hand the screen seems more vulnerable to damage and it is just slightly fiddly to make sure it is fully stowed away before moving on. I’d say there are both pros and cons to the folding screen and I’m not sure yet which way the balance tips for me.
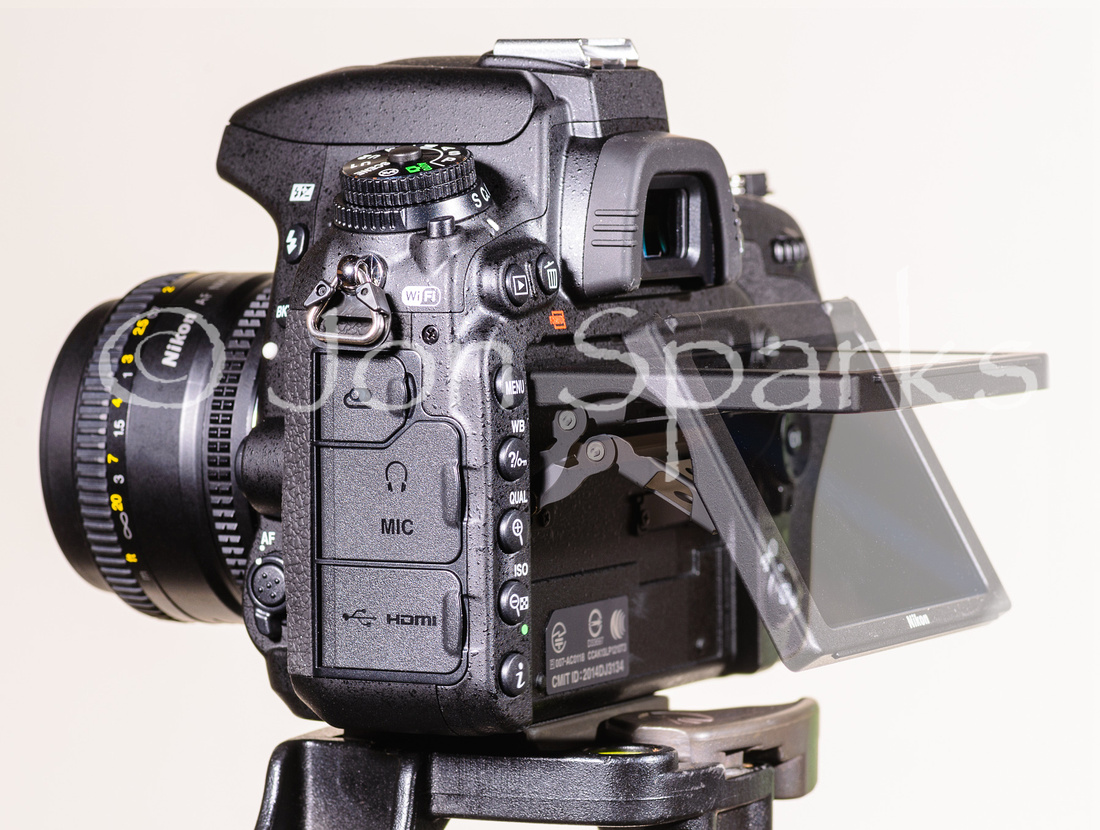
Folding screen on the D750
One other difference is that the D750 has dual SD card slots while the D810 has one SD and one Compact Flash, I know some people feel that CF cards are more professional in some way, but for me it’s just a pain having to deal with two different types. This is a definite plus point for the D750.
In most other respects there’s not too much difference between the two cameras. The control layout is all familiar Nikon stuff and I’ve experienced very few glitches either switching between the two or on going back to the D7000 or D600. When working with the D810 and D750 together I was able to shuffle pretty seamlessly between the two.
In use
When Nikon launched the D750 they made a lot of play about its speed. Its maximum continuous shooting speed is 6.5 fps, well ahead of the D810’s 5fps – itself an improvement on the D800. (For comparison, the D600 manages 5.5 and the D7000 6fps).
Against this, the D810 has higher buffer capacity so is able to shoot longer continuous bursts. personally I rarely shoot more than 6 or 8 frames in a burst so this is almost immaterial to me, but it might be of importance to some sports shooters. The extra speed of the D750 is of much greater value to me.
I’ve found the autofocus performance of both cameras to be excellent. I tested the D810 shooting high-speed cycle racing in Lancaster city centre and even as night drew on, so that the main light source was street-lighting, it didn’t miss a beat. The D750 also performed brilliantly when shooting the the 3 Peaks cyclo-cross race in heavily overcast conditions.
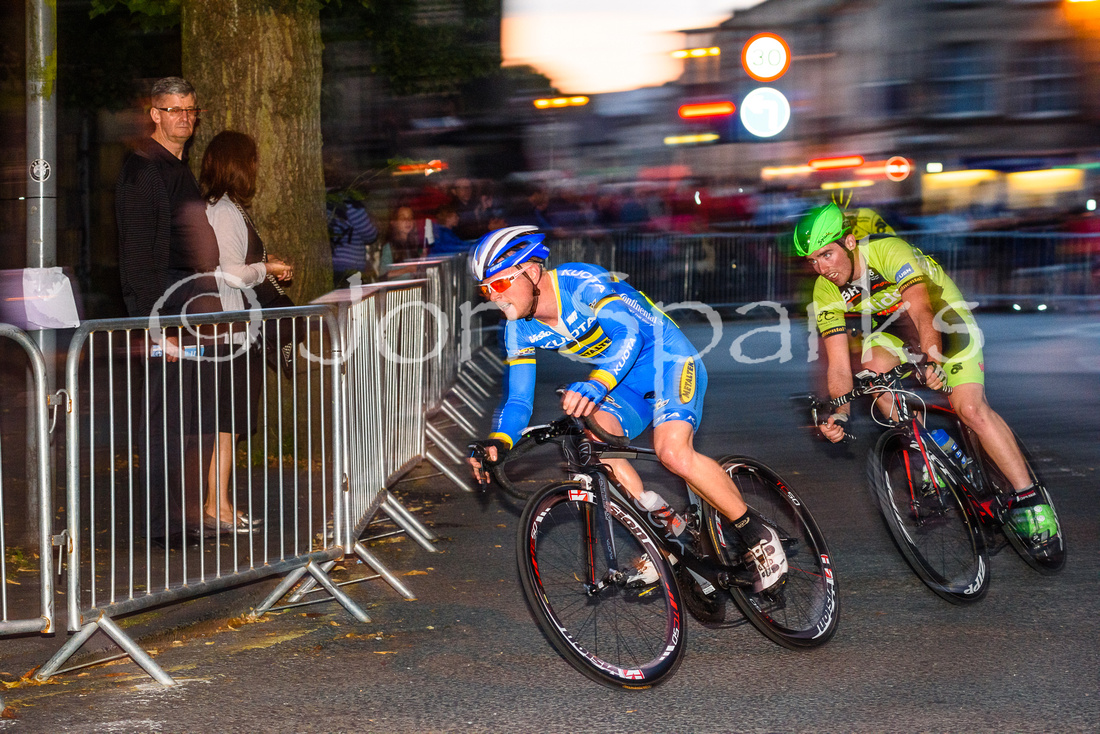
High speed, low light
The D810 performed superbly in these demanding lighting conditions
There is one important difference, however, in that the area covered by the autofocus points is wider in the D810, and this is something that does make a real difference to some of my work. (The D600’s AF point coverage is narrower again, which is one reason why I still use my D70000 quite a bit to shoot action). I noticed this recently when shooting at an indoor climbing wall as I often wanted to focus on a climber’s face or hand that was quite close to the corners of the frame and outwith the focus point coverage.
If there is one factor that would make me choose the D810 in preference to the D750, this would be it.
On balance
But that’s only one factor, and as you can see from the foregoing, there are quite a few reasons for me to prefer the D750. It’s lighter and more compact, it’s faster, the folding screen is occasionally useful, and it uses the same type of card for both slots. The smaller file size also speeds up my workflow on desk days.
Does that mean I’m rushing out to buy one? Not yet. It doesn’t really do anything that I can’t already do with my D600 and D7000. It does a few things slightly better, but on a finite budget I need to balance that against alternative spending options like new lenses...
And besides, I have a feeling (and judging by the rumour mill, I’m not alone) that Nikon is about to reveal something interesting in the DX department, though whether it’s a modest upgrade to the D7100, i.e. a D7200, or something more dramatic, perhaps even the long-awaited ‘pr0 DX’ replacement for the D300/D300s, remains to be seen.
Anyway, the D810 has gone back and I have managed just fine without it. The D750, too, will go back when I’ve finished dealing with editorial queries on the book, and I suspect I will miss it only slightly. I’m sure there’ll come a time, before too long, when I can convincingly say ‘I need a new camera’ rather than just ‘I want a new camera’, but I’m not there yet.
Which is not to say that the D750 and D810 aren’t excellent cameras. They are. If money were no object I might even have both.

Hoverfly
As you’d expect, the D810 is great at recording fine detail, like the lenses of the compound eyes...

Dalton Crags
...but the D750 also does an excellent job on finely detailed subjects. 24 megapixels is still a lot!
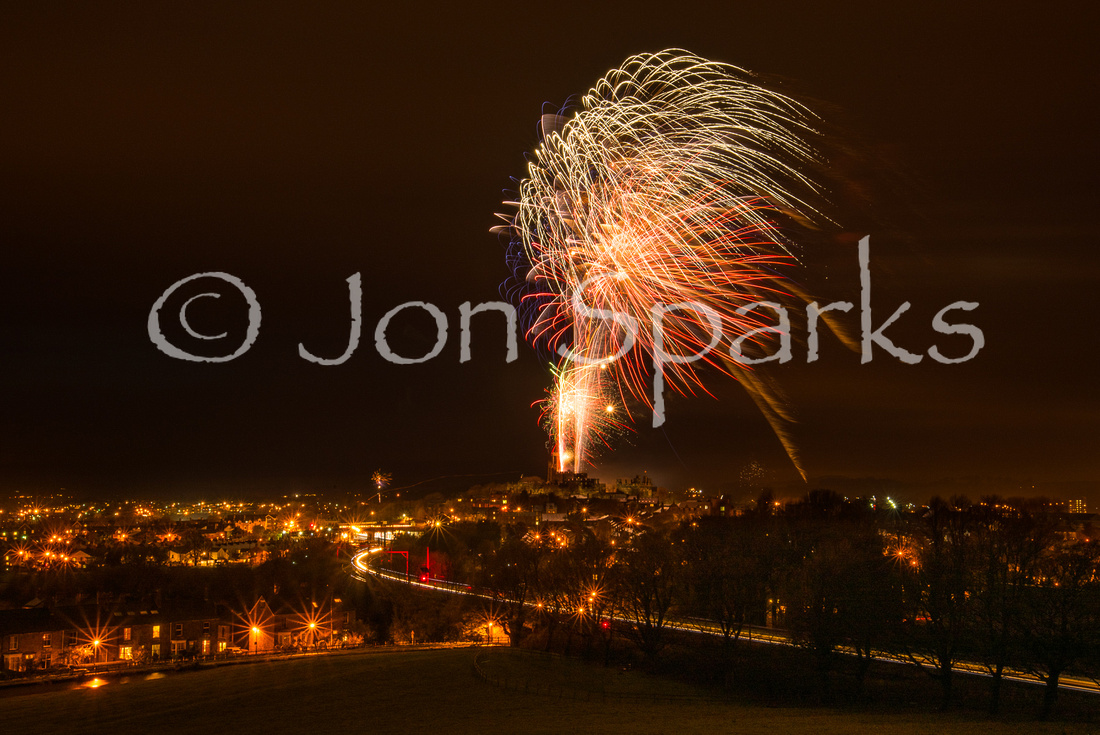
Fireworks and Pendolino, Lancaster
The D750 did a great job on this shoot too, capturing images with very little noise even on long exposures (this one is 57 seconds).
]]>
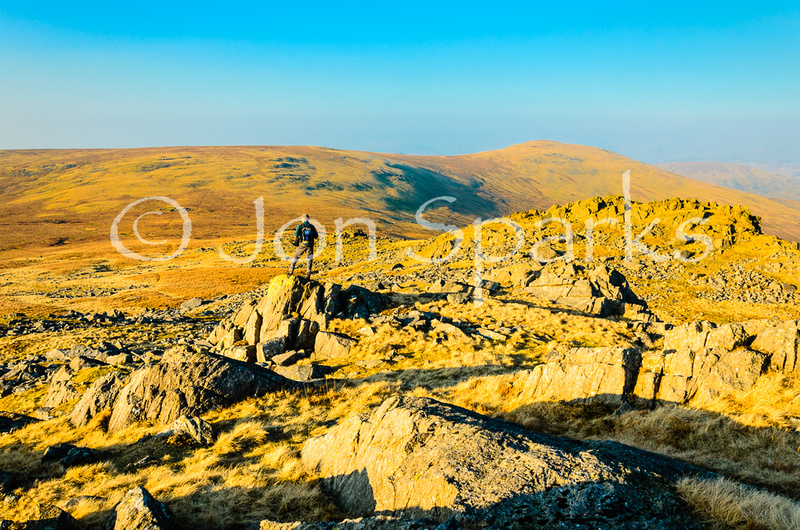
“That’s not a landscape photo.”
“Why not?”
“Because there’s a person in it.”
This is, almost verbatim, an exchange I had with a student on one of my courses a long time ago. Politely, of course, I begged to differ. Partly because I’m not that fussed about whether any particular photo is, or isn’t, a ‘Landscape’ (capital ‘L’ essential, I think) – and partly because I think that the human element often adds meaning to images. It can help to give the viewer a sense of connection or involvement with the landscape, and it often helps give a better sense of scale too.
For me, there are lots of situations where I want a figure in some of my shots, and I don’t always have anyone else at hand to act as a model. This means that the only option is to become my own model. If the figure is to be static, it isn’t terribly hard to do, but there are still a few things to think about.
So let’s look at Putting Yourself in the Picture (PYITP for short). First of all, you have to have some way of triggering the camera when you aren’t right behind it.
Trigger happy
The most obvious of these is the self-timer. Most cameras have one of these, though in some cases you might have to ferret around in the menus to find it. This fires the shutter at a set interval after you press the button, giving you time to stroll, or possibly sprint, into the required position. Ten seconds seems to be a standard interval, though some cameras allow you to select longer or shorter times too. The Nikon SLRs which I use have a maximum delay of 20 secs, which allows a lot more flexibility, especially when you want to position yourself a significant distance from the camera.
Another possibility is to use a wireless remote control device. A few cameras even come with one in the box, but usually it’s a separate purchase, though not necessarily an expensive one. I’ve got a Nikon ML-L3, a simple little infrared unit which allows the camera to be triggered from a distance of up to 5 metres. List price is just under £20 and you can get it for less. It works with most Nikon SLRs as well as a number of Coolpix and Nikon 1 models. There are comparable products for most other makes.
That 5-metre range is the most obvious limitation – there are 3rd party units which have a much longer range, but at a higher price. The other concern when using such a device for PYITP is that you don’t necessarily want to appear to be obviously pointing something at the camera. My SLRs have a ‘delayed remote’ mode which means that the shutter trips 2 seconds after pressing the remote button – just long enough to conceal the device and rearrange myself into a more ‘natural’ pose.
The third, and most flexible option, is to use the interval timer. This allows me to set any delay up to 24 hours, and to shoot an almost unlimited number of images (certainly enough to fill up a memory card and drain the battery!) at intervals thereafter. This is way over the top for PYITP, but it does mean, for example, that if I want to be that tiny figure silhouetted on the edge of the crag I can set a suitable delay of 10 minutes, or whatever it takes. Setting the options takes a fraction longer than using the self-timer, but there are times when this level of flexibility makes it the only viable choice. Of course, not every camera has an interval timer – it’s missing from Nikon’s entry-level D3300 DSLR, for example.
In practice, the one that I use most often is the self-timer. On my Nikons (a D7000 and a D600) there’s also the option to fire a sequence of up to 9 shots, at intervals between 0.5 and 3 secs, For instance, if I set a 20 sec delay and 1 sec interval, the camera will take its first shot after 20 secs, the next at 21 secs (1 sec later) and so on up to 29 secs after first pressing the button.
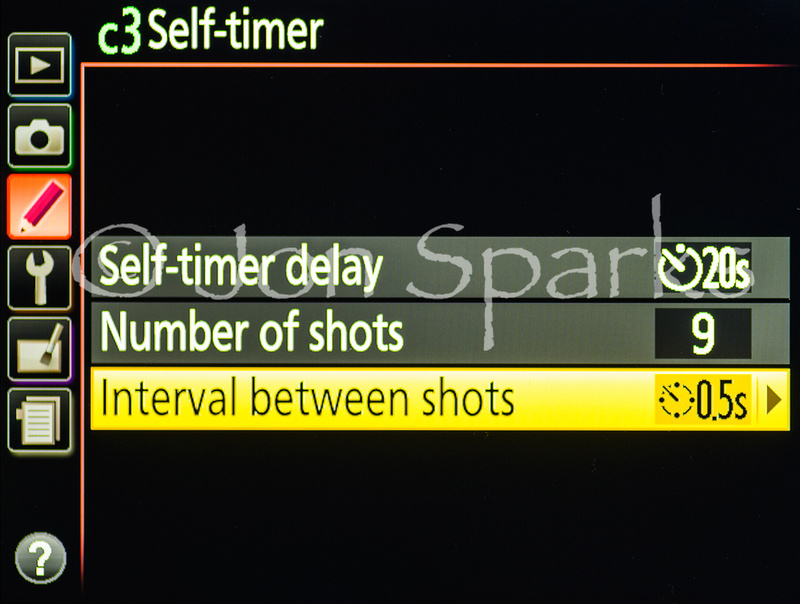
Exactly how I use this depends on the situation and the type of action I’m trying to capture – we’ll look at one or two examples later. But the timing isn’t the only thing that needs to be thought about; for a start, there’s the where as well as the when.
Right time, right place
The ‘where’ aspect is all about the placement, size and visual impact of the figure in the frame. When you have someone else to act as ‘model’ you can judge this easily by eye and through the viewfinder. Unless you’ve worked out how to be in two places at once, you can’t do this when you’re on your own.
This aspect of PYITP can be either challenging or fun, depending on how you embrace it. You have to imagine – or, in a more ‘photographer-y’ word, visualise –where the figure fits into the overall image. Of course you can take a shot and check it on the camera back, but it can be a fairly lengthy process of trail and error unless you can short-cut it with some pre-visualisation.
Experience obviously helps, particularly in developing a sense of how large a figure will appear in the frame when they are at a particular point. Objects of comparable scale, such as walls, gates, signposts, shrubs, can be very useful reference points but they aren’t always there in open settings such as a beach or a mountain ridge. (In fact these are just the settings where a human figure in shot can be particularly powerful in terms of creating a sense of scale).
When you’re using a wide-angle lens, then even quite small shifts in position of the figure can make a big difference to its size and impact in the frame. With longer lenses, a shift of a metre or two may be much less crucial, but you’ll probably have to be farther from the camera to get into the shot at all.
Sometimes there will be obvious landmarks or reference points – scrambling along a mountain ridge, there may be an obvious crest or edge where you’ll be well outlined against the sky or against a distant backdrop. It nearly always pays to identify something, even if it’s just a particular tuft of grass, to aim for once you trip the timer and start scurrying off to get into shot.
When working out where to place yourself, think about the light too –, especially if it’s patchy (e.g. in a forest). One good way to tell if you’re fully illuminated when standing at a certain point is to look at your shadow – is it complete?
Dynamic element
When a static figure is all you need, it all seems relatively straightforward: set the timer, get into position, wait a few seconds (or until you hear the shutter click). Check image on camera-back and if satisfied, move on. When you want an element of action in the shot, it gets harder. In particular, timing becomes much more critical.
Undoubtedly, this is where it really helps to have a camera, like my Nikons (and many others) that can shoot multiple frames via self-timer or interval timer. It’s still hit and miss and it’s extremely hard to get that perfect ‘peak of the action’ shot, but you can certainly improve the odds in your favour.
Let’s look at a couple of real-life examples.
I’m currently working on a book of long (average c100km) road bike rides across the north of England. Wherever possible I’m doing these with someone else, and I’ll certainly take any opportunity offered by other riders randomly encountered en route – but I’ve had to do some of them solo and when doing them midweek there often haven’t been many other cyclists around, let alone on the stretches where I want a photo.
The first problem is that I’m travelling light (I did mention these were 100km rides, often hilly, didn’t I?) So I’m not carrying a tripod, and this means that I’m looking out for anything I can use as a place to set up the camera. In this case I’m on a lane above Lorton in the Lake District (a lovely sneaky was up to Whinlatter Pass, if you’re interested).
Another aspect I should mention is that I want riders in the photos, whether it’s me or someone else, to be travelling in the same direction as the ride is described. And I don’t want every shot to be a rear view. So the view in this shot isn’t what I saw in front of me as I was riding up the lane. In other words, you need eyes in the back of your head.
So, as the lane climbed and before it swung away to the right, I knew there was a good view behind and there was a continuous stone wall alongside which gave lots of potential places to set up the camera. I balanced the handlebar-bag which I use to carry the camera on top of the wall to give a bit of extra height and fiddled about with it until the overall framing looked right. I like the way the edge of the lane goes almost exactly into the corner of the frame, for example.
I then set the timer to 20 secs, number of frames to 9 and interval to 1 sec. I knew I needed the time to get a decent way down the road, turn round, clip back into the pedals and get under way again. Even so, on the first attempt I went a little too far and so was still quite small in the frame even for shot no 9. So I tried to adjust my pace a bit and the two shots here are nos 7 and 8 from the second attempt. As you can see, even at fairly moderate speed (it’s steeper than it looks), a cyclist can move a fair distance in a second.
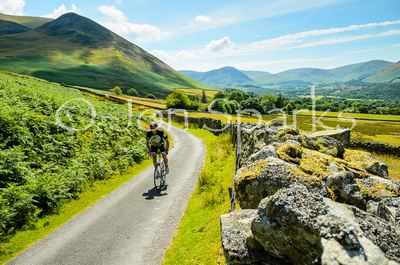
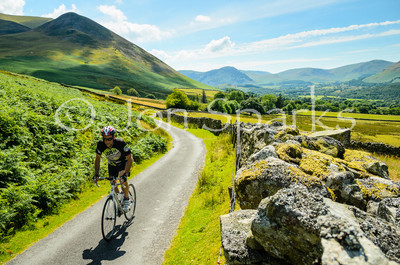
I think my ideal would have been somewhere between the two shots. I’d really like the second shot if I was maybe half a meter further away – just far enough to get the whole of my shadow into shot. But there was no guarantee that I would do any better on a third attempt, and I needed to think about time, the distance remaining, and so on. I’d probably only spent 5 or 6 minutes at this location, but 5–6 minutes repeated 5 or 6 times adds half an hour to a trip. And that suggests that another aspect of PYITP is picking your locations carefully, so that each one counts.
Tech details: ISO 200); focal length 18mm on APS-C (27mm equivalent); aperture f/9 and shutter-speed 1/320 sec.
The second example also features me on a bike, but it’s a bit different because this was a magazine commission. There was a very specific requirement, to illustrate some of the major Yorkshire climbs which didn’t feature in this year’s Tour de France – but which will feature in the Hoy 100 sportive in September. (Which, by the way, I’ve just entered!).
I’d already spent some time on Park Rash and then moved on to Fleet Moss – Yorkshire’s highest road, climbing to 589 metres. It clouded over for a while so I actually rode down and back up the whole thing, partly to get a workout and partly by way of reconnaissance, but it was already pretty clear that this hairpin just below the top was a great spot to choose.
As I had the car with me I had no shortage of gear and could set the camera on a tripod exactly where I wanted – just as well, as there aren’t many alternative camera platforms hereabouts. Fortunately the band of cloud was moving over and I was getting some nice late afternoon light.
Again I set the timer to 20 secs but because the climb was steep I knew I might need extra time. I wanted to go back down to where it levels out slightly (the bit of road largely hidden by my torso in the picture). I decided that the thing to do was set the interval to the maximum 3 secs and, once I got to the key part and I could hear the shutter, slow right down. It’s not hard to do this as the gradient is around 20%!
Even so, I rode this section five times before I had a shot I was satisfied with – the light was great and, unlike the Lakes shot, my shadow is entirely in frame. The body language is appropriate, too. And obviously it worked, as the magazine used it across a double-page spread.

Tech details: ISO 100 (for maximum dynamic range); focal length 24mm on full-frame; aperture f/11 and shutter-speed 1/100 sec. I didn’t need anything faster as I was going so slowly; if you look at the image at 100% there’s a tiny bit of motion-blur at the top of the front wheel, which doesn’t do any harm at all. Everything else is pin sharp.
Final thoughts
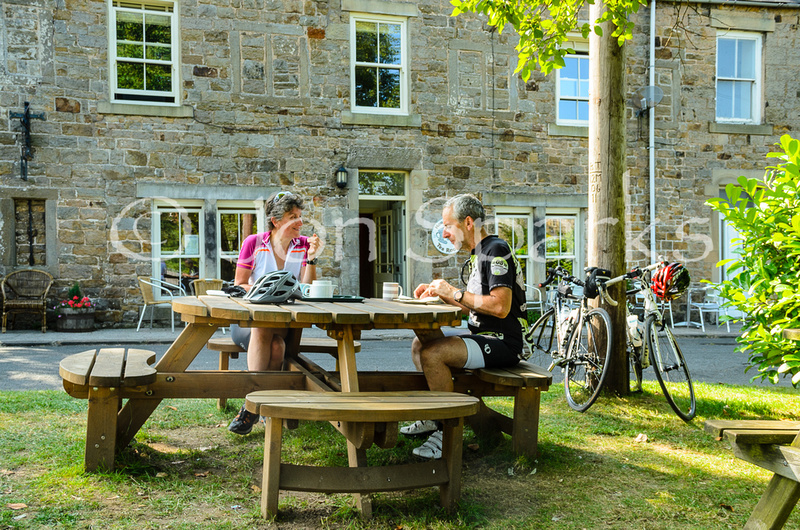
I’ve spent some time working out the finer points of PYITP, especially how it works with the relatively high speeds of cycling. One of these days I want to try it on a mountain bike, where the timing will be all about catching myself riding up or down some significant trail feature or obstacle. I have a plan in mind... but I’ll report back later. Meanwhile, here’s a final, more restful shot – perhaps a more conventional use of the self-timer. And I can recommend the coffee and cakes at House of Meg in Gilsland, Cumbria...
New Nikon
First – a little belatedly, I'm afraid– there's the Nikon Coolpix P7800. I am quite intrigued by this because it in most respects it is identical to the previous Coolpix P7700, to which I wrote an Expanded Guide. The one real difference – and it is of course a big one –is that they have added an electronic viewfinder, and removed the Quick Control dial to make space for it.
I thought the Coolpix P7700 was a decent performer, although – like most compacts and many other cameras – its autofocus is way too slow for serious action shots. I haven't had my hands on a P7800 yet (and there probably won't be a separate Expanded Guide) so I don't know first-hand how good that EVF is, but it's a very welcome addition to the woefully small number of compacts with a viewfinder of any kind. Lots of pundits are saying that the compact camera sector is being seriously challenged by smartphones, so it seems to me that bringing back viewfinders is one way that camera makers could make their compacts stand out as superior for picture-taking.
New Fuji
This is even more interesting. Fujifilm have just launched their XT-1. It's a nice-looking SLR-style camera with an APS-C sensor. There's a hint of retro in the styling – it is reminiscent of Fujica 35mm SLRs of yore – but it's carried off intelligently rather than slavishly, and avoids the split personality of the Nikon Df (FM2 at the front, D800 at the back). The EVF is reportedly the best yet, with a huge image size and super-fast refresh rate. And the Fuji X-series cameras are already well regarded for their fine image quality.
Sounds like a tempting camera., but if the rationale is to get something lighter than a DSLR, it is worth noting that the XT-1 comes up 10 grams heavier than a Nikon D3300. And in my quest for just such a light and portable system, I'd inclined strongly towards one of the Fuji X series before veering off because the gains in weight and bulk would be minimal – the lenses are excellent performers but not exactly small or light. But that's another story, and I'll return to it soon.
Meanwhile, here's the table of viewfinder cameras with the Nikon and Fuji models added.
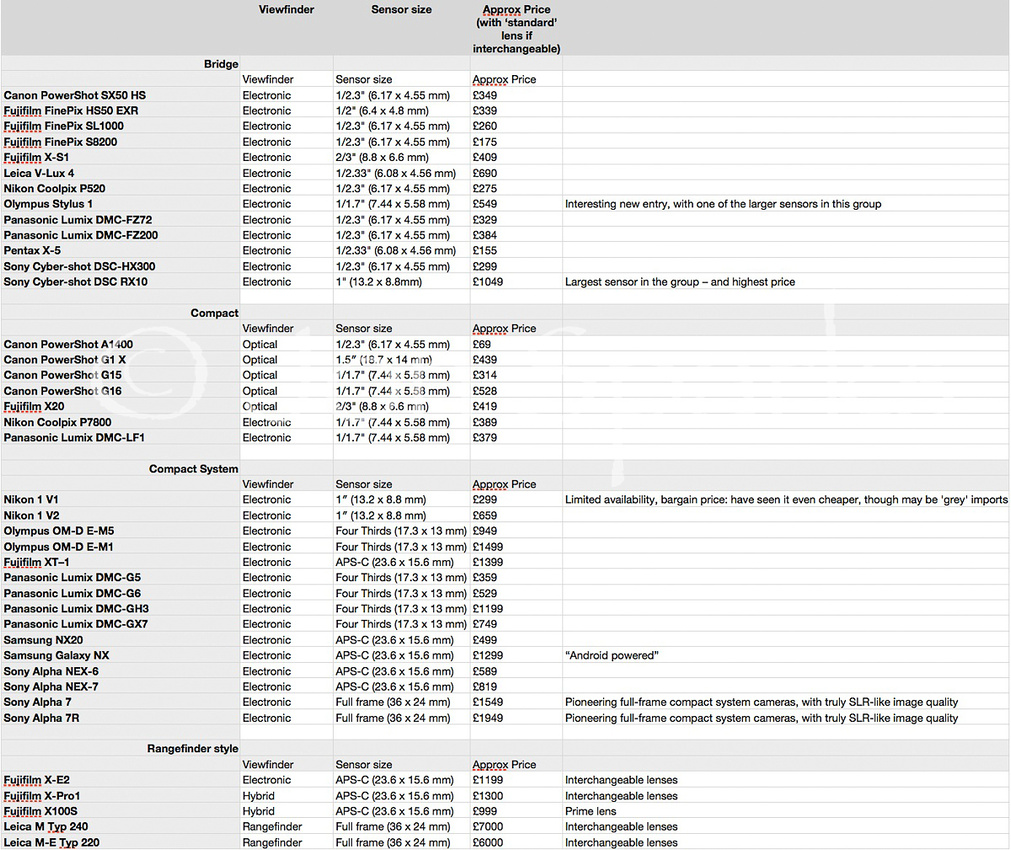
Take a look around now. It’s not just that 35mm SLRs have all but vanished: Nikon still makes the F6 in limited numbers (but I very much doubt there will ever be an F7), Canon is still selling the EOS-1v but probably just because there are still some in the warehouse, and – much to my surprise – it appears Zenit are still making 35mm SLRs, though I haven't seen one for sale in the UK for decades. Even more surprising, so is Vivitar.
What has really struck me, though, is how few companies still make digital SLRs. As far as I can see, it’s down to Nikon, Canon, Pentax and Sigma. Some might count Sony’s ‘SLRs’ as well, though these are actually SLTs. Olympus does still market its E-5 SLR, but it’s absent from many of the major dealers’ listings and I’m dubious as to whether there'll ever be an E-6.
I’m not an industry expert but it’s not hard to think of some reasons why so many companies have ceased trading or exited the SLR market. In no particular order:
1: higher development costs: digital SLRs are packed full of sensors and circuitry whereas traditional 35mm SLRs were much simpler (and contained quite a lot of empty space! So there are simply more components to develop or to source.
2: shorter product cycles: as noted before, the Nikon F3 was produced, with only minor changes, from 1980 to 2001, and the FM2 for almost as long. These days new models in the ‘enthusiast’ category come along virtually on an annual basis and even the pro cameras only last 2–3 years before at least a minor upgrade.
3: globalisation: nearly all cameras are now made somewhere in East Asia. Hard for European factories to compete in this market.
4: brand consolidation: big fish swallow little fish.
And being an old cynic, I could say there’s at least one other reason why some of these brands have disappeared or downsized...
5: some of them were crap.
This, of course does not apply to names like Contax, Leica and Topcon... I’ll leave you to work out for yourself which names in the list below it does apply to.
Of course there’s another major factor in play here: the seismic shift from film to digital. 20 years ago almost all of us used film; now almost no-one does. Some manufacturers didn’t see this coming, or didn’t get on board early enough.
I’ve occasionally claimed, with some justification, that the digital revolution really began with the Nikon D1. For press photographers, in particular, there’s a strong case that this was the first really usable camera – and it bore a comforting resemblance to the F5 35mm SLR. In the following few years, the majority of digital cameras looked either like a 35mm compact or a 35mm SLR, and used many common components like shutters, pentaprisms and mirror assemblies – as well, of course, as using the same lenses.
And we still see one strong legacy effect in the fact that many cameras, including all those Nikon, Canon, Pentax, Sigma and Sony SLRs, have a default image format that has the same 3:2 aspect ratio as a standard 35mm frame. The Four Thirds consortium set out to challenge this and arguably they succeeded. Many would argue that 4:3 is a more pleasing or more ‘natural’ shape for an image than 3:2. Against that, there’s the smaller size of Four Thirds sensors, which is a slight handicap in areas like dynamic range and high ISO image quality.
A few years ago, Olympus offered several Four Thirds SLRs, and Panasonic also made a couple; now there’s just the lonely E-5. But Four Thirds is alive and well, albeit under the slightly different monicker of Micro Four Thirds. Micro Four Thirds uses the same size sensor but in a mirrorless body, relying on an electronic viewfinder and/or rear screen viewing. Olympus’ OM-D models look similar to its classic OM series 35mm SLRs, but they’re mirrorless cameras, not SLRs.
Mirrorless (aka Compact System) cameras are now available in a range of formats:
1” sensor (CX in Nikon jargon): Nikon 1 series, Pentax Q
Micro Four Thirds: Panasonic, Olympus
APS: Fujifilm, Samsung, Sony NEX, Canon (EOS M), Leica
Full-frame: Sony A
That makes the mirrorless marketplace look a bit more crowded than the traditional DSLR one. (BTW it does seem odd using the term ‘traditional’ for a product that has really only been around for 15 years, but of course what sets DSLRs aside from their mirrorless rivals is the mirror and pentaprism, and that technology is considerably more venerable).
However, this is slightly misleading as SLRs are still selling in pretty large numbers – and there may be fewer manufacturers in the market but they tend to have more models on offer. At least that’s true for the big two, Nikon and Canon. Nikon has at least 7 current DSLRs, and that’s without counting variants (e.g. D800/D800E) or older models which remain on sale even though they’ve been supplanted: for example you can still find the D5100 and D5200 on sale alongside the recently-released D5300. Nikon even continues to list the D90 and D300s (and actually, they’re still darn good cameras). Canon lists 11 current models, Pentax 7 and Sigma just 2.
Conclusions? Heck, I think I’m more confused at the end of this review than I was at the start. There may be far fewer brand-names to choose from in the SLR market, but there’s still a genuine choice, and all of them are excellent cameras. As I’ve suggested earlier, you couldn’t say that about every 35mm SLR that was around, say, 30 years ago. And as photographers now we have an even wider genuine choice with the increasing diversity and ever-advancing quality of mirrorless models.
For nerds like me, here’s a list of all the names I can remember or have been able to trace of 35mm SLRs, starting with what we used to call the ‘Big Five’. I’m quite sure this list is neither exhaustive nor definitive, but it gives at least an impression of the number of names that used to be around. I’ve commented where I can.
Nikon – still making SLRs, and a 35mm SLR too!
Canon – still making SLRs, and still selling a 35mm SLR
Olympus – still making cameras, including some of the best mirrorless cameras around, but its last remaining SLR looks like a lame duck
Minolta – pulled out of camera business in 2008, sold its SLR business to Sony
Pentax – still making SLRs
Zenit – yes, apparently they are still making 35mm SLRs, or just selling off massive backlogs of old stock
Praktica – still making cameras, but all fairly low-end digital now
Contax – ceased making cameras in 2005
Yashica – ended up in same stable as Contax and also ceased in 2005
Ricoh – acquired Pentax, increasingly sells all its cameras under the Pentax brand
Mamiya – always more of a medium format specialist, still makes 645 digital and Leaf backs
Miranda – made its last SLR in 1978
Cosina – used to make 35mm SLRs for many other brands as well as some under its own name. Still makes lenses and a few cameras, but not SLRs.
Konica – merged with Minolta (see above) in 2003
Vivitar – still makes (or at least sells) a 35mm SLR, as well as lenses and compact cameras
Voigtlander – made at least one 35mm SLR. Now part of Cosina and brand still used on rangefinder cameras
Leica – better known for rangefinders but made R-series SLRs until 2009.
Fuji/Fujica – perversely, now uses the name Fujifilm on its digital cameras. The X-Pro and XE models are some of the best mirrorless cameras around. Used to make digital SLRs – I had a less than wonderful experience with the S3.
Petri
Topcon
Praktina
Chinon
Agfa
Zeiss Ikon/Contaflex – forerunners of Contax
Rolleiflex
Great Wall
Seagull
Exakta
The Df attracted a lot of comment before it was even officially launched, and I was certainly intrigued as details emerged, not least because it deliberately harks back to classic 35mm SLRs like the FA, F3 and of course the FM2 – which was my first Nikon, more than 20 years ago now (see Why I am a Nikon user for background on how I stumbled into the world of Nikon). I was even interested enough to venture some thoughts before I got my hands on one.
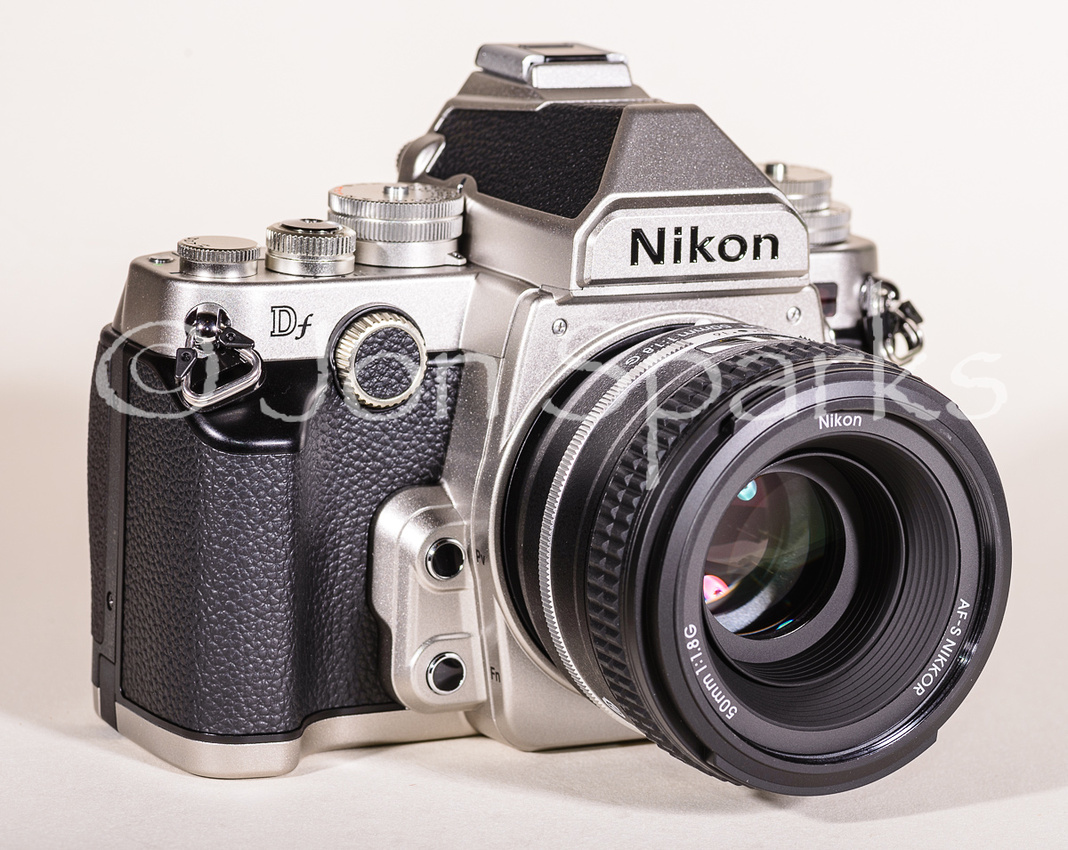
I’m pleased to see that most of my speculative thoughts in that earlier post stack up pretty well but obviously I can put more flesh on the bones now that I’ve been working with the Df for several weeks.
Image Quality
Let’s start with the vital issue, which I couldn’t pronounce on before, of Image Quality. In a word, it’s superb. One of the qualities I always look at most closely is dynamic range. In theory, the Df – and the D4, which has the same sensor – are some way behind the D800 and D600 – to the tune of around 1Ev (13.1 as against 14.2 or thereabouts according to DXOmark). This may be so, and if I have time before the Df goes back I’ll do some side by side tests, but my impression after using the Df in some pretty demanding lighting conditions (like the cave shot below) is that it has a more natural look in extreme highlights: in theory the D600 can capture more detail but when it does clip it tends to do so more abruptly.
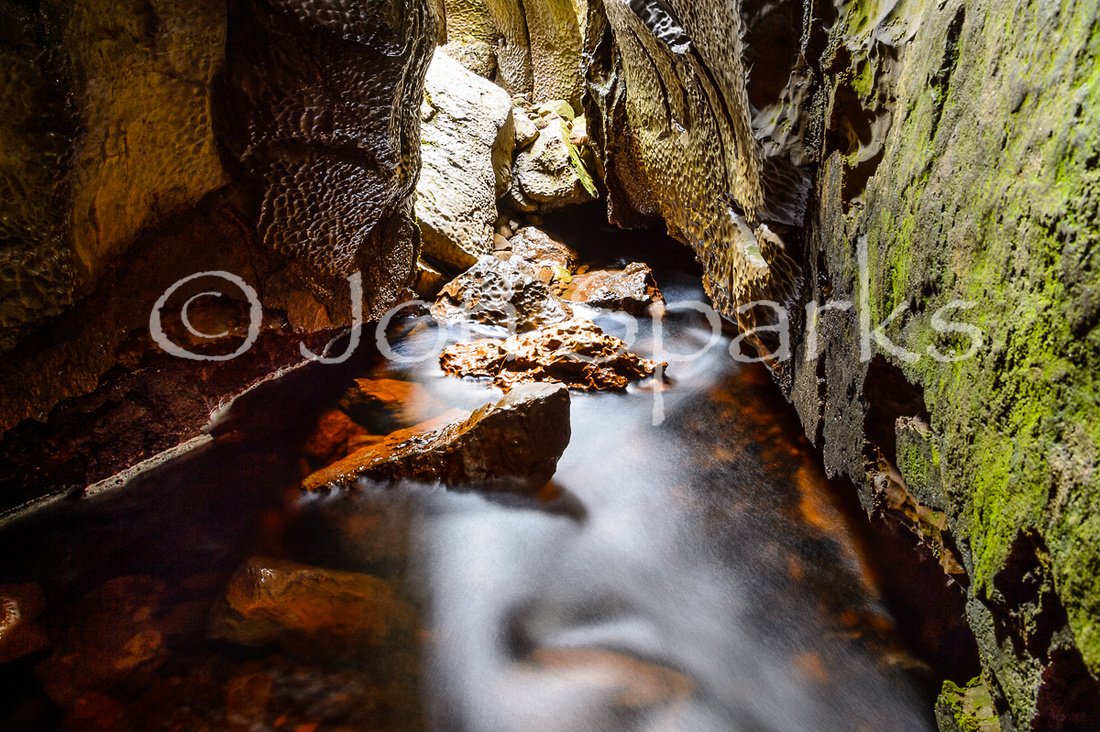
Where the Df really scores, of course, is in its low-light abilities. In DXOmark’s low-light ISO tests it is the best performer bar none – interestingly, it even beats the D4 although supposedly they have the same sensor. I’ve found that I can use my D600 pretty happily up to ISO 3200, when the situation requires it – whether it’s racing at the Manchester velodrome or in street-lighting at our local Christmas Festival. In ‘studio’ tests with the Df I reckon I could probably take it to 6400 without too many qualms.
In fact I’ve been remarkably impressed with its performance up to 25600, though I’d only use it in extreme circumstances. The ISO settings don’t stop there, though: you can take the Df right up to ISO 204800. That’s definitely a last resort, but you can still get remarkably usable images from it with some careful post-processing.
It’s worth remembering, especially as the Df so consciously recalls 35mm SLR design, that the fastest film we could readily get hold of was rated ISO 400. You could ‘push-process’ black-and-white films in particular up to 1600 or 3200 at the outside, but quality suffered in a big way, with grain that was glaringly obvious in, say, a 10 x 8 print, and very limited dynamic range.
The Camera
Since we’re talking about the days of film, this seems like a good moment to consider the camera's ‘retro’ design. I said in my First Thoughts blog that I liked the look of the Df, but having had it around for a few weeks I think I’ve cooled a bit. A lot of people seem to either love or hate it but I’m sitting on the fence. Viewed simply as an object, it’s nice enough, but not so gorgeous I’d want to put it on a shelf just to gaze at.
And when you view it as a camera, things get more complicated. From the front, it looks a lot like one of those classic 35mm SLRs – here it is next to my trusty old FM2:
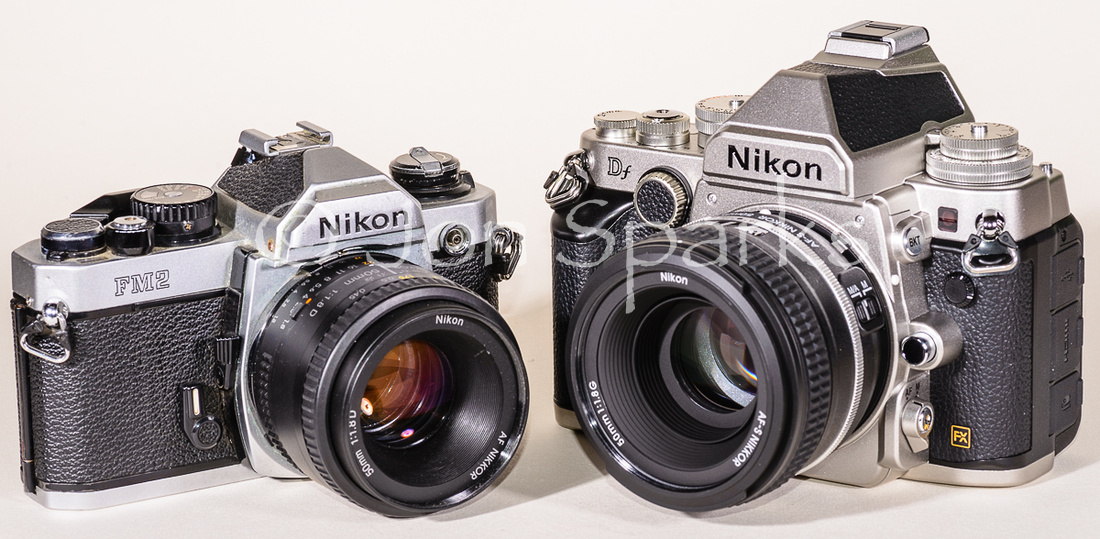
However, in rear view it is 100% a digital camera; the layout of the camera back is very reminiscent of the D800 in particular. Well, of course, a digital camera is what it is: which begs the question of what is gained by turning the clock back 20 years or more in major elements of design, especially the controls on the top-plate.
To be honest, I’m slightly conflicted about the control interface. I quite like the external ISO and exposure compensation dials, not least because I can check what the settings are even when the camera is switched off. However, the acid test for any camera, as far as I’m concerned, is how easily you can change shutter-speed, aperture and ISO – the three points of the ‘exposure triangle’ – when the camera is at your eye. How does the Df stack up on this?
ISO. The DF requires you to depress a lock button and turn the dial to change ISO. It’s perfectly possible to do this with the camera at the eye, but to me feels awkward. On my D600, I depress the ISO button, which is easily located as it’s the lowest button on the left side of the camera back, and turn the main command dial, which is right there under my thumb. This is quicker and easier. A clear win for the D600.
Aperture. The Df allows you to use the aperture ring on older lenses, but most of my lenses don’t have one, and even on those which do I’m going to use the same method as on the others. I can see no earthly reason to shuffle between aperture ring and command dial according to which lens is mounted. This is a useful option if you have really old lenses which can’t set aperture electronically, but for me that’s academic.
The Df, like every other Nikon DSLR – including my D600 – allows aperture to be set using the sub-command dial. However, unlike any other Nikon DSLR, the Df’s aperture dial is set vertically rather than horizontally. It’s not a big difference and it’s not hard to get used to, but it does seem to take more effort from the index finger. I can’t really see the point of setting the dial like this, except to make the camera look more 35mm-like. But that’s a case of form driving function, when it should be the other way around. A narrow win for the D600.
Shutter-speed. This is complicated because the Df has two means of setting shutter-speed. On the one hand, you can set it using the top-plate dial, just like a 35mm SLR. The dial has a lock button, which means you can’t change the shutter-speed inadvertently. Fair enough, but this means that to operate the dial you need to move both thumb and index-finger from their normal positions.
The dial also only allows you to set shutter-speeds at 1 Ev intervals, e.g. 1/60, 1/125, 1/250. The main command dial offers 1/3 Ev steps, e.g. 1/60, 1/80, 1/100, 1/125. Second, the slowest shutter-speed that can be set with the dial is 4 seconds. There’s a Custom Setting which allows you to use the command dial to nudge the shutter speed up or down by 1/3 or 2/3 Ev, and to set times up to 30 secs when the dial is at the 4 secs position, but if you’re going to do that, why not use the command dial full-time anyway?
Suffice it to say, after a very short time with the camera, the shutter-speed dial went on to the 1/3 STEP position, which allows me to use the main command dial in the same way I do my D600 (and other Nikon DSLRs) – and I’ve barely touched the top-plate dial since.
Since I can use the main command dial in the way I’m used to, I’m calling this one a draw. Still, that’s two wins for the D600 and one tie in what I consider the most crucial aspects of the control interface. I’m not the first to observe that Nikon have spent decades, and employed top designers, to refine the ergonomics of their DSLRs. I’m also not the only one who thinks that in cameras like the D600 they have pretty much nailed it, and that Nikon DSLRs handle better than any others I have used. So why – again, I’m far from the first to ask – would they discard great chunks of that successful formula?
Performance and handling
I’m afraid my reservations about the handling of the DF don’t end with the ‘exposure triangle’. In particular – and this is my biggest bugbear of all – I really hate the placement of the Live View button. It’s right where I expect the info button to be, and I keep activating Live View when I want to see the information display. This is one aspect where the Df’s rear layout doesn’t match the D800 (or the D600), and I wish it did.
Now, don’t get these reservations out of proportion. Partly they arise because I’m much more used to cameras like the D600. If I used the Df full-time I’d get properly acclimatised to it. None of them make it a bad camera and it still handles better than many other DSLRs I could name. In particular, it beats any camera without a second command dial. It’s just not as quick, easy and intuitive to use as my D600 or D7000. Mostly the differences are marginal, but the ‘aggregation of marginal gains’ can add up to something big.
In the end, I think the design of the Df makes perfect sense if you are using AI and pre-AI lenses. If that’s what most people are buying it for, then that’s fine – but I suspect most people will be using it with more modern lenses and it seems to me like a case of quite a small ‘classic lens’ tail wagging a much larger ‘modern lens’ dog.
One limitation I haven’t mentioned is the lack of a movie mode. Personally, I’m quite happy about this. I’m a photographer, not a film-maker (and I do wish the world still recognised that they are two very different skill sets). The Df sets its stall out as a camera for ‘Pure Photography’ and that’s probably the thing I like best about it. But of course if movies are important to you then the Df is a non-starter.
There’s one other ‘missing’ feature which I do find a significant limitation, and this is the lack of a built-in flash. I know, I know, built-in flash is for amateurs – but the D800, which is a professional camera by almost any reckoning, has one. And while built-in flash is essentially useless as a main source of light, in my view is still has two important roles; it can be a useful fill-light, and it can act as the Commander for a wireless setup. If I want to use off-camera flash with the Df, I either have to pack a sync lead, which means the flash can’t be very far off-camera, or I have to drag along my Phottix Odin wireless triggers. They’re great, but it’s more stuff (and more batteries!) to carry, which is not what I want when travelling light.
More neutrally, focusing speed and coverage are on a par with my D600; in fact, they use the same focus module. In this regard, then, the Df is not equal to a D800 or even a D7100, let alone a D4, for critical action shooting. In particular, though its image quality in low light is outstanding, its ability to focus in the same conditions is not. Even so, it’s still pretty damn good. To put it in perspective, it knocks spots off any mirrorless camera, let alone compact or phone. But if I was actually going to fork out over £2.5K for one, I might expect more.
And there we have one of the big issues about the Df. Price. It’s awkward to make exact comparisons, because in the UK the Df is only supplied with a 50mm lens – and that’s another gripe, because I’ve already got one of those. This means we have to guess at a body-only cost but it would probably be around £2600. That’s almost £500 more than a D800 and £100 more than a D610.
Some people will no doubt observe that both of these have more megapixels (36 on the D800, 24 on the D610). To me that’s almost immaterial. In fact it’s one of the things I like best about the Df. If it’s good enough for the D4 (and the upcoming D4s)... 16 megapixels is a fine sweet spot. Few of us ever need more and results in low light in particular are great. But those other models handle better and outperform it in all kinds of ways.
So if I was buying now, which camera would I choose? In the end, probably a D610 for light weight (albeit marginally more than the Df), compact size and all-round image quality. For sports shooting the superior AF system on the D800 might swing it. Either way, it wouldn’t be the Df.
(Even narrowing the search down to full-frame Nikon, my ideal camera doesn’t quite exist. If I could get the size and weight of the D610, the sensor from the D4/Df, and the build quality and just about everything else from the good old D700 – then I’d be in clover. Especially at a D610-ish price).
Final verdict
The Df is a confusing camera. Maybe it’s a confused one. I probably sound like I’m slating it, and I don’t mean to. In its performance, especially image quality – and above all, low-light image quality – it’s a terrific camera. But in design terms, it’s a step sideways, not a step forward, and its handling in particular just feels like too many compromises have been made for no better reason than paying homage to 30-year-old 35mm cameras. I loved my FM2 and I don’t want to part with it. But I haven't shot a frame of film for at least five years. The only way in which the FM2 conceivably scores over today’s cameras is its sheer indestructibility, and perhaps its ability to go on shooting with no battery.
The Df is the right camera for some people. It makes a style statement, and that will be enough for some buyers. If you want better reasons to buy one, its image quality is terrific, especially in low light, and for a full-frame DSLR it is relatively light and compact. But before I got it I thought this might be one of those cameras that’s hard to hand back. Now I don’t think it will be.
]]>Of course the camera market is not static so, nearly six months on, I thought it would be worth updating the list of cameras. I'm pleased to say the list has grown from 31 to 38, suggesting that manufacturers are waking up to the fact that a lot of people still want a viewfinder – something that has been underlined by feedback to my earlier post as well as comments on Facebook. It's also worth mentioning that a lot of these cameras are now priced lower than they were in June, so bargains may be there for the taking.
A few of the new entries are really interesting – Olympus' Stylus 1 and Sony's RX10 are a shot in the arm for the never-quite-convincing (to me) 'bridge' category, and the Sony Alpha 7 and 7R bring full-frame sensors to the compact system sector. These are very new, but reports suggest image quality is right up there with the best SLRs. I don't think I'll be trading in my Nikons just yet, though, as other aspects of performance – such as AF speed – don't quite seem to compete. In many ways the Olympus OM-D E-M1 looks like the most convincing all-round compact system camera so far.
However, having said all that, I reckon the camera most likely to tempt me to splash the cash right now has to be the Fujifilm X-E2; APS-C sensor, stunning image quality, interchangeable lenses, sensible size.
But then again, by the time I've actually saved up for one, who knows what else might be out there? Both Canon and Nikon have cameras in this list, but I can't say any of them really tempt me. We already have a Nikon 1 V1, which is pretty impressive for a pocketable camera – its AF performance beats many SLRs I've tried and image quality is surprisingly good for a small sensor. I suspect – as do many people who are closer to the industry than I am – that both of the Big Two have something up their sleeves.
So watch this space, but here's the list, as current as I can make it right now (mid-November 2013):
|
|
Viewfinder |
Sensor size |
Approx Price (with ‘standard’ lens if interchangeable) |
|
|
Bridge |
|
|
|
|
|
|
Viewfinder |
Sensor size |
Approx Price |
|
|
Canon PowerShot SX50 HS |
Electronic |
1/2.3" (6.17 x 4.55 mm) |
£349 |
|
|
Fujifilm FinePix HS50 EXR |
Electronic |
1/2" (6.4 x 4.8 mm) |
£339 |
|
|
Fujifilm FinePix SL1000 |
Electronic |
1/2.3" (6.17 x 4.55 mm) |
£260 |
|
|
Fujifilm FinePix S8200 |
Electronic |
1/2.3" (6.17 x 4.55 mm) |
£175 |
|
|
Fujifilm X-S1 |
Electronic |
2/3" (8.8 x 6.6 mm) |
£409 |
|
|
Leica V-Lux 4 |
Electronic |
1/2.33" (6.08 x 4.56 mm) |
£690 |
|
|
Nikon Coolpix P520 |
Electronic |
1/2.3" (6.17 x 4.55 mm) |
£275 |
|
|
Olympus Stylus 1 |
Electronic |
1/1.7" (7.44 x 5.58 mm) |
£549 |
Interesting new entry, with one of the larger sensors in this group |
|
Panasonic Lumix DMC-FZ72 |
Electronic |
1/2.3" (6.17 x 4.55 mm) |
£329 |
|
|
Panasonic Lumix DMC-FZ200 |
Electronic |
1/2.3" (6.17 x 4.55 mm) |
£384 |
|
|
Pentax X-5 |
Electronic |
1/2.33" (6.08 x 4.56 mm) |
£155 |
|
|
Sony Cyber-shot DSC-HX300 |
Electronic |
1/2.3" (6.17 x 4.55 mm) |
£299 |
|
|
Sony Cyber-shot DSC RX10 |
Electronic |
1" (13.2 x 8.8mm) |
£1049 |
Largest sensor in the group – and highest price |
|
|
|
|
|
|
|
Compact |
|
|
|
|
|
|
Viewfinder |
Sensor size |
Approx Price |
|
|
Canon PowerShot A1400 |
Optical |
1/2.3" (6.17 x 4.55 mm) |
£69 |
|
|
Canon PowerShot G1 X |
Optical |
1.5″ (18.7 x 14 mm) |
£439 |
|
|
Canon PowerShot G15 |
Optical |
1/1.7" (7.44 x 5.58 mm) |
£314 |
|
|
Canon PowerShot G16 |
Optical |
1/1.7" (7.44 x 5.58 mm) |
£528 |
|
|
Fujifilm X20 |
Optical |
2/3" (8.8 x 6.6 mm) |
£419 |
|
|
Panasonic Lumix DMC-LF1 |
Electronic |
1/1.7" (7.44 x 5.58 mm) |
£379 |
|
|
|
|
|
|
|
|
Compact System |
|
|
|
|
|
|
Viewfinder |
Sensor size |
Approx Price |
|
|
Nikon 1 V1 |
Electronic |
1″ (13.2 x 8.8 mm) |
£299 |
Limited availability, bargain price: have seen it even cheaper, though may be 'grey' imports |
|
Nikon 1 V2 |
Electronic |
1″ (13.2 x 8.8 mm) |
£659 |
|
|
Olympus OM-D E-M5 |
Electronic |
Four Thirds (17.3 x 13 mm) |
£949 |
|
|
Olympus OM-D E-M1 |
Electronic |
Four Thirds (17.3 x 13 mm) |
£1499 |
|
|
Panasonic Lumix DMC-G5 |
Electronic |
Four Thirds (17.3 x 13 mm) |
£359 |
|
|
Panasonic Lumix DMC-G6 |
Electronic |
Four Thirds (17.3 x 13 mm) |
£529 |
|
|
Panasonic Lumix DMC-GH3 |
Electronic |
Four Thirds (17.3 x 13 mm) |
£1199 |
|
|
Panasonic Lumix DMC-GX7 |
Electronic |
Four Thirds (17.3 x 13 mm) |
£749 |
|
|
Samsung NX20 |
Electronic |
APS-C (23.6 x 15.6 mm) |
£499 |
|
|
Samsung Galaxy NX |
Electronic |
APS-C (23.6 x 15.6 mm) |
£1299 |
“Android powered” |
|
Sony Alpha NEX-6 |
Electronic |
APS-C (23.6 x 15.6 mm) |
£589 |
|
|
Sony Alpha NEX-7 |
Electronic |
APS-C (23.6 x 15.6 mm) |
£819 |
|
|
Sony Alpha 7 |
Electronic |
Full frame (36 x 24 mm) |
£1549 |
Pioneering full-frame compact system cameras, with truly SLR-like image quality |
|
Sony Alpha 7R |
Electronic |
Full frame (36 x 24 mm) |
£1949 |
Pioneering full-frame compact system cameras, with truly SLR-like image quality |
|
|
|
|
|
|
|
Rangefinder style |
|
|
|
|
|
|
Viewfinder |
Sensor size |
Approx Price |
|
|
Fujifilm X-E2 |
Electronic |
APS-C (23.6 x 15.6 mm) |
£1199 |
Interchangeable lenses |
|
Fujifilm X-Pro1 |
Hybrid |
APS-C (23.6 x 15.6 mm) |
£1300 |
Interchangeable lenses |
|
Fujifilm X100S |
Hybrid |
APS-C (23.6 x 15.6 mm) |
£999 |
Prime lens |
|
Leica M Typ 240 |
Rangefinder |
Full frame (36 x 24 mm) |
£7000 |
Interchangeable lenses |
|
Leica M-E Typ 220 |
Rangefinder |
Full frame (36 x 24 mm) |
£6000 |
Interchangeable lenses |
]]>
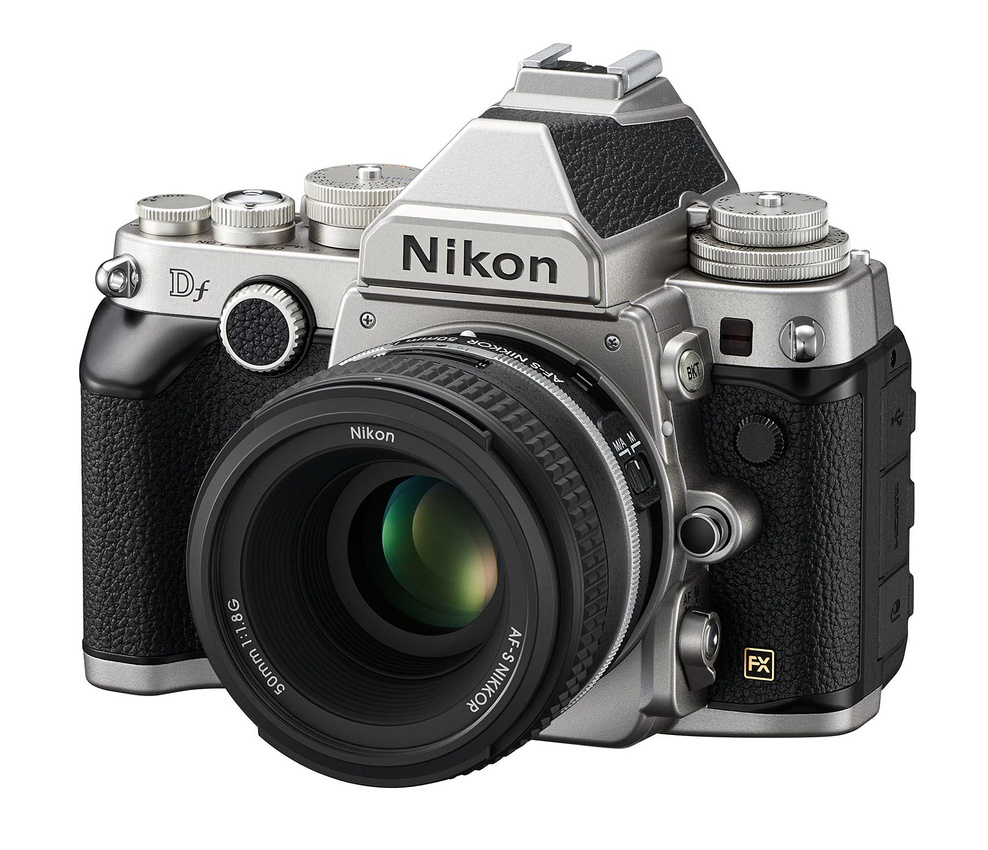
Meanwhile, following up on my recent post about shooting the time trial at the Tour of Britain, here are a few thoughts about another branch of bike racing – and one that I heartily recommend as a great spectator event and one that any keen action photographer should find rewarding. I’m talking here about cyclocross.
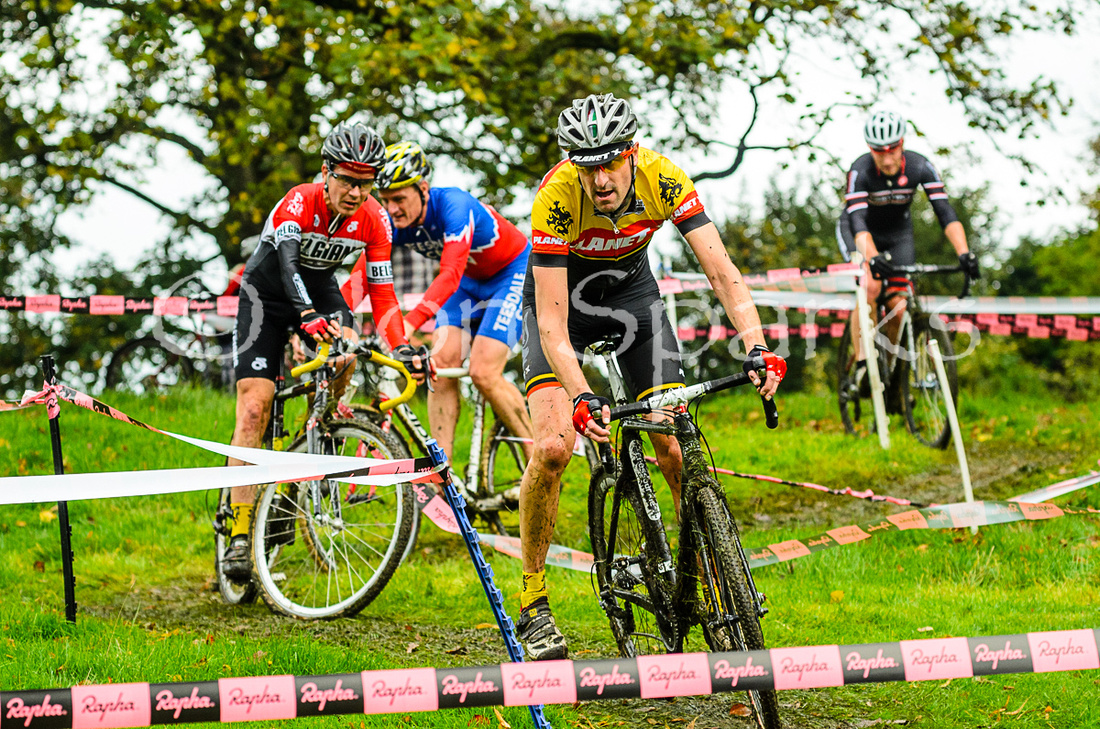 A longish lens enabled me to shoot this section of the course even while I was standing alongside a completely different part of the lap.
(Broughton Hall, 2013)
Nikon D600, focal length 120mm (180mm equivalent), ISO 1000, 1/1600 sec, f/4
Cyclocross (often abbreviated to ‘cross) may seem a tad obscure. That’s not the case in Belgium or Holland, where it’s hugely popular, and it seems to be big in North America too. Over here I’d bet most people have never seen a cyclocross race either in the flesh or on TV, but there are far more of them than you might think (see a calendar of events here), most are free to spectators and they have a special, friendly atmosphere that isn’t so obvious at, say, a big road-race.
For those who don’t know, ‘cross racing is traditionally what road riders (some of them anyway) do in the winter to stay fit and sharp. As befits a winter sport, races are normally short, rarely more than an hour long and are run off over short circuits, often in local parks or country parks, where you can see much of the action from one spot. Riders start in a bunch but, unlike road-races, they don’t generally stay grouped for long and usually are soon spread out around the course, with back-markers often being lapped by the faster riders. While individual races are short, there may be several races on a single afternoon (e.g. children, juniors, seniors, veterans) and men and women often race together.
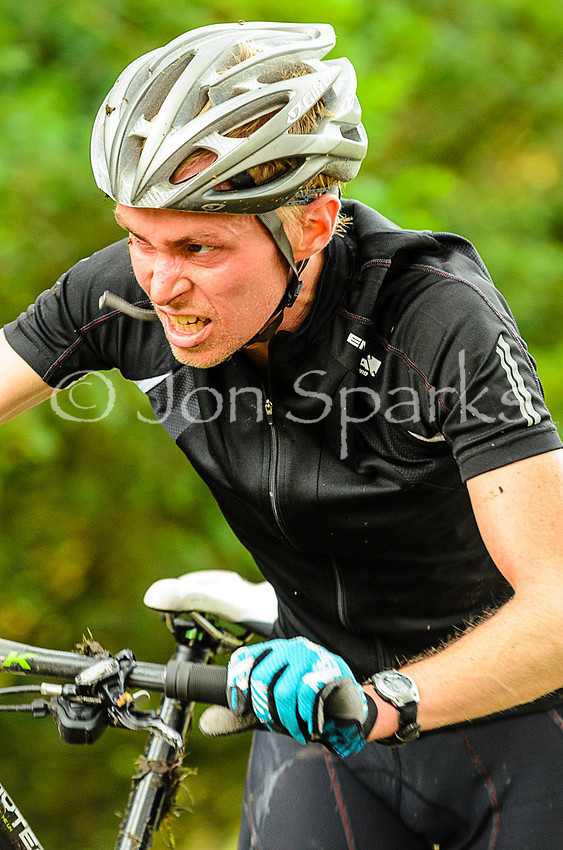
It’s all in the expression. At the top of an off-the-bike climb, speeds were low, but it was under trees and light was also on the low side;
I needed a high ISO and noticed that the AF occasionally lost target. (Broughton Hall, 2013)
Nikon D7000, focal length 200mm (300mm equivalent), ISO 1600, 1/200 sec, f/5
Cyclocross bikes look superficially like road bikes, with slightly modified geometry and fatter, knobbly tyres. In local races you may also seem some people competing on mountain bikes. On every lap the rules require there to be some obstacle that forces riders to dismount – usually it’s a couple of low barriers. One of the skills of ‘cross racers is the ability to dismount, hurdle the barriers with the bike and remount as quickly as possible. Steep climbs, especially when muddy, may also force most or all riders off their bikes.
For the photographer this translates into abundant opportunities. By the mid-way point of a race you may have a steady stream of riders passing a given point on the circuit so there are lots of chances to capture individuals. There’s something essentially eccentric about ‘cross racing too – either it brings out the character in people, or it just brings out the ‘characters’. There can be plenty of (mostly harmless) spills and on occasions it can be wonderfully muddy too. Many riders will have two bikes, changing every lap so a helper can clean off one bike while they ride the other one. The pits and the bike-changes can also furnish shooting opportunities.
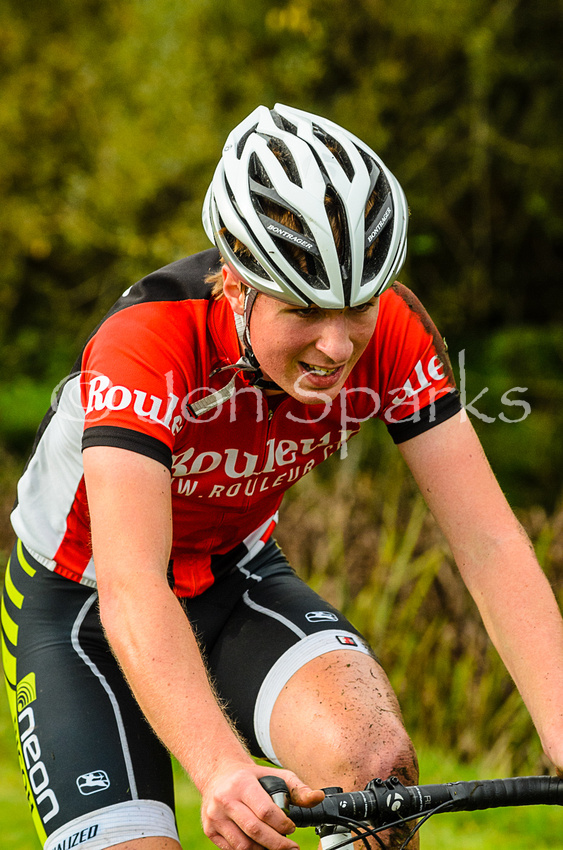
Out in the open, in better light, faster shutter-speeds were possible, and greater rider speeds made them essential. (Broughton Hall, 2013)
Nikon D7000, focal length 200mm (300mm equivalent), ISO 800, 1/1000 sec, f/7.1
Technically, it may seem easier to shoot ‘cross than road-racing as the speeds are considerably lower – especially on climbs – but set against this the fact that it mostly takes place on winter afternoons and you may often be dealing with considerably lower light levels.
Actually I’ve been pretty lucky with the weather in my experience of shooting cyclocross – so far! I’ve reached the point where I’d actually welcome some wet and muddy conditions next time to add that extra dimension to the shots.
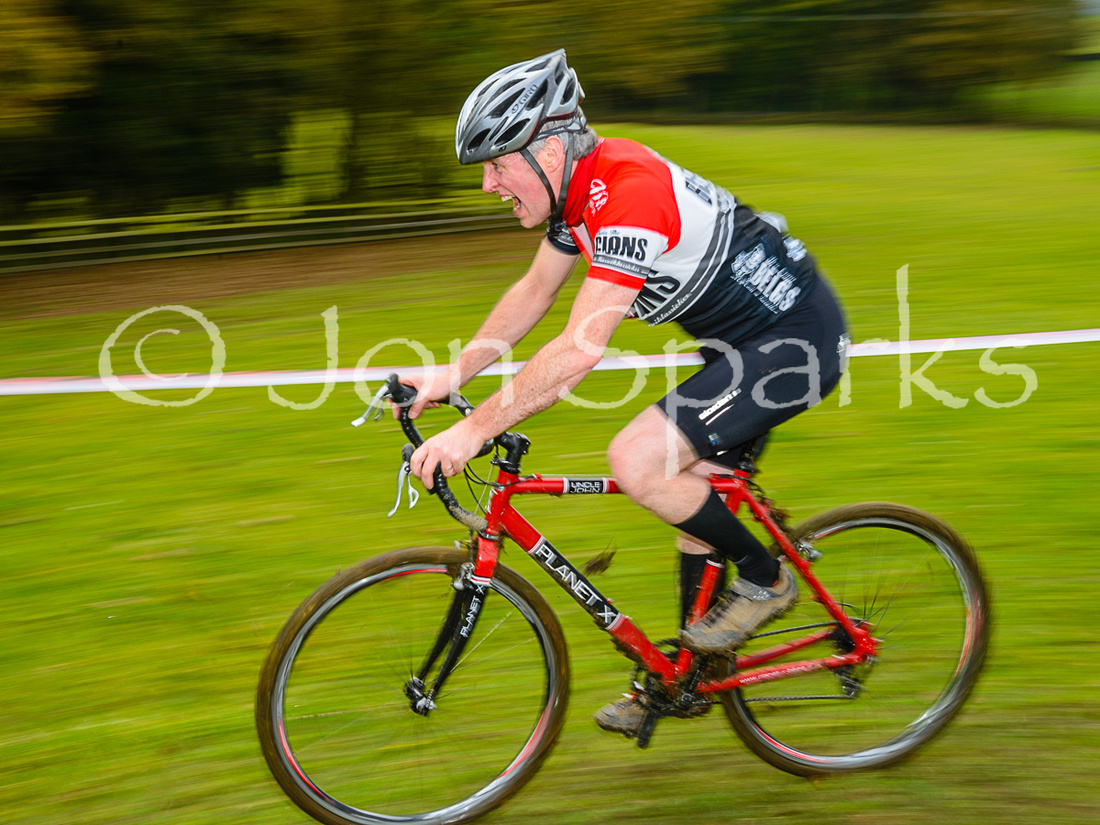
Pretty much a textbook panning shot: a high aperture and low ISO allowed a slow shutter-speed.
Fill-in flash helps keep the rider sharp too. (Broughton Hall, 2012)
Nikon D600, focal length 50mm, ISO 200, 1/50 sec, f/16
So far I’ve shot at three ‘cross events, all part of the Rapha Super Cross series – at Brockhole on the shores of Windermere in 2011 and at Broughton Hall near Skipton in 2012 and 2013 – just last Saturday, in fact. If you’re reading this blog within a few days of posting, the final round of the Rapha 2013 series is at London’s Alexandra Palace next Sunday (27/10/13). But if you’ve missed it, don’t despair; there are plenty more events through the winter. Top events include the National Trophy Series, Regional Championships, and of course the National Championships, which are in Derby on the 11th/12th of January.
I don’t want to get bogged down in photographic technicalities, but there’s a bit of background in the picture captions. A few basic pointers:
1: It’s winter and the light may be poor: take a camera that gives good results even at higher ISO ratings. This usually means an SLR or mirrorless, or a large-sensor compact.
2: Although speeds are lower than road-racing (or downhill mountain biking) they can still be high in places, and you can be shooting really close to the action. A lot of mirrorless cameras will be challenged by this, and I don’t know any compact that will cope. You can always try pre-focusing – even with my DSLRs I’ve used this technique for some shots. It’s great at fixed points like the barriers and works well for panning shots too.
3: Flash is good to help sharpen up your results, add fill-light in tricky conditions. But built-in flashes are weak and the light isn’t very pretty. A separate flashgun is better and one that you can take off-camera gives you a whole host of extra options. With some SLRs you can trigger and control remote flash using the camera’s own built-in flash. I’ve done this with good results in the past, though I’m now using a Phottix Odin remote flash system.
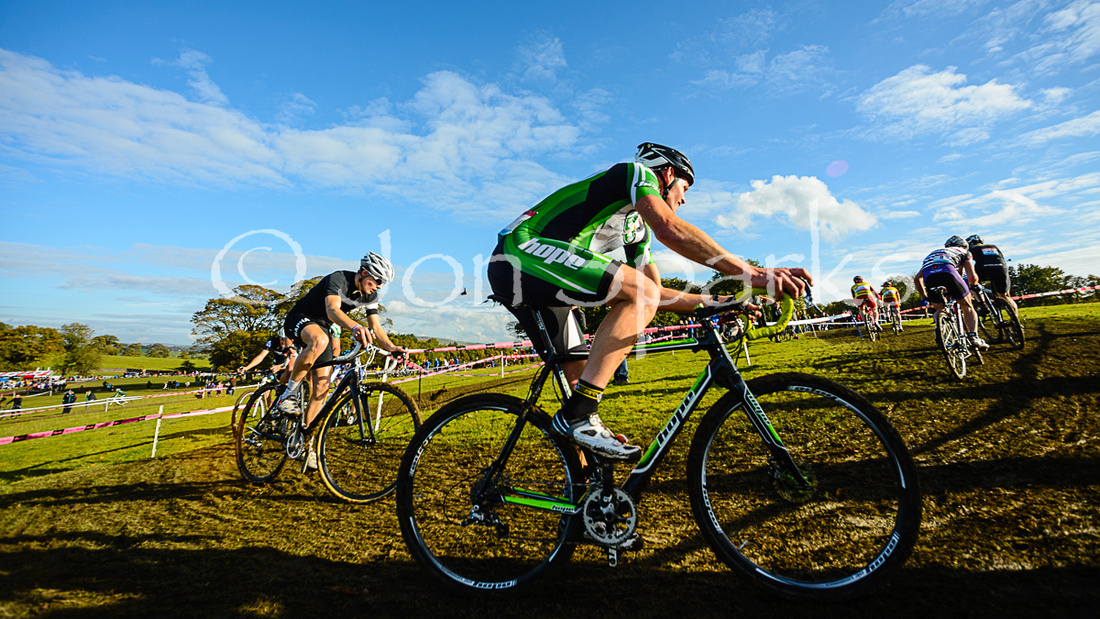
Using the widest lens I had with me, on a full-frame camera, gave a different view.
A low viewpoint meant the riders stood out against the sky. Fill-in flash. (Broughton Hall, 2012)
Nikon D600, focal length 14mm, ISO 200, 1/800 sec, f/5.6
And general advice – the weather may be challenging, and indeed some of the best photos may come in difficult conditions, but remember to look after both yourself (warm clothes, wellies or hiking boots, waterproofs if necessary) and the camera (some sort of rain protection, spare battery).
Cyclocross is out there – get out too, and enjoy it.
Under the trees, I used a remote flash, off to the right of the shot, to add light and crispness.(Broughton Hall, 2013)
Nikon D600, focal length 85mm, ISO 800, 1/125 sec, f/6.3
 After struggling with AF here, I found it better to prefocus the barrier shots – after all, I knew where I wanted the riders to be when I took the shot. Again I was using remote flash, on a tripod on the right. And again, a low viewpoint helped – who cares about muddy knees? (Broughton Hall, 2013)
Nikon D7000, focal length 31mm (cropped), ISO 250, 1/259 sec, f/9
Something different: the Rapha Super Cross events include a fun race, a feature of which is the ‘Tequila shortcut’. (Broughton Hall, 2013)
Nikon D7000, focal length 175mm (263mm equivalent), ISO 640, 1/500 sec, f/5.6
]]>
 I’ve said it before, and I’ll say it again: photographing cycling, and specifically bike racing, is pretty challenging. However, for the amateur photographer who relishes the challenge, bike racing has a lot to recommend it. How many other sports, even at the elite level, are completely free to watch and allow you to get within touching distance of the racers? (I shouldn’t need to say this, but though you can get that close, you should give them a bit more space).
Of course, there are many running events which are also free and open – road, cross-country and fell running all included – but, with all due respect, they are a lot slower. The world record time for a marathon (2.03.38) is an average speed of 20.46km/h. There’s no exact equivalent in cycling, but the British competition record for 25 miles (45.54) equals 52.59km/h; that for 50 miles (1.35.27) equals 50.23km/h. We can see a similar pattern across a range of distances: cyclists are around 2 1/2 times faster, with the advantage tending to increase at longer distances.
Throw in a few hills and the picture changes: the steeper it gets, going up, the slimmer the advantage the bike has, but on the way down bikes outstrip runners by a huge margin, with speeds in excess of 100km/h readily attainable in favourable conditions. I’m a pretty ordinary rider, but I’ve been close to that myself.
The point of all this is that the combination of high speed and potentially close shooting distances can be a challenge to both camera and photographer, but also creates the potential for really dynamic and involving images.
And so to the Tour of Britain. As soon as the route for the 2013 race was announced, I knew I wanted to be at Stage 3. First, it was to be an individual time-trial, which meant that the 100-odd riders would be passing one-by-one, and riding flat-out; in a ‘normal’ road-race stage they may whizz past in one compact group in a few seconds. There was an extra frisson because the distance was to be 10 miles (16km); one of the classic distances over which British time-triallists race regularly. I’ve ridden dozens of them myself. And finally, the venue was to be Knowsley, within fairly easy reach. The date went into my diary right away.
 Picking the spot
I had no commission for this shoot and certainly wasn’t an accredited photographer (the ones you see on the back of motorbikes in the road-race stages). I decided to pick a spot on an open section of the course, where the crowd probably would be light, so I wouldn’t be jostling with other people and would have relatively uncluttered backgrounds for my shots. I checked the course out on Google Street View and picked a point on Knowsley Lane, about a third of the way into the race. As it turned out, the weather on the day was pretty poor, especially for the earlier starters in the race, and this kept the crowds down even more.
Of course, rain also poses a few extra problems for photographers. I wasn’t too worried about my Nikon cameras and lenses as they have good weather-sealing, but was a bit reluctant to haul out my flashguns as water and high-voltage don’t mix. Fortunately the rain eased off as the day went on (although it never completely stopped, and the roads remained wet) and I had a chance to try out my recently acquired Phottix Odin remote flash system. But we’ll come to that.
Head-on
I used two main shooting strategies, both tried and tested. The first was using a relatively long lens for some more-or-less head-on shots. For these I used my Nikon D7000 and Nikkor 70–200 f/4 lens, mostly at the 200mm end of its range. The crop factor of the DX format D7000 means this is like using a 300mm lens on a full-frame camera (or a 35mm SLR, if you’re old enough to remember!) and I never really felt the need for anything longer. I left the lens wide open at f/4. Because I wanted to use a high shutter speed and the light wasn’t great, I set the ISO to 800 and this allowed me to use 1/800 or 1/1000 sec. This is fast enough to give a sharp image of a rider heading towards the camera but probably wouldn’t be quite fast enough for a side-on shot. Remember, these guys would be doing 50+ km/hr and passing pretty close.
Focusing is pretty critical with shots like these as depth of field is minimal. A time-honoured technique is to pre-focus on a spot in the road and shoot as the rider reaches it. This would have been slightly tricky on this occasion as the roads were closed and riders could be riding anywhere across the width of the road. I opted for autofocus, partly to give this camera/lens combination a good test. Continuous AF with 3D focus tracking worked pretty well. This image of Peter Hawkins (Team IG Sigma Sport) was actually one of the first I took and ended up as one of my favourites, one reason that he was among the minority of riders not wearing glasses or a visor and therefore his facial expression is that bit clearer.
 I also really like this shot of Christopher Jones of (UnitedHealthcare) – again the facial expression is great and this time the angle is slightly oblique and we’ve ‘lost’ the following car – although there is a lamp-post directly behind him, which detracts slightly. I was concentrating entirely on keeping him in frame and didn’t notice the post at all as I pressed the shutter.
Pan flat
For variety, I also took some panning shots. These were all done with my Nikon D600 and Nikkor 24–85mm lens. As I’ve said, riders might be passing almost anywhere within the width the (two-lane) road and 24mm was wide enough to take in a rider on the near side, while 85mm gave a reasonably frame-filling image if they chose to use the opposite gutter. The photo of Marcin Bialoblocki (in blue) was shot at 24mm, while the one of Gerald Ciolek (wearing gold as race leader) is an 85mm shot, uncropped.
If you look at the Bialoblocki shot, it’s obvious he was less than three metres from me. In that situation it’s not easy even to keep a rider centred in the frame; the panning movement is really fast. It was much easier with riders like Ciolek on the far side of the road; the extra distance makes the panning movement a more controllable swing. I did switch sides several times but there was no way to predict which side any given rider would choose. This is one aspect that’s generally easier when shooting regular domestic time trials; the roads aren’t closed so riders will always be well to the left.
Flash tracks
Shutter speed for all these shots was either 1/100 or 1/125 sec. I’ve experimented with slower speeds for panning shots as it increases the background blur, but image of the rider is not so consistently sharp.
For the later batches of panning shots I also used remote flash: a Nikon SB-700 on a tripod at the side of the road. This helps to sharpen the image of the rider as well as adding a bit of lift on such a dull day. As I’ve mentioned, I triggered it using the Phottix Odin system. This is not only a bit cheaper than the better-known Pocket Wizard but seems to be simpler to use. In the past I’ve often triggered remote flash(es) using the camera’s own flash as the master unit, but using a radio trigger increases the range and makes the system more flexible as you don’t have to worry so much about line of sight between camera and remote flash.
Anyway, on this first ‘for real’ outing, the system worked perfectly. The strength of the flash does vary with distance but working with co-operative riders or in a situation where the line they take is more predictable this would not be a problem. The flash is in evidence in the shot, but I think you can see it more clearly in this shot of Omega Pharma Quick-Step’s Martin Velits. Still, it doesn’t overwhelm the natural light; I’m not keen on shots which shout ‘REMOTE FLASH’ as the first thing you notice.
Here's one more shot to finish off – after all, I could hardly fail to include stage winner (and overall race leader as I write this) Bradley Wiggins.
I’ve photographed fireworks on many occasions, including open-air concerts and the World Championships as well as the good old Fifth of November, so I'd like to think I know a bit about it.
Fireworks World Championships, Blackpool; reflections for extra value!
There's some good advice out there, and some that's not so good. For instance there’s a mostly sound piece by Joe McNally for Adorama. He has lots of suggestions that are worth reading – scouting the location, checking that no-one will object to you turning up with a tripod on the big day, taking food and drink and extra clothing. He even suggests taking a comfy chair and an iPod: fireworks photography can be like wildlife photography – a lot of waiting before a short period of intense activity.
However, McNally makes one suggestion that I strongly disagree with. He correctly says that long exposure times can cause digital camera sensors to get hot and this can lead to increased image noise. However, he then suggests that you could turn on Long Exposure Noise Reduction. This is a very bad idea!
Long Exp. NR will lock up the camera for as long as the actual exposure. Shoot for 15 secs and the camera then takes another 15 secs processing the image. In other words, you lose half your shooting time, and with many displays only lasting 10–15 minutes time is precious. Instead, shoot RAW and apply noise reduction in post-processing.
It is true, as McNally says, that more modern cameras are much less susceptible to this kind of noise, and in particular, large-sensor cameras really show their class when tackling long-exposure or high-ISO shooting. Trying to shoot fireworks on an iPhone or an average compact is likely to prove frustrating. However, a large-sensor compact like the Sigma DP-1 Merrill, which I evaluated recently, will give good results, as will most Compact System cameras and DSLRs.
You can also shoot film. Some of the best fireworks shots I’ve ever done were taken on film; if you’ve a choice between a smartphone and the old 35mm SLR in the back of the cupboard, dust off the SLR.
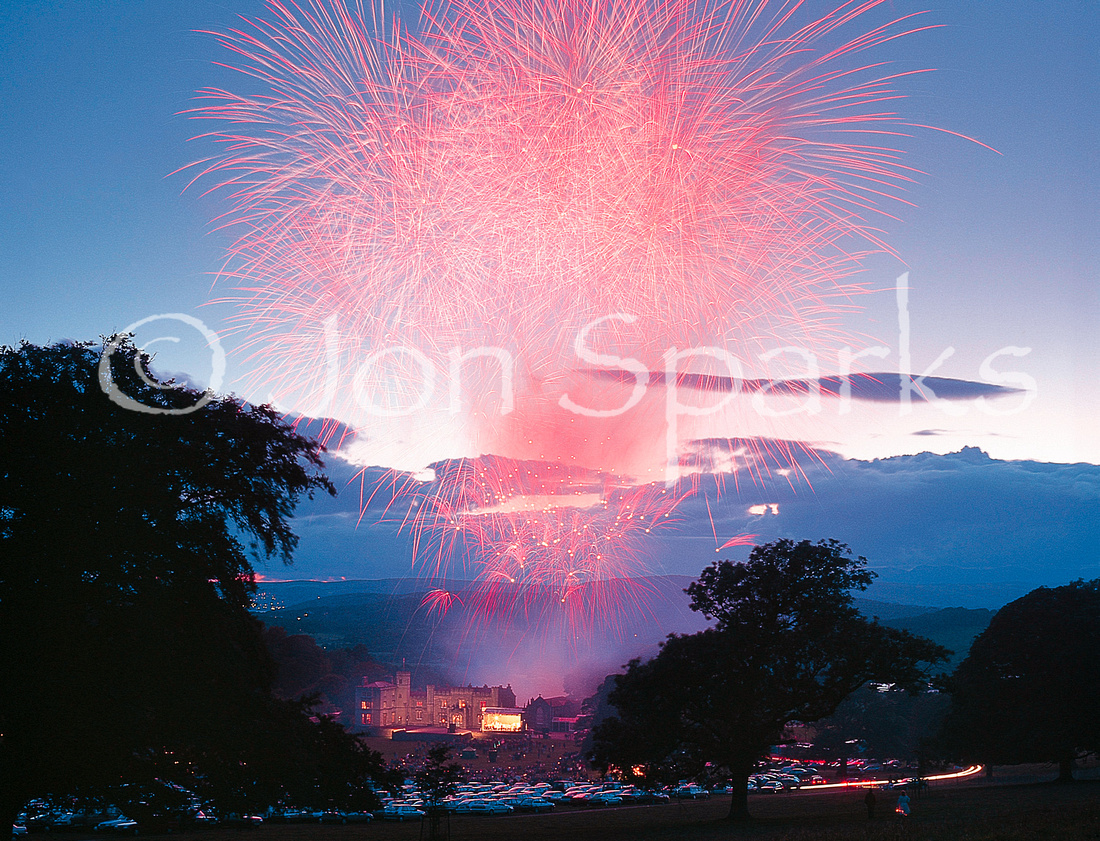 Leighton Hall, Lancashire, shot on film (Fuji Velvia). The light summer evening limited the length of exposure, even on slow film.
After that preamble, here’s my ten-step guide to successful fireworks photography:
1: Prepare
Scout the location in advance if possible. Work out where the fireworks are launching from. For photographic purposes, it’s usually worth being well back, often further away than the main public viewing areas. Try and find a spot with a clear field of view. Bear in mind that strong winds can push fireworks some distance off course so if there’s room for manoeuvre on the night so much the better.
2: Look at the wider scene
Photographs of a burst of fireworks against a black sky may be pretty but ultimately they usually have a fairly high ‘so-what’ factor, with no real sense of scale. Including other elements usually makes the images more real and much more impressive. These can be buildings (especially illuminated ones), or the crowd of spectators, perhaps lit by a bonfire.
3: Use a tripod
There is no way you can shoot fireworks hand-held. Don’t even bother trying. Use a tripod and make sure it’s a good solid one. Be sure, too, that once set up all the movements are firmly locked. Use a cable release or wireless remote, preferably one with a lock, which saves you having to keep your finger on the shutter button throughout long exposures.
4: Lens choice
A big fireworks display can reach heights of 300 – 500 metres; use this to give yourself an indication of what lens to use. Once the display starts there won't be much time to change lenses. A good plan is to use a zoom lens whose widest angle covers the maximum expected extent of the display; if it turns out smaller than expected you can zoom in a bit. But also bear in mind that the biggest/highest bursts may be saved for the end, so leave some margin for error. Better to crop the images later than have half the burst disappearing out of the frame.
5: Turn off flash
Make sure built-in flash is not going to pop up unexpectedly; with some cameras you may need to disable it manually, though usually this does not arise when shooting in Manual. Flash isn’t going to have the slightest effect on the fireworks – it can only ever illuminate things at close range – so all it’s doing is running down your battery and spoiling your night vision.
The only exception to the ‘no flash’ rule is if you want to be really clever and get an image of foreground objects or people with the fireworks in the background, but if it’s your first time shooting fireworks, I’d leave this till later.
6: Set the ISO
In the days of film I had fantastic results shooting on Fuji Velvia (ISO 50). On digital, ISO 100 is a good choice for larger displays. You might try 200 for smaller shows. Turn off any automatic ISO control.
7: Camera preparation
As I’ve already mentioned, turn off Long Exposure Noise Reduction.
I would also strongly recommend setting Image Quality to RAW. This gives you the opportunity to apply the right amount of noise reduction later as well as tweaking the exposure and colour balance if necessary.
8: Shooting settings
Set exposure mode to Manual. Onboard metering is highly unlikely to respond accurately to fireworks.
Some cameras have a ‘Fireworks’ mode. Don’t use it. I’ve tried it with a Nikon Coolpix P7700, for example. On this camera, it sets a fixed exposure time of 4 secs, which is just not long enough. Here’s an example of the results, though I’m almost embarrassed to show it.
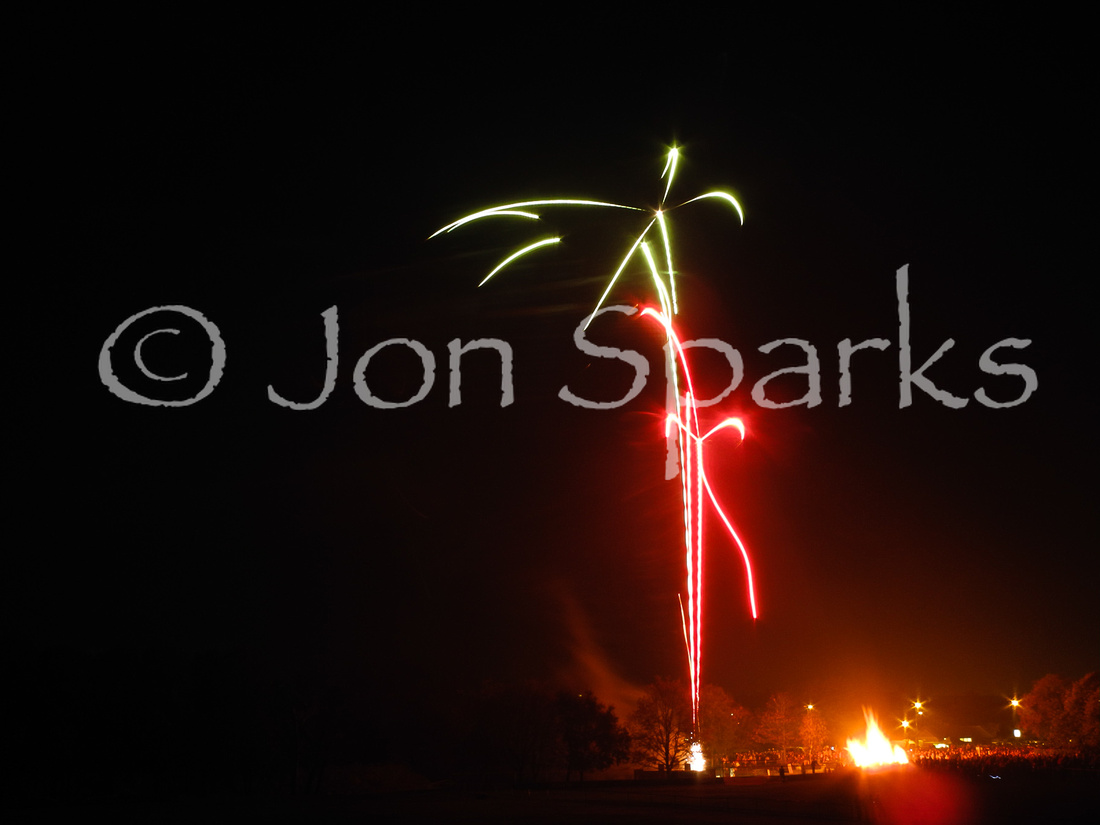 Stick with Manual and set shutter speed to B. Some cameras will allow you to manually set 30 secs or occasionally even longer, but I prefer the flexibility of B as I can decide exactly when to close the shutter – basically, between bursts rather than in the middle of one.
It’s harder to give a simple recommendation for aperture. Try f/11 to start with and do a quick review after the first shot. I would also do a few test shots before the display even starts, to give you an idea of the time and aperture which give a good result for the surroundings. Obviously, unlit areas will just go black, so here we are looking at illuminated buildings, the crowd around the bonfire, and so on.
Here's an alternative image from the same display as the one above, but this time the exposure was a useful 34 secs (f/11, ISO 100) rather than a measly 4 secs.
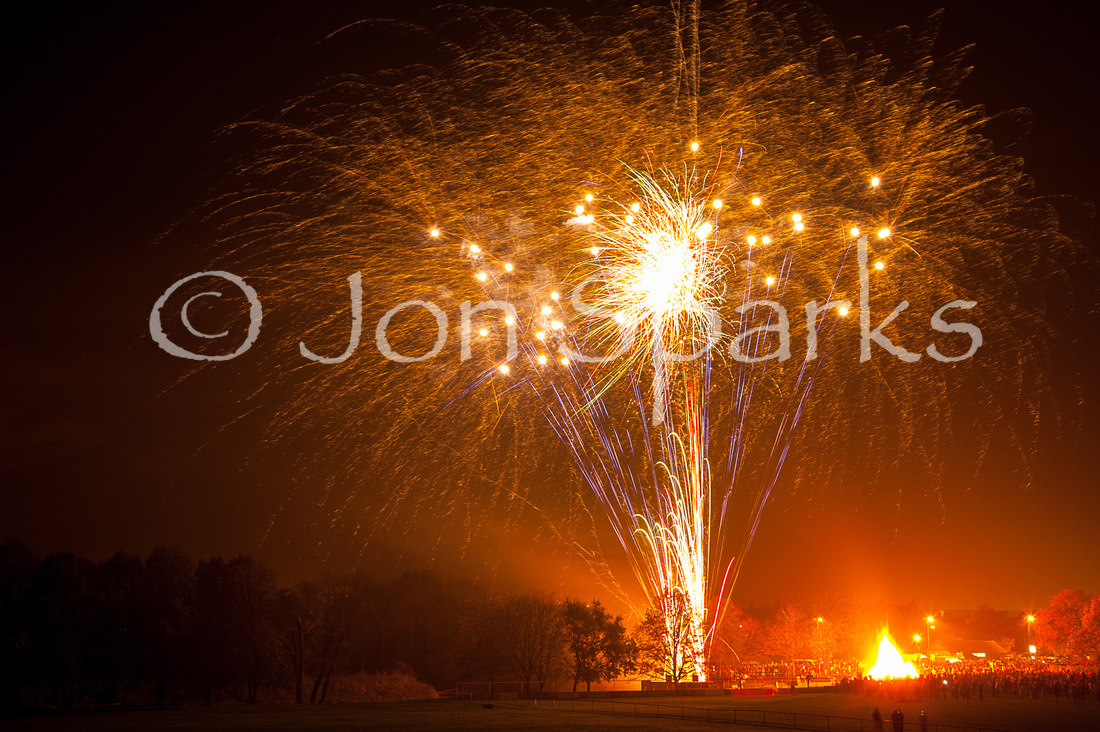
9: Shooting procedure
As the display starts, open the shutter and keep it open until several good bursts of fireworks have happened. As a rough guide, an exposure time of 30–60 secs often works well, but don’t worry about variations – anything between 15–90 secs can work well. A lot depends on the scale of the display and your first exposure will give you a good idea. If the bursts are clear but the colours look washed out, quickly reduce the aperture, e.g. from f/8 – f/11. If the image looks too busy, i.e. there are too many bursts overlapping each other, use a shorter exposure next time.
If possible, avoid closing the shutter in the middle of a burst; it’s much better to end the exposure in a pause. If there’s a pause but you don’t think there’s been enough action, keep the shutter open. If there’s a lot of other light (streetlights etc) around, you might want to cover the lens during these pauses. Hold a black card just in front of the lens without actually touching it; whip it away as soon as the fireworks resume and you can continue to record them on the same frame.
Remember that fireworks displays often start small and build to a climax, so if your first couple of frames have a lot of black sky, don’t be too hasty about zooming in for later shots. The bursts will probably get bigger and brighter. You may also find it a good idea to use shorter exposure times for these later stages.
10: Don’t be greedy
The average fireworks display lasts around 10–15 minutes. If you get 20 decent exposures, you’re doing well. If you get a dozen good shots, even better. Just one really stunning image makes the effort worthwhile.
As a result, I thought it would be interesting, and I hope helpful, to try and pull together a list of cameras which do have viewfinders. This obviously excludes DSLRs, and I’m also excluding ‘medium format’ and ‘large format’ kit, which is expensive and highly specialised.
This leaves me with a list of just 31 cameras, and that’s stretching it a bit; it includes both the Nikon 1 V1, which is probably discontinued (see end of page) and the Panasonic Lumix DMC-LF1, which hasn’t really arrived yet. However, the Nikon is a camera that I use and like, and the Panasonic is one I’ll be very interested in seeing and evaluating as soon as possible.
The cameras are split into four main categories; I’ll discuss each one as I get to it. Before that, however, l’ll just outline the different types of viewfinder.
Optical: Sometimes called a ‘tunnel’ finder, this is essentially a simple window or porthole which shows you approximately the scene the lens will see. They have two big advantages – they’re easy to use in bright sunlight and they don’t drain the battery – and one big drawback: when I used the word ‘approximately’, I wasn’t kidding. Here’s what I wrote in my Expanded Guide to the (now discontinued) Nikon Coolpix P7100:
Unfortunately, it only gives a rough approximation of the final image framing: viewfinder coverage is only about 80%. That’s measured horizontally and vertically, so the viewfinder only shows about 64% of the total picture area. And it isn’t even necessarily the central 64%; shooting a distant scene at 200mm, for example, there’s cut-off at the sides and a lot at the top, but none at the bottom.
Electronic: Like the LCD screen which – all too often – is all that users have, an electronic viewfinder (EVF) shows you the image as seen by the camera’s sensor. This suggests that ‘what you see is what you get’ and most EVFs do indeed show you 100% of the image area (but it’s always worth checking before a purchase). They may also give you a better preview in relation to depth of field, and perhaps other image qualities, than an optical finder and even an SLR. They’re also much more usable in bright sunlight than LCD screens, but they do draw power from the battery.
Hybrid: Unique to Fuji, the hybrid finder lets you switch from an optical to an electronic finder image. It’s well-implemented, too, arguably giving the best of both worlds – but they’re among the most expensive cameras here, apart from the Leicas.
Rangefinder: Always strongly associated with Leica and in this list unique to that brand, rangefinder focusing works by aligning two images of the subject. It takes a little practice but is extremely accurate. The image area is indicated by a bright-line frame within the finder. In other respects it’s an optical finder. It doesn’t drain the battery and is extremely usable in bright sunlight. And the Leica rangefinders are, far and away, the most expensive cameras in this review.
Accessory finders. It’s worth mentioning that you can attach an accessory viewfinder to many cameras not listed here. Some, like the Sigma Merrill DP-1 and DP-2 which I reviewed recently, have optical accessory finders while others, like the Olympus Pen range, are fully-coupled electronic finders. These are welcome but they do add bulk, cost and a bit of faff, none of which are ideal when you’re looking for a simple camera that will slip into your pocket. I’d need a very compelling reason to opt for a camera+accessory finder over one that has a viewfinder built in.
Note on prices: these are based on ‘street’ prices and are as current and accurate as I can make them. For cameras with interchangeable lenses, to aid comparison, the price includes a standard zoom lens. Prices on the Leicas are somewhat more notional but then Leica is one of those brands where ‘if you have to ask the price, you can’t afford it’.
Compact cameras
This is a familiar category that hardly needs description. What's striking (I think the word I really want is ‘appalling’) is that out of – literally – hundreds of compact cameras available, I could only find six boasting a viewfinder. It’s reported that the compact category is showing a sharp decline in market share. I’m not saying the lack of viewfinders is a major cause, but having one would be one way to differentiate a compact from a smartphone.
If you’re just looking for a simple, inexpensive compact with a viewfinder, then Canon’s Powershot A1400 seems to be the only option. The other five are all aimed at relatively advanced users. Canon’s G15 has a solid pedigree while the G1X has by far the largest sensor in this group, but having handled it briefly I wasn’t blown away by the build quality and it only has an optical finder. To me, it’s the two EVF cameras that are most interesting. I’d probably go for the Fuji if only because it has a slightly larger sensor, but the Panasonic is very new and I will be interested to see how it fares in reviews.
|
Camera |
Viewfinder |
Sensor size |
Price |
|
Canon PowerShot A1400 |
Optical |
1/2.3" (6.17 x 4.55 mm) |
£89 |
|
Canon PowerShot G1 X |
Optical |
1.5″ (18.7 x 14 mm) |
£469 |
|
Canon PowerShot G15 |
Optical |
1/1.7" (7.44 x 5.58 mm) |
£399 |
|
Fujifilm X20 |
Optical |
2/3" (8.8 x 6.6 mm) |
£469 |
|
Panasonic Lumix DMC-LF1 |
Electronic |
1/1.7" (7.44 x 5.58 mm) |
£379 |
Bridge cameras
I’ve tended to be rather dismissive of this category – also known as ‘long zoom’ or ‘superzoom’ cameras – but they are numerically the largest group here. I still think the massive zoom range is a marketing tool rather than a feature that’s of great value to most users. 1200mm-plus lenses are impossible to handhold, even with excellent image stabilisation. If you're, say, a birder, you may value the zoom reach, but you'll need a tripod.
These are not pocketable cameras either; some of them approach or exceed SLRs in bulk. The Fujifilm XS-1, for example, weighs 920 grams: a NIkon D3200 with 18–55mm lens is 150 grams lighter and has a sensor over six times larger by area. Most Compact System cameras are even smaller and lighter, but knock spots off bridge cameras in terms of sensor size and system flexibility. Some bridge cameras are very cheap, but possibly at the expense of build quality.
|
Camera |
Viewfinder |
Sensor size |
Price |
|
Canon PowerShot SX50 HS |
Electronic |
1/2.3" (6.17 x 4.55 mm) |
£359 |
|
Fujifilm FinePix HS50 EXR |
Electronic |
1/2" (6.4 x 4.8 mm) |
£399 |
|
Fujifilm FinePix SL1000 |
Electronic |
1/2.3" (6.17 x 4.55 mm) |
£284 |
|
Fujifilm FinePix S8500 |
Electronic |
1/2.3" (6.17 x 4.55 mm) |
£249 |
|
Fujifilm X-S1 |
Electronic |
2/3" (8.8 x 6.6 mm) |
£419 |
|
Leica V-Lux 4 |
Electronic |
1/2.33" (6.08 x 4.56 mm) |
£690 |
|
Nikon Coolpix P520 |
Electronic |
1/2.3" (6.17 x 4.55 mm) |
£319 |
|
Panasonic Lumix DMC-FZ60/FZ62 |
Electronic |
1/2.33" (6.08 x 4.56 mm) |
£250 |
|
Panasonic Lumix DMC-FZ200 |
Electronic |
1/2.3" (6.17 x 4.55 mm) |
£400 |
|
Pentax X-5 |
Electronic |
1/2.33" (6.08 x 4.56 mm) |
£184 |
|
Sony Cyber-shot DSC-HX300 |
Electronic |
1/2.3" (6.17 x 4.55 mm) |
£379 |
Compact System cameras
Alternative names include ‘mirrorless’ and ‘EVIL’ (electronic viewfinder interchangeable lens); shame that one didn’t stick, as it’s a snappy definition as well as yielding a great acronym. Some look much like compacts with a larger lens, others more like mini-SLRs, but all have the advantages of large sensors: APS-C is the same size as used in the majority of SLRs. The larger sensors don’t necessarily translate into massively larger bodies, but they do mean that lenses have to be larger.
Unsurprisingly, this is the category that has seen the strongest growth in recent years. All the cameras here have a lot to recommend them; the Nikon 1 series score by being the smallest, the Olympus OM-D as the most professionally specified.
|
Camera |
Viewfinder |
Sensor size |
Price |
|
Nikon 1 V1 |
Electronic |
1″ (13.2 x 8.8 mm) |
£299 |
|
Nikon 1 V2 |
Electronic |
1″ (13.2 x 8.8 mm) |
£678 |
|
Olympus OM-D E-M5 |
Electronic |
Four Thirds (17.3 x 13 mm) |
£949 |
|
Panasonic Lumix DMC-G5 |
Electronic |
Four Thirds (17.3 x 13 mm) |
£449 |
|
Panasonic Lumix DMC-G6 |
Electronic |
Four Thirds (17.3 x 13 mm) |
£629 |
|
Panasonic Lumix DMC-GH3 |
Electronic |
Four Thirds (17.3 x 13 mm) |
£1199 |
|
Samsung NX20 |
Electronic |
APS-C (23.6 x 15.6 mm) |
£499 |
|
Sony Alpha NEX-6 |
Electronic |
APS-C (23.6 x 15.6 mm) |
£649 |
|
Sony Alpha NEX-7 |
Electronic |
APS-C (23.6 x 15.6 mm) |
£849 |
Rangefinder-style cameras
I suppose I could have listed the Fujifilm X100S, with its fixed prime lens, as a compact, and the X-E1 and X-Pro1 as Compact System cameras; it’s a moot point. These cameras do seem to stand apart by virtue of their traditional styling and – to a greater or lesser extent – the way they embody a traditional approach to photography. The Fujis are beautifully made and to me are some of the most appealing cameras on the market. I can’t afford to even think about the Leicas.
|
Camera |
Viewfinder |
Sensor size |
Price |
|
Fujifilm X-E1 |
Electronic |
APS-C (23.6 x 15.6 mm) |
£899 |
|
Fujifilm X-Pro1 |
Hybrid |
APS-C (23.6 x 15.6 mm) |
£1300 |
|
Fujifilm X100S |
Hybrid |
APS-C (23.6 x 15.6 mm) |
£999 |
|
Leica M Typ 240 |
Rangefinder |
Full frame (36 x 24 mm) |
£7000 |
|
Leica M-E Typ 220 |
Rangefinder |
Full frame (36 x 24 mm) |
£6000 |
|
Leica M9-P |
Rangefinder |
Full frame (36 x 24 mm) |
£6500 |
Note: Nikon 1 V1
I’m unclear about the status of this camera as it has disappeared from many dealers’ listings but is still shown on Nikon’s own website. I’ve noticed discontinued kit hanging around on the Nikon site before, but as it has just had a major revamp you would expect it to be up to date.
Whatever the official story, this camera is still available to buy new from some dealers and is now at a knockdown price – it should be possible to get one for under £300. This makes it not just the cheapest Compact System camera in this review, but the cheapest camera of any type other than the very much more basic Canon PowerShot A1400. Looks like a real bargain to me.
]]>
Before my final thoughts, just a codicil to my comment in the previous post about chromatic aberration. Here’s a slice of the image I referred to, at 100%:
The colour fringing on those twigs should be really obvious, and it’s possibly the worst I’ve seen in any image I’ve ever run through Lightroom… but is it in fact chromatic aberration (i.e. a lens issue) or could it be a result of the unique design of the Foveon sensor?
Fringe issues
I haven’t discussed this in detail, and don’t intend to now: Sigma’s own site gives plenty of info on this. But in a nutshell, ‘normal’ sensors use a matrix of receptors sensitive to red, green or blue light, all in the same plane. The Foveon sensor, on the other hand, has a three-layer structure which is more akin to traditional film.
Chromatic aberration means that the lens is failing to focus light of different colours at exactly the same distance, and can therefore lead to coloured fringes. But Sigma is one of the world’s best lens makers, and I really wouldn’t expect CA to anything like this degree, especially as the lens is a prime (28-mm equivalent) and not a zoom. But because the sensor has three layers, light striking this at an angle might not be recorded in exactly the same place.
If this is the explanation, then I think it should be easily corrected in post-processing, or even in-camera in the case of JPEG images. Sigma’s PhotoPro software does do this, but the setting is easily overlooked and I’m a little surprised it isn’t enabled automatically.
Overall verdict
Actually, software issues are – as I’ve already suggested – one of the reasons why this camera is not the answer to my hunt for a pocketable camera that still delivers great quality.
Yes, the DP-1 can deliver excellent image quality, though Sigma’s claims that it is equivalent to 46 megapixels, or that it is superior to ‘normal’ sensors as found in most DSLRs don’t stack up for me. Sharpness and recording of fine detail are excellent – competitive with DSLRs of the same sensor size if not superior – but to me dynamic range performance is equally important, if not more so, and here the Foveon sensor does not measure up to my Nikon D600, or the D7100 I’ve been using. Quality also falls off more sharply at higher ISOs than it does with the SLRs.
Still, used carefully, excellent results are possible, but I don’t have the patience. Waiting 15 seconds before I can check the histogram for an image is a pain, and running every image through Sigma’s clunky software before I can open it in Lightroom is even more so.
Another real black mark against the camera is the lack of an eye-level viewfinder. Obviously you can’t have a reflex finder in a camera as compact as this, but a decent electronic viewfinder is perfectly possible. I don’t think it would need to make the camera significantly bigger or heavier either; other makers have managed to produce cameras with an APS-size sensor and an EVF in a smaller body.
One final problem is the truly woeful battery life. Even turning the screen display off between whiles does not help much.
So, sorry Sigma – and many thanks for the loan – but if you would like me to buy a camera like this, or recommend it to anyone else, you need to fix at least three of these four issues:
(lack of) viewfinder;
operational speed;
battery life;
(lack of) direct Lightroom support
Get somewhere with those and I could be really interested in trying a Mk2 version.
]]>I still find using the camera very frustrating – using the screen to frame images is less of a pain on a tripod, but it's still impossible to see the screen well enough in bright sunshine. And contrary to rumour, we've had lots of sunshine of late. (I did 30 days of biking in April, and only had two wet rides). I also grind my teeth waiting.. and waiting... for a playback image, and specifically a histogram, so I can get proper feedback on exposure. After all, if I'm to give this camera a fair trial, I want to be absolutely sure I'm commenting on correctly exposed images.
Anyway, here are a few shots from that morning's endeavours, with my thoughts on each. I'm looking hard at the image quality here, because that is the camera's big selling point.
Leaves
 Can’t fault the sharpness and micro-contrast on the leaves here; mostly this is pretty much the result I was aiming for. It bugs me, though, that the leaves nearest the camera aren’t sharp. I might blame the lack of any functional depth of field preview, but to be fair I should have reviewed the image more thoroughly.
Ferns (1)
 Much the same applies here, but there was always going to be a difficult balancing act to manage with a shot like this: on the one hand, it would be nice to have every one of these emerging fronds sharp; on the other, I didn’t want too much sharpness on the background as it would be distracting. I think this would have been hard to nail no matter what the camera.
Fallen tree
 There’s a problem with dynamic range here, with some highlights on the shiny bark clipping quite severely. I’d like to see a side-by-side comparison with one of my Nikons, but I’d deliberately set out to shoot everything solely on the Sigma, so I didn’t have that option. I have no real doubt, however, that the D600, in particular, would have lapped this up and asked for more.
On the other hand, to be fair, this would have been a nightmare shot on slide film, especially dear old Velvia.
Even more troubling, in the very bright vertical twigs on the left side of the upright trunk, there is some very noticeable chromatic aberration; you can clearly see a magenta stripe down the left side of some of the twigs and on closer inspection some show green banding on the right side too.
The Sigma software does have lens profile correction, which I hadn’t applied to this conversion – but I’m more than a little surprised it’s so necessary with a fixed focal length lens. At default setting it does appear to remove most of the aberration.
Still, this is both surprising and disappointing, because Sigma are one of the world's best lens makers. I have several Sigma lenses for my Nikons, mostly zooms, and have never seen such bad chromatic aberration from any of them.
Train
 The obvious problem with this shot is that the colours aren’t true. Most obviously, there is an inconsistency in the rendering of the red on the nose and roof of the train, which appears distinctly magenta in places. Because the colour is patchy, there’s no way to tackle it by applying global colour correction to the image. I’ve no doubt that the issue is caused by clipping in the red colour channel, in particular. Looking at the histograms for individual channels does not make for pretty reading.
Ferns (2)
 This shot seems to encapsulate both the best and the worst of the DP1. On the plus side, the sharpness and detail in the ferns is excellent, though I’m not convinced it’s significantly better than DSLR quality. On the downside, the colour rendition isn’t accurate, though I’ve no doubt I could get it there or thereabouts if I could only open these RAW files directly into Lightroom or Photoshop instead of struggling with Sigma Photo Pro (as I sue this software more, I like it less). There’s also some very obvious highlight clipping on the fern fronds and, again, I’m convinced my Nikons could do better. Clearly a direct head-to head comparison is called for, and that will be the next job.
I had a Nikon D7100 on hand (already on loan for Expanded Guide duty) and a Nikon 1 V1 (we own this), and I didn’t approach Canon because they get more than enough publicity already… With that in mind, telling you who did take the trouble to respond and supply me with something might also give you a good clue as to who didn’t.
Anyway, the two companies which did let me have a camera to play with were Sigma and Pentax, so many thanks to both of them. By a happy-ish chance, considering that the cameras they sent could both be (loosely) described as ‘compacts’, they could scarcely have been more different. They are the Sigma DP-1 Merrill and the Pentax WG-3 GPS.
I don’t intend this to be a detailed review. I haven’t tested the cameras to that extent and there are plenty of places where you can find detailed reviews: dpreview is always the first one I turn to. Instead, here are a few general impressions of the two cameras from my personal point of view.
Common Ground
One thing that they have in common is that there’s no viewfinder. I’ve commented before on my low tolerance for cameras that force you to use the screen at all times, and neither of these cameras has done anything to change my view. In fact, they’ve reinforced it. Here’s a shot taken with the Pentax during an evening cycle ride.
 As you can see the light was great – strong evening sunlight. Using an SLR, this would have been an unalloyed Good Thing. Using a compact, all I could see on the screen was the reflection of my own face. Even shading it as best I could, framing this shot was about 90% guesswork. It actually doesn’t look too bad, but at the time I had very little idea how much of that wall in the foreground was actually going to appear in the image.
Of course in poorer light it’s much easier to see the screen, but that’s just not good enough. What use is a camera that you can’t use effectively when the light is good?
I plan to try the Sigma a bit more seriously one day soon; when I say seriously, I mean using a tripod. As we’ll see, this is a camera whose natural home is on top of a tripod, and I have generally found that the drawbacks of screen viewing are at least partly neutralised when you use a tripod. This was very much my experience with the Nikon Coolpix P7700. Its tilt-and-swivel screen was mostly a pain in handheld use but much less so on the tripod; sometimes, especially with low shooting positions, it was a real boon. The Sigma does not have a movable screen, so we'll see how we go.
Pentax WG-3 GPS
 This is Pentax’s latest ‘outdoor’ model, which is obviously why they suggested it for a cycling feature. Its almost military styling – which I guess you either love or hate – makes a bold statement that this is a tough camera. Personally, I quite like it; I certainly don’t see any need for all cameras to be dull grey boxes. It’s shockproof and waterproof, and it’s also designed to be easily operated when wearing gloves: it fits the hand well, has a grippy surface and the textured control buttons are a decent size. These are all great features, and the fact that it slips easily into the back pocket of a cycling jersey is great too.
As the name suggests, the camera has built-in GPS. It works. I’ve no more to say about it because it’s of little interest to me and I’ve turned it off; it’s a nice feature but there’s quite a penalty in terms of battery life. There’s a cheaper version of the camera without GPS.
In use I’ve found the buttons easy to use, as advertised, and the layout of controls and menus generally logical. At first I did find that the placement of the On-Off button next to the shutter-release meant I kept turning the camera off when trying to take a shot. As you might guess, this was ever so slightly annoying. However, I adjusted very quickly, so it’s more a matter of acclimatisation than fundamentally bad design.
In use it seems very responsive; it powers up quickly and there’s not much shutter lag. I haven’t yet tested focus on fast-moving subjects, and continuous shooting abilities are distinctly modest, especially at higher image quality settings – but this is par for the course for compact cameras. Shooting rapid bursts demands a lot of processing power.
As with any camera, the crux of the matter is image quality. Just by reading the spec sheets, I could tell this is not a camera I could use routinely as it doesn’t shoot RAW. With JPEG images, settings like white balance, saturation and contrast are baked in to a much higher degree, and so is sharpening.
The shot I’ve used above is an interesting example. This was taken in Landscape mode at the base ISO setting (125), so image quality should be as good as it gets. What’s interesting, looking at the image in detail, is that there’s clearly some noise and that noise reduction has been applied. Noise reduction has a softening effect, so images are then sharpened; the collision between these two processes produces images in which fine details are somewhat lost and everything tends to have a ‘plastic’ look. Here’s a screen grab from the same image at 100%, followed for comparison purposes by a similar grab from an image from the Nikon Coolpix P7700.
The noise is undoubtedly related to the unfortunate cramming of too many pixels into a tiny space (16 megapixels on a 1/2.3 inch CMOS sensor). The Coolpix comparison is a little unfair because this has fewer megapixels and a a larger sensor (12.2 megapixels on a 1/1.7-in. type CMOS) but then I would strongly maintain that that’s how it should be. In fact I think the Coolpix would also be better with fewer pixels. It’s also unfair because the Coolpix shot originated as a RAW image so I’m able to seek the best balance of noise reduction and sharpening for each image. But I’ve no doubt that the Coolpix images are intrinsically much less noisy in the first place.
It’s immediately clear to me that – even at base ISO – I would never make large prints from this camera and it wouldn’t stand up to well to repro in magazines either. You might say that this is irrelevant to most users, who will either look at images on a screen (remember that an HD TV is equivalent to 2 megapixels) or as fairly small prints. This is true, but what many users do want is the ability to crop their images, either when shooting (so-called ‘digital zoom’) or later.
I don’t want to make this too much of an attack on the Pentax. It’s much more about the limitations of compact cameras generally. I even accept that the combination of noise reduction and sharpening is designed to make images look good at smaller sizes, and by and large they do. It’s just that it all begs the question – what is the point of 16 megapixels?
In many ways I like this camera. It’s tough, it’s neat, it’s responsive and (with a little acclimatisation) the controls and interface are easy to get on with. I couldn’t use it long-term without a viewfinder or a screen-shade, but then that’s a failing it shares with most other small cameras out there. I can’t help feeling that I’d like the images a lot more if it had far fewer pixels – 5 or 6 mp at most. It would almost certainly be able to shoot faster as well.
Sigma DP-1 Merrill
 As I’ve already hinted, this is a very different beast. For starters, it has a much larger sensor. In fact, the DP-1 has an APS-C sensor, the same size as the majority of DSLRs. This gives it more than 13 times the light-collecting area of a camera like the Pentax. The number of pixels is harder to express because Sigma’s unique sensors (called Foveon) use different technology from the Bayer-pattern sensors you’ll find in almost every other camera. Because the sensor has three layers they claim that it has 46 megapixels, but the actual images that you end up with are 4800 x 3200, or 15.36 megapixels.
However, it’s not entirely hype. The sensor design is said to produce exceptional colour fidelity, colour depth, and crisp but natural rendering of fine detail. My early trial shooting suggests that this is not an idle boast. Take a look at this image, for example:
 And here’s a section at 100%:
 I’m not convinced that image quality here is actually better than my DSLRs. For sharpness and colour it probably compares well, but dynamic range is not as good, and that’s a big factor in landscape photography. On the other hand, it is streets ahead of the Pentax in every IQ measure, and better overall than my once-prized Nikon D2x: all this is in a camera that will (just about) fit in a pocket. On the weight and bulk angle, it’s certainly one I’d consider carrying on casual bike rides.
However… There are some very real issues with this camera. I’ve already rambled on about the restriction to screen viewing. I’ve seen reviews suggesting an accessory viewfinder is available but at the moment it’s not listed on Sigma’s UK website. I used to use an accessory optical finder regularly when shooting with the wide-angle lens on my Mamiya 7 – a rangefinder camera which delivered 6 x 7 cm images on 120 rollfilm. In fact I had to use the accessory finder for framing and the one in the camera body for focusing. This might seem like a digression, but actually it provides an interesting perspective on some of the ‘weaknesses’ of the Sigma. For certain types of photography, things that slow you down aren’t necessarily bad. If they encourage a more considered, contemplative approach, then they can be a very good thing.
Which is just as well, because the Sigma is a very slow camera. For action sequences, forget it. In fact, I’d forget about shooting any kind of action with it other than the one-off pre-focused shot and the occasional panning shot. That’s OK, that’s not what this camera is for.
What it’s for is thoughtful, careful photography, where you take time and trouble and make each image count. Which, by the way, you have to do for another reason, because the battery life is utter, utter pants.
I’ve seen 60 images – yep, 60, not 600 – quoted as the average you’ll get off one charge. On my first outing, because I was playing with the screens quite a lot to explore the settings, I didn't even get that. On my DSLRs I expect to manage more than a thousand images per charge.
Of course, you can argue that most people shoot far too many photos. And if you’re trying to make every image count, shooting introspective landscapes or architectural studies, 60 might be plenty for a day. And, to be fair, you do get a second battery in the package. But what the hell are you supposed to do on a 3-week wilderness expedition or trek? Those solar chargers are going to be in constant use…
The camera is also extremely slow in writing images to the memory card. Of course, harking back to my days with the Mamiya, there was a time when we sometimes had to wait not minutes but weeks before we could see the results from a shoot. And some will say it was better that way, but we have all grown used to being able to see results right away, to look at the histogram and highlights display and check that the exposure is bang on. I don’t have to wait any appreciable time for the review image when I’m shooting with a DSLR and I’m not convinced that the Merrill needs to be as slow as it is. Landscape photography isn’t always slow; sometimes tricky, fleeting light leaves you very little time to get things right.
The Slow Photography Movement may also like the fact that you are currently limited to using Sigma Photo Pro software to process the RAW files. To me it’s just an exercise in frustration. In fact I haven’t used photo software that’s as clunky as this since I had a Fujifilm Finepix S3Pro, in the Dark Ages BL (Before Lightroom). Sigma’s software isn’t as bad as Fuji’s was, but I’ve got used to far better things. There’s a compromise workflow which involves using Photo Pro for a few key adjustments first and then exporting a JPEG or TIFF to Lightroom. Sorry, but it doesn’t work well enough and it’s too much hassle.
Another aspect that makes you think with this camera is the fixed 28mm-equivalent lens. That’s right, no zoom and no interchangeable lenses either. Want a different focal length? Then carry a second camera – like the DP2 Merrill, for instance, which has a 45mm-equivalent lens.
Again, this isn’t entirely a bad thing. Using a camera like this would certainly teach a lot of people to use their legs instead of twiddling a zoom – and bring it home that the results are different. It’s certainly an excellent exercise and I’d recommend it to everyone. And 28mm is a very useful focal length for landscapes. My problem with it is not so much the lack of longer focal lengths as that there are times when 28 is not wide enough. On my full-frame camera I use 24mm a lot, and I also have a 12-24mm lens. But it’s worth remembering that Cartier–Bresson – possibly the greatest photographer there has ever been – did the vast majority of his work with a 50mm lens, and used a modest wide-angle (I think 35mm) occasionally for landscapes.
There’s a strong argument that we have it too easy today and I think a day out with the Sigma, a tripod, and nothing else would be very good for me. But is it a camera I could use all the time? No way. Add a viewfinder, speed up the write speeds and do something about the battery life and give us Lightroom support and then – but only then – it might start to get interesting.
I’ve just completed my Expanded Guide to the Nikon Coolpix P7700; you’ll have to wait for that to be published to get a full rundown on the camera in use, but I thought I’d share a few thoughts right now – and I’ve got a few practical tips for P7700 users. If you’re looking for an exhaustive review and the possibility to make direct comparison with other high-end compact cameras, dpreview is the place; these are just a few key impressions.
However, I have had the opportunity to work intensively with this camera over a month or so, as I did with its immediate predecessor, the P7100, so I can directly compare both the experience of working with it and the images which have resulted.
There are two key differences between the P7100 and P7700. First, the megapixel count has risen from 10.1 to 12.2. I call this a key difference, but I’m struggling to see any benefit from it. In ways that really matter, like image noise and dynamic range, I can’t see any improvement at all in the images. In theory you might be able to make marginally bigger prints from the 12-megapixel images, but I do find that even at ISO ratings as low as 200 there’s enough image noise to obscure fine detail. So here’s my first tip for anyone wanting to make serious use of this camera:
Tip No. 1: For any critical work, especially landscapes and so on, shoot at ISO 80 or 100 whenever feasible.
Great quality – on a tripod! Woodacre Great Wood, Scorton, Lancashire
The second key difference is that the P7100 had a viewfinder and the P7700 doesn’t, so you’re entirely reliant on the rear screen (which is now a fold-out one) for framing your shots.
This period of intensive work with the P7700 is the longest I’ve spent with a camera that relies on screen viewing, and it hasn't changed my view one iota. If anything it has reinforced it. It’s not just that the screen is impossible to see properly in bright conditions. It also makes handling more awkward.
I need to qualify this a bit. In a lot of situations it doesn't make that much difference. With the camera on a tripod, and if the light’s not too bright, I find it perfectly feasible to use the screen and occasionally, especially when shooting low down, it’s even a bit easier. In fact, I found that to get decent results I needed to use the camera on a tripod more than I probably would with my DSLRs. In fact:
Tip No 2: This camera likes to live on a tripod as much as possible.
Of course, if you follow Tip No.1 and keep the ISO ratings low, Tip No. 2 becomes even more important.
So it’s a decent tripod camera. However, for hand-held shooting, and in particular when fast reactions are required, the screen is nowhere near as good as a decent viewfinder.
One case in point: last year, with the P7100, I photographed a cyclo-cross event, and found that the viewfinder worked well for panning shots. Unlike an SLR, the viewfinder didn’t have that momentary blackout as you released the shutter, which made it easier to follow through with the subject. This more than compensated for the fact that the viewfinder was a pretty poor effort in many ways; it only showed about 80% of the actual image – and that 80% is a linear measurement, which means it only showed about 64% of the image area. And, dependent on focal length and subject distance, you couldn’t even be sure that the 64% you were seeing was actually centred in relation to the image you’d get.
This year, with the P7700, I shot runners in a 10-mile road race. Bear in mind that they were actually travelling slower than the cyclists, so panning should have been easier, but it wasn’t.
In fact very few of my panning shots from that event were even usable. I got far better results when I switched to a head-on view and used a high shutter-speed to freeze the action. I already knew that the autofocus was not entirely to be relied on with fast-moving subjects, so I used manual focus and prefocused at a particular spot – a patch of sunlight on the road. Every single one of these shots was perfectly in focus. I have absolutely no doubt that if I’d relied on the AF, I’d not have achieved that, and I’d have missed a few shots because the AF was ‘hunting’.
Pre-focusing gave sharp images – but there's more highlight clipping and more depth of field than I'd have got on an SLR.
Just to confirm my problems with panning, I tried another exercise. Since one of my regular walking routes to some favourite locations goes right by, and then over, the M6 motorway, I tried some panning shots with cars in the outside lane. Anyone who knows me knows I’m not interested in cars, but this does make a good test as the speed will be fairly consistent; you can assume they were all travelling at 70 mph. It’s even possible that some were going a teensy bit faster – but no, surely people don't flout the limit, do they?
Anyway, with my D7000 SLR, I’m not saying every shot was perfect, but I did at least get the car pretty well centred in the frame every time. With the P7700, I couldn’t get it right at all. Not once. At least, not with the lens zoomed in far enough to give a reasonable size image of the car.
I’m sure I’d get better with practise, but I’m also sure that panning will never be as fluent and intuitive as with my SLRs.
Of course, the P7700 is not the camera I’d choose for any professional ‘action’ photography. When I worked to its strengths, the results were good, but there’s an inescapable problem in that, every few seconds, it locks up as it writes the latest image(s) to the memory card. If you shoot a burst of 6 JPEGs at the fastest shooting rate (an impressive 8fps), there’s then a delay of 3–4 secs. If you try and shoot RAW, the delay is a lot longer – probably around 25 secs. So:
Tip No. 3: Shoot JPEG for action sequences. Shoot RAW and you’ll miss more than you get.
I’m well aware that I’ve been pushing this camera hard – but it’s implicitly marketed as a pocket camera for people like me, not just another ‘point and shoot’. And of course there’s lots to like about it. It feels, as most Nikons do, really solid and robust. It has lots of external controls, so most settings that I want to change regularly are readily accessible – and I change settings a lot, especially when working on one of these books. It’s maybe not quite as good in this respect as my regular DSLRs (D700*, D7000 and now D600), all of which have the benefit of two command dials – but on balance I’d say it’s at least as user-friendly (for my kind of user) as single-dial SLRs like the D3200 and D5100 – and the D5200 will be my next task.
And, if I sounded critical about the image quality at the beginning, I need to qualify that too. It’s as good as any compact I’ve used, or whose images I’ve scrutinised. In fact it’s better than most , including the Olympus XZ-1 which we (briefly) owned. It doesn’t measure up to an SLR or other large-sensor cameras. No compact will.
And of course I like a camera that can fit in a pocket. I’m far more likely to take it along when I go for a casual bike ride than I am with my DSLRs. However, against this there’s the fact that I feel the need for a tripod more than I do with an SLR.
And finally, if you’ve read this far, and you are a P7700 user, here’s a morsel of useful info that you won’t find in the Nikon manual.
The Nikon manual tells you that closest focus is at the 28mm wide-angle end of the zoom range. They say it’s 2cm from the front of the lens; I’d say it’s maybe even a millimetre or two closer than that. However, at that sort of range it’s often hard to get enough light onto your subject (you certainly can’t use the built-in flash for this!), and if the subject contains straight lines it’s painfully obvious that the lens gives severe distortion (barrel distortion to be precise) at 28mm.
However, if you zoom out to 50mm, you get nearly the same magnification, far less distortion, and you’ve got more space in which to get some light on the subject. In fact, if you correct the distortion at 28mm (in-camera or in post-processing), this crops the image so that the end result is almost exactly the same magnification as at 50mm.
Tip no. 4: Use the 50mm zoom setting for better macro shots.
Macro quality – at 50mm focal length
And Tip no 4a: ‘zoom memory’ means if you hold the Fn1 button as you operate the zoom control you can zoom to 50mm precisely, every time. You can even deselect the 35mm zoom memory setting and make it a one-step operation, or you can use the Startup Zoom Position item in the Shooting menu so that the camera zooms to 50mm each time it turns on.
And suddenly this becomes quite a capable ‘macro’ camera. It’s not life-size reproduction, so pedants (like me) will maintain it’s not true macro. On the other hand, you can get nearer to that kind of magnification than with most regular zoom lenses for DSLRs. To do better usually demands a genuine macro lens.
One other limitation is that the zoom lens goes no wider than 28mm equivalent. Since I’d regard 24mm as a minimum for landscape, preferably 20mm, this is a problem. I have got round it by shooting three overlapping frames, panning horizontally with the camera in portrait format, and stitching them in Photoshop; I reckon the result is roughly equivalent to a 21mm lens. But it’s a slow process, it’s really problematic if there’s any movement in the frame, and above all you can’t actually ‘see’ the image at the time of shooting.
21mm equivalent view achieved by stitching three images
 The same scene at 28mm
Verdict
I’m not a camera reviewer. I don’t, thank goodness, have to give spurious star ratings. It’s not a question of whether this is a good or bad camera. I hardly ever see bad cameras. They may be out there but they don’t seem to pass through my hands. The real question is: who is this camera for? Will it suit you?
Put it this way. I like a lot of things about it – but when it goes back to the publisher, I won’t be buying one for myself.
One reason is the lack of a viewfinder. I’ve tried – I’ve had to, using this camera intensively for all kinds of images – and in bright conditions the screen just isn’t good enough. I’ve never seen a camera screen that is. And anyway, I like the directness of a viewfinder. It gives me the sense that the camera is connecting me to the subject, not coming between me and it.
The other most serious issue is image quality. The evidence of noise at any ISO above base, and the lack of dynamic range compared to my DSLRs, are major stumbling blocks. Of course, this will be true of any small-sensor camera and if I want a camera for the back pocket of my cycling jersey, I know I have to compromise. But there are compact-size cameras with APS-size sensors, so I know I can do better.
And, given that I’d like to use the camera when I’m riding my bike, I’ll probably want to sue it to shoot cycling/mountain bike action too. And, as I’ve noted, it’s not a camera for actions sequences. I could work around this when out with friends, by planning individual shots, but it would always be a workaround.
If you can live with all of these limitations, and bearing in mind that they would apply to almost any compact camera, perhaps even more forcibly, then the Coolpix P7700 is definitely worth a look.
No obvious quality problems here (Cleveleys, Lancashire)
* By the way, that D700 is about to go up for sale. Contact me now if you’re interested, or it’s hitting eBay tomorrow.
]]>In general, I’ve tended to steer clear of ‘Nikon vs Canon’ fanboy punch-ups. Like most other forms of brand-loyalty competitiveness, it usually tells you more about the fanboys themselves than about the true merits of their preferred brands.
By the way, am I being sexist? It does seem to me that the overwhelming majority of those who get off on this sort of thing, especially in relation to cameras, are guys. And I can say with certainty that… wait, let me roll back to the very beginning.
My first SLR, way back in the mists of time and long before digital was even dreamed of, was a Zenith, product of a Russian tractor factory. When I wanted to move up to something more sophisticated, I ended up with a Yashica. This in turn gave way to a Contax 139. Contax cameras were beautifully made and the Zeiss lenses were fantastic, but I can’t help thinking I also liked them because they were something of a niche brand and had a bit of snob value. And those lenses were expensive; I’m sure I could have afforded more of them if I’d plumped for a mainstream brand like Pentax, whose K-mount was shared with several brands back then.
And then in 1990 I went on an expedition to the Karakoram. I had big plans for this, even sometimes imagining I could write a book or something (naive, I know). I certainly intended to do a bang-up job photographing the trip. I mortgaged my parents and my dog to buy a second 139 body and off I went.
I learned a lot of things on this trip, including a few things about lenses that I won’t go into here. But it got a bit traumatic near the end when both cameras’ batteries started to run down. I had spares, of course, but I found the hard way that unless you had exactly the right size of coin (yes, coin) the battery compartments were really hard to get into. And spare change was a bit hard to come by on the Hispar glacier.
When I got home I decided that the sensible thing for a budding outdoor photographer to do was to go for a camera that didn’t need batteries at all. Looking around, I settled on the NIkon FM2. It needed a battery to make its meter operate but otherwise would keep right on shooting with no battery at all. Nikon also had a lot of prestige as they seemed to be the choice of the majority of the world’s pro photographers. Galen Rowell, whom I admired particularly, was a Nikon user.
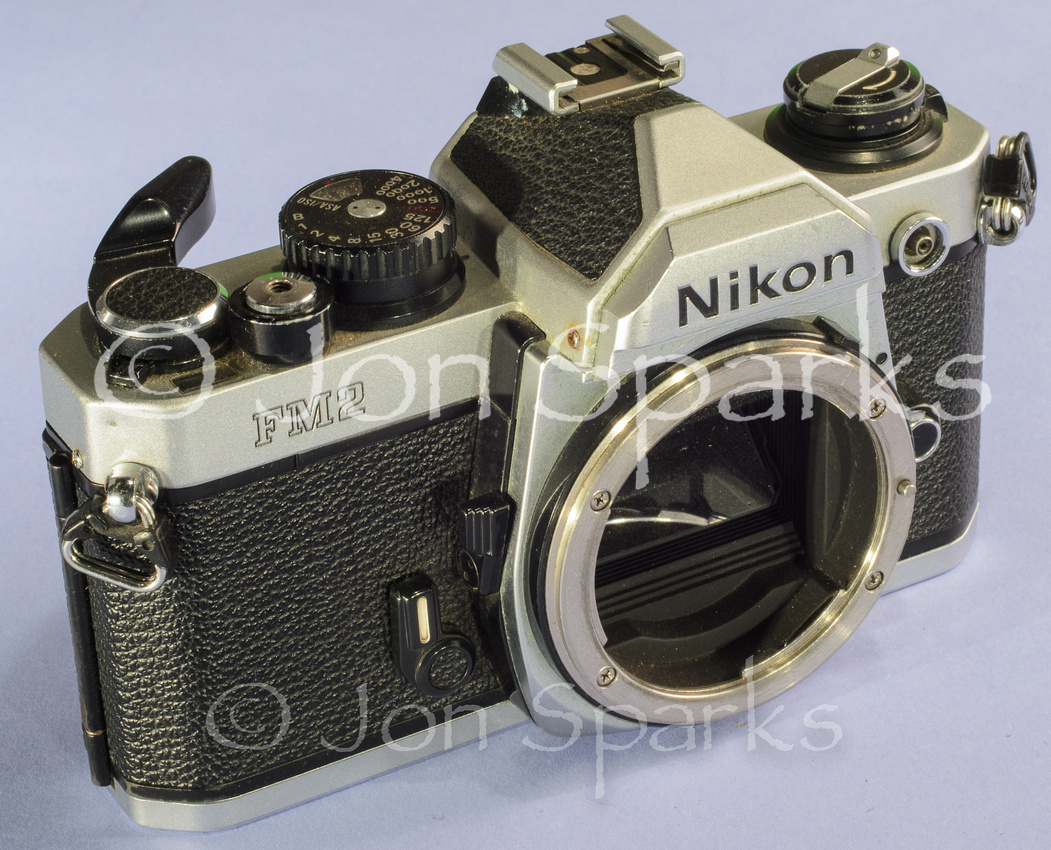
The trusty FM2
So I traded in my once-beloved Contaxes and lenses and started again as a Nikon user. Over the next decade and a bit I also used several medium-format cameras (ending up with a Mamiya 7), but for 35mm work, the FM2 just kept on trucking.
And this brings me back to the fanboys because, as my professional career began to take off, there was a phase when I did quite a lot of exhibitions and craft fairs, and at these events people would often march up to me and ask (‘demand’ was more like it in many cases) what camera I used. And, yes, to the best of my recollection every one of these was male – and many of them would be wearing a camera and a big lens around their neck like some sort of pumped-up Medallion Man.
These questions used to annoy me, partly because they seemed to assume that the camera you used was more important than any skill or effort you put in, and partly because, even at the techy level, they weren’t the right question anyway.
Remember, these were the days of film. A camera was a much simpler thing than it is now. And any camera, if its bits were all assembled and aligned correctly, and its shutter timing was accurate, would do the job. That Nikon FM2 was brilliant because it was both light and incredibly rugged, because it would shrug off all sorts of testing conditions and because it would go for a year on one little battery and then not much care if the battery died. But it didn’t actually take better pictures than a Canon or a Pentax. The things that really mattered for image quality were lenses and film (for a decade I shot almost exclusively on Fuji Velvia, which was great for landscapes but often a dumb choice for action photography). On the very rare occasions when someone asked me what film I used, instead of what camera, I felt like cheering.
Everything changes
And then the world changed. I bought my first digital camera, a Nikon D70, in 2004. I was already delivering a lot of work in digital form, which meant it all had to be scanned first. I could see that for many jobs it would be more convenient to shoot on digital, but I wasn’t immediately convinced that it would measure up for image quality. Somewhat to my surprise, I was soon won over.
The D70 was an obvious choice; it was one of the first digital SLRs worth having at an ‘enthusiast’ price, and so made a lot of sense when I was just dipping my toe into the water. The fact that I could use my existing Nikon-fit lenses made it far more affordable than buying a Canon or any other make.
It turned out well. I kept that camera for five years. I moved on: after a brief, unhappy flirtation with a Fuji S3 (nice images, but horribly slow, and abysmal software), I acquired a Nikon D2x as my main camera, until this in turn gave way to a D700, and the joys of a full-frame sensor. But I was still using the D70 regularly when I wanted to travel light; its last major outing was when I biked the West Highland Way with my nephew Tom in summer 2008.
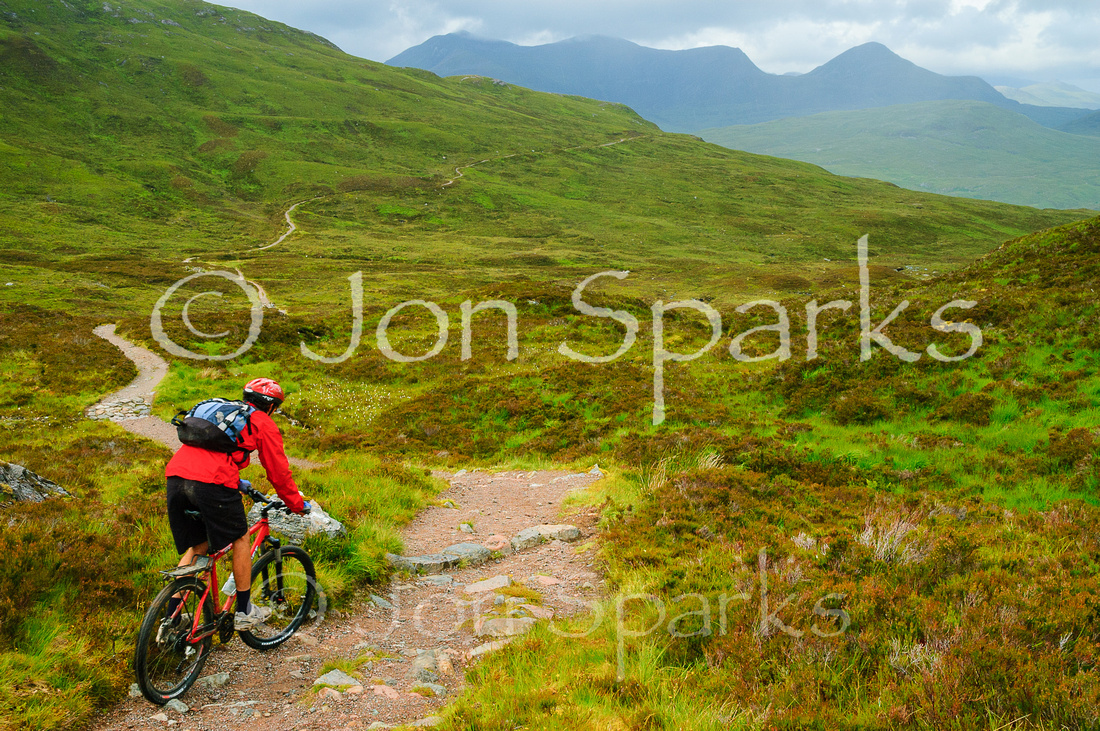
On the West Highland Way with a D70
By then I’d started writing the Expanded Guides to Nikon’s SLRs – the first was the D300, in 2007. This meant that I got to try every new Nikon as it came out, shooting a wider range of subjects than I ever had before. This, and other work writing about cameras, also obliged me to pay closer attention to the marketplace than I had before.
Backtracking slightly, I said earlier, “the things that really mattered for image quality were lenses and film”. Lenses are as important as ever, but the sensor in the camera has replaced film. Sensors are not all the same and therefore the choice of camera can make a real difference to image quality.
That’s not the only reason why the choice of camera matters more than it did with film. Digital cameras are far more complicated than their film predecessors, with far more functions and options, and therefore far more control dials, buttons and/or menu choices. Therefore, design and ergonomics make a massive difference to the user experience, particularly if you actually mess around with settings and don’t just leave the camera on Auto. Traditional things like build quality and weather-sealing are still important too.
One implication is that, in the digital era, you can have a conversation about whether ‘Nikon is better than Canon’ and it will actually mean far more than it did before – at least when it’s based on something more important than whose latest model has more megapixels.
Playing leapfrog
I think the best thing I can do here is quote a couple of paragraphs from my own Expanded Guide to the Nikon DSLR System, written in 2009 (published 2010):
As ever, Nikon’s primary rival was Canon. Canon’s EOS 1D was a match for the D2h with 4mp and 8fps, but in September 2002 the EOS 1Ds was released, mustering 11 million pixels on a full-frame sensor (developed in-house at Canon), 45-point autofocus system and superb build quality with excellent environmental sealing. Right then and there, Nikon lost its lead and, as the release date for the D2x indicates, it took two full years even to draw close to level, never mind regaining the advantage.
As the release of the D2x approached, many Nikon followers were hoping for a full-frame camera to match Canon, but they were to be disappointed. The D2x did have a theoretical resolution advantage, with 12 megapixels against 11 for the EOS 1Ds, but in practical terms that’s insignificant. The Canon’s larger sensor, and therefore larger pixel pitch, would be expected to deliver lower noise and higher dynamic range, and did. It also enabled DSLR users to get the most out of their wide-angle lenses for the first time. Perhaps Nikon was back in the game, but they weren’t back in the lead. And then, only days after the release of the D2x, Canon revealed the EOS 1Ds Mark II, with over 16 megapixels.
Don’t get me wrong, I was very happy with my D2x, and got many successful images with it. However, its smaller sensor was a bit of a handicap for someone who loves wide-angle landscapes. Also, while image quality was excellent at base ISO, noise levels increase dramatically as soon as you increase the ISO setting; I hesitated to set ISO 800 and rarely ever went above that. (We’re all a bit spoiled now; ISO 800 seemed ridiculously fast in film days, especially for shooting in colour).
However, if I’d been a brand-new buyer in, say, 2007–08, not constrained by being lumbered with a lot of Nikon lenses or a commitment to writing NIkon guides, then the best camera I could have bought would almost certainly have been an EOS 1Ds Mark II (assuming I could have afforded it!) At that point full-frame DSLRs were few and far between, so the choice was relatively simple.
But then Nikon came roaring back, with the launch of the D3. Quoting the System Guide again:
The D3 and D300 were crucial launches for Nikon, which had seen steady erosion of the leadership it had enjoyed with the D1. Its main rival, Canon, had gradually crept ahead across all sectors of the DSLR market. In the professional sector, hard-headed buyers were finding solid reasons to prefer Canon (…) While the pro sector might be relatively small in sales volume and contribution to overall company profits (though pros also change cameras often and buy more lenses and other accessories), it’s hugely important in terms of prestige and brand image. The fact that more pros were choosing Canon undoubtedly had an influence on SLR buyers lower down the price scale, especially in the hotly contested ‘enthusiast’ category. The significance of the D3–and to a lesser degree the D300 also–went far beyond its impact in terms of sales. It said to the world that Nikon were back.
Using the D3 was a revelation for me; image quality even at base ISO was a big step up from the D2x, and at higher ISOs it was a quantum leap ahead. The extra wide-angle reach of the full-frame sensor was fantastic too. I hated sending that camera back, and if I’d had the funds I’d have bought one like a shot. But I didn’t, and perhaps it was fortunate as it wasn’t long before I could get all those benefits in a lighter and more affordable form with the D700.

Great low-light performance from the D700 at ISO 6400
Since then, Nikon and Canon have played leapfrog with camera specifications, and there’s never been a time when one make has had a really clear advantage. Obviously the megapixel fetishists have rushed to embrace Nikon’s 36-megapixel D800. This is a brilliant camera but I can’t say it too often: most people don’t need 36mp, and unless you have really good lenses and excellent technique you won’t get the benefits anyway. It’s long past time we stopped treating pixel numbers as the be-all and end-all and started focusing more attention on a few other metrics, such as dynamic range.
Dynamic trio
And this is where things get rather interesting. DXO labs produces independent tests of camera sensors. The link goes directly to the dynamic range scores; for 99% of photographers this is actually far more important than the ability to resolve ridiculously fine detail. And just to summarise, here are the scores (in Ev), for the top 5 cameras.
Nikon D800: 14.4
Nikon D800E: 14.3
Nikon D600: 14.2
Pentax K-5: 14.1
Nikon D7000: 13.9.
My well-loved D700 looks well off the pace now at 12.2 Evs, but the dear old D2x is way down at 10.9. But I suppose that’s progress.
However, let’s just look at where Canon’s current models are on the same rating:
EOS 1DS Mk III and Mk IV: both 12 Evs
5D Mark II: 11.9
5D Mark III: 11.7 (hmmm, Mk III actually worse than Mk II?)
7D: 11.7
At the other end of the price range the differential is also clear, with the Nikon D3200 scoring 13.2 Evs while the EOS 1100D is at 11 Ev.
Of course, dynamic range isn’t the only measure of image quality, and image quality isn’t the only thing to look at when choosing a camera – but it’s darned important. And I can’t see anything in the image quality metrics, ergonomics, build quality, or any other area, that compensates for Canon’s current lag in this area.
For as long as people have been asking, I’ve generally avoided giving definite answers to the ‘Nikon or Canon?’ question. I’ve always said, I use Nikon because of a choice I made over 20 years ago. I’ve always been happy with Nikon but that doesn’t mean it’s better than Canon.
However, right now, looking at the dynamic range scores, as well all the other factors, I’d have no hesitation about recommending a brand-new SLR buyer to choose Nikon; if they wanted a real choice they could take a look at Pentax too.
But that’s today. Things don’t stand still. In a years’ time it might be different again, and Canon might be competitive again. If you make a choice today, you can guarantee that in a year’s time something will have come along to knock it off its pedestal; but if a camera takes great pictures now it’ll still be taking great pictures in a year, two years, even five years time.
And who knows if I’ll still be using Nikon. Heck, will I even be using SLRs? Now there’s an interesting question...
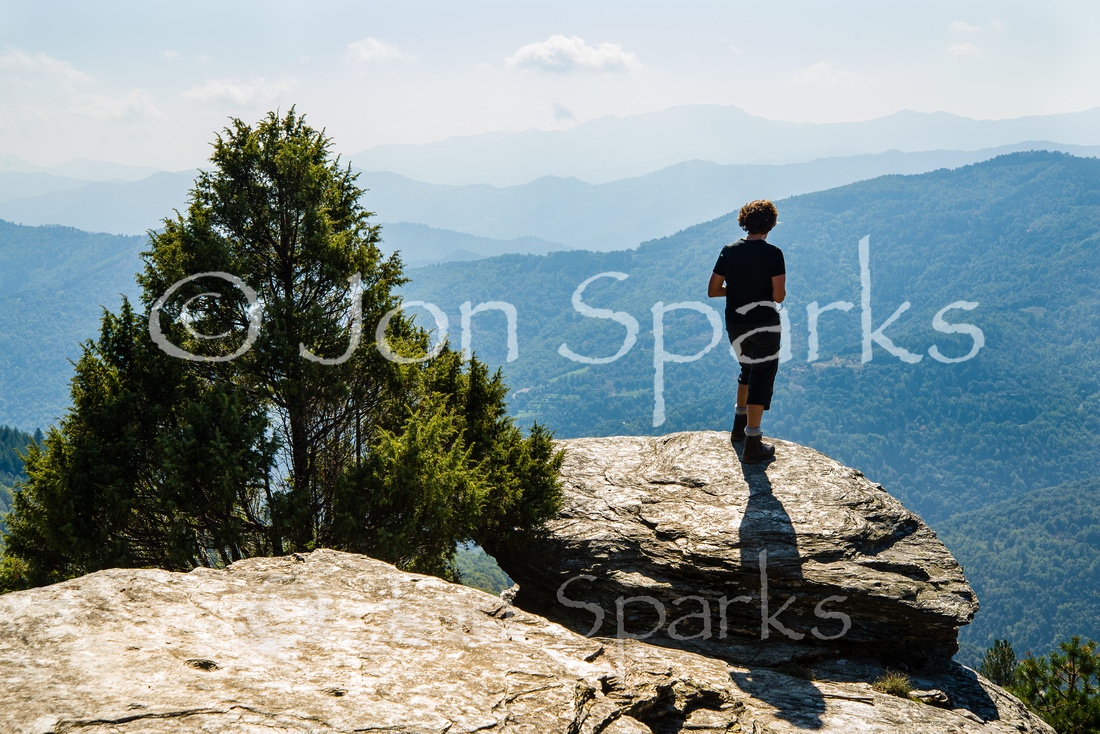
High dynamic range, handled with ease by a Nikon D600
]]>The hoary subject of digital manipulation can be relied on to rear its ugly head at regular intervals. It cropped up again last week when the the Take a View Landscape Photographer competition first hailed a winner and then, in short order, announced that he had been disqualified.
I don’t propose to discuss this specific case in detail, as it’s already been well explored, notably by Alex Nail. And as I don’t have the right to post the offending image here, my discussion would be hard to follow anyway.
It’s indisputable that the ‘winning’ image did in fact breach the rules of the competition (or at least the category in which it was entered) and therefore there was really no question that it had to be disqualified. In fact, there are two problems with it; it appears to be a digital composite, with a sky which doesn’t belong to the rest of the scene; and it’s also a very close imitation of an earlier image by another photographer, so it’s not even genuinely original.
Where things get more interesting, if not problematic, is when we look at image manipulation more broadly. When (if ever) is it acceptable to patch, clone or heal an image to remove, say, parked cars, wind turbines or pylons? And when (if ever) is it acceptable to, say, drop an ‘improved’ sky into a shot?
I’ve actually written about this before, both on the old ukphotographics website and subsequently in OWPG journal Outdoor Focus (or was it still called Bootprint back then?), and most of what I said stands up pretty well so the next few paragraphs are a straight lift from that earlier piece (with a few cuts indicated by …). You can date it from the fact that I’d just seen Peter Jackson’s The Lord of the Rings: The Two Towers, which premiered in 2002. This was, in fact, before I’d bought my first digital camera (which was in April 2004), but I’d done plenty of work with scanned images by then and knew my way around Photoshop.
The Two Towers is (…) also worth seeing simply to admire the seamless blend of conventional film and digital images. The character Gollum is a brilliant creation, but there are also many amazing partly or wholly digital landscapes.
The real footage was shot on location in New Zealand. New Zealand is now Lord of the Rings country, and frenetically selling itself as such. The New Zealand Tourist Authority would no doubt like us to think that what we see on the screen is what we’ll see when we go there. But how, with so much digital content, can we be sure? How, indeed, can we be sure of anything we see?
This has been most discussed in relation to news and documentary images, but it concerns all photographers. The Nature Group of the RPS, for example, in its Nature Photographer’s Code of Practice, states that: ‘a nature photograph should convey the essential truth of what the photographer saw at the time it was taken’. (…)
I’m not a digital Luddite. I don’t care whether an image is initially captured on silver halide crystals or on a CCD. Nor do I object to all ‘manipulation’. Digital imaging allows us, for instance, to control local tonal values more precisely than would ever be possible with fill-in flash and filters. I’m happy to embrace its power to fine-tune the image: improving shadow detail, correcting colour casts, and of course getting rid of dust and scratches.
However, when manipulation alters the actual content of the image, it’s a different matter. I would argue that, just like a nature photograph, ‘a landscape or travel photograph should convey the essential truth of what the photographer saw at the time it was taken’. In the context of a fantasy like The Two Towers the only limit is the human imagination. But in, say, a New Zealand tourist brochure, an image should be - at the very least - a reasonable indication of what one could expect to see at that location.
Two incidents during my own career have strengthened this conviction. Over ten years ago, when digital technology was much less commonplace, I was commissioned to photograph a local church which, for historical reasons, flies the Stars and Stripes on July 4th each year. On the day the light was good and there were no parked cars in the way, but there wasn’t quite enough wind. Lancaster Tourism asked me if they could blend in a flag shot by another photographer, and I agreed. The result is hardly a misleading image: you might see it just like this on another July 4th. Still, I hadn’t anticipated that they would tell everyone about this sleight of hand when they launched the resulting greetings card.
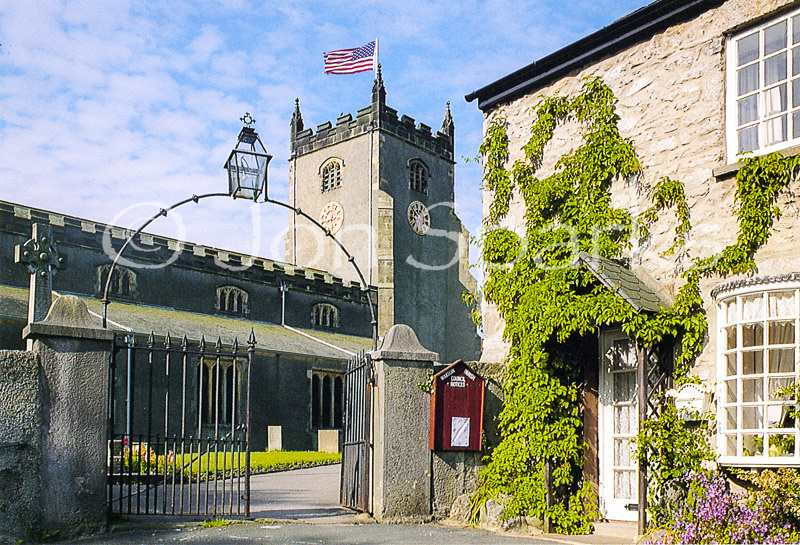
Still, it returned to haunt me a few years later. After some detective work I’d found a spot where I could get a view of Lancaster Castle with the Lakeland fells behind. A ‘window’ in the trees framed the shot perfectly and a 300mm lens helped to pull in the distant fells. This has become my most reproduced shot, appearing on greetings cards, posters, calendars and in magazines and tourist brochures. It has also attracted much comment locally, because most people weren’t familiar with this view. Some have simply branded it a ‘fake’ or ‘trick photograph’ – citing the Stars and Stripes image as evidence that I manipulate images.
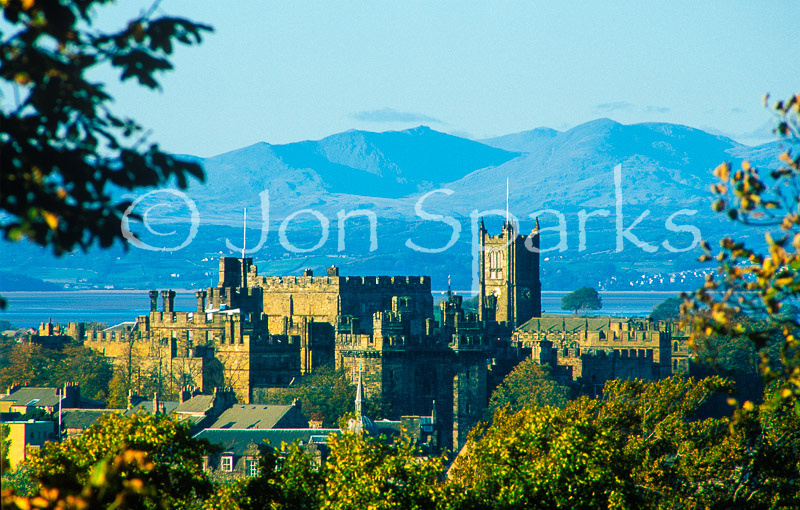 Having been quietly proud of how I’d found the viewpoint, these comments stung. It felt like an attack on the truth of the image - and, by implication on my own honesty. And it led to a decision. I started putting the following on invoices and delivery notes: Substantive manipulation of these images is not permitted, except in special circumstances and by prior agreement. What I mean by ‘substantive manipulation’ of an image is simply anything that changes the substance: taking out something that was there or adding in something that wasn’t.
Tweaking the contrast or colour of an image is a matter of interpretation, at least up to a point. But when you make substantive changes, or allow someone else to do so, you are no longer just interpreting the scene, you are materially altering it. And when that image is presented, explicitly or implicitly, as a representation of a real place, it becomes a falsehood. Which, if you are in the business of travel or landscape photography, is a serious matter.
Of course parked cars and power-lines can be an irritating distraction. Cars come and go, and sometimes you can ‘lose’ a power-line just by choosing a different viewpoint. But if you can never see a scene without parked cars, that’s the reality. If there’s no way to see the view without power lines, that too is the reality. The fact that most people would apparently prefer to see the scene without cars or power lines raises other issues: maybe the answer is to campaign for more yellow lines.
These issues are not new. Manipulation is as old as photography itself. Combination printing, air-brushing and retouching, double-exposures and slide sandwiching have all been used. We’ve all seen impossible shots created by double exposure, like a telephoto moon hovering over a wide-angle landscape. (These make me almost queasy). If there is anything new about the digital aspect, it is the utterly casual way in which images are manipulated without a second thought. But a falsehood is a falsehood, however it’s created.
My resolve on this point was tested again more recently, when a book publisher wanted to ‘remove’ a rock from a potential cover image. However, having declared in the book that none of the images had been manipulated, I really had to stick to my guns. Fortunately we were able to agree on an alternative shot.
What’s the harm? Was that rock really important? Maybe not: I could easily have taken a shot without it, just by moving along the beach a few metres. But as the sun came up on that particular morning, that was the shot I felt I wanted to take. I can’t say that removing the rock would significantly mislead anyone about the location. But it would mean that the image was no longer the shot that I took. It would no longer be the embodiment of what I saw and what I felt.
What this illustrates is that there’s another side to this debate: it is not just about honesty. For me, it comes back to why I became a photographer in the first place, why photography still excites me, why it will never be just a job. For me, being a photographer is about being there. It’s about the whole experience of a place and the effort to capture an image that says this is what it was like. It’s why the time spent walking around, looking, touching, listening, even smelling, are as important as time spent looking through the viewfinder. And ultimately, photography is about those moments when everything comes together: when the light and the weather conspire to make magic.
Moments. Decisive Moments. ‘Being there’ is not only about place; is is also about time. In the studio you may be able to repeat a shot exactly. In the natural world every moment is unique. Clouds move, the light shifts. Over longer time-scales, streams alter their courses; trees grow and fall. So do mountains, if you wait long enough.
It may seem paradoxical that a still photograph can capture this dynamism - but there’s no doubt that it can, just as it can capture the dynamism of an athlete or gymnast. And the process of landscape photography – the actual doing of it – means tuning in to the dynamism of land, light and weather. It means developing a relationship with the landscape. It doesn't make it easy, but it does make it endlessly rewarding.
I’m more than happy with anything that helps me to express what I saw and felt. Some forms of manipulation – be they filters, traditional darkroom techniques or Photoshop’s Curves dialog – can enhance the image and thereby sharpen that sense of being there. But deleting a rock, or importing a ‘better’ sky from another time or place, destroys it. It negates everything that makes me want to be a landscape photographer.
The problem with manipulation, then, is not just about the literal truth of an image or whether it creates a false picture of reality – though this is in itself a very serious issue. It is also about something of more personal concern to all of us: it is about what it means to be a photographer.
And that, in 2002, is where I left it. Ten years later, are we any the wiser? Well, I can tell you, New Zealand is still selling itself as LOTR country – and now The Hobbit is due out soon and Air New Zealand has unveiled the latest in its line of cringe-making safety videos; yes, they really do say ‘Welcome aboard this Air Middle-Earth flight’.
In some ways I’ve had to become more relaxed about the manipulation question. I know that when I sell images through libraries such as Alamy, many buyers will routinely ‘improve’ them. And after a few brushes with Alamy’s quality control, I’ve realised that its semi-automated processes don’t always distinguish between dust-spots (which I would naturally clone out) and distant birds in the sky – which, by preference, I would leave untouched. The choice is to remove those distant specks or not to submit that image to Alamy – which represents a significant income stream, probably more than 5% of my total earnings.
But when it comes to those images which are under my direct control – like those in the annual Calendar I produce with Pagefast – I’m sticking to my guns. Peer closely at the cover of the 2011 Calendar (also on the August page) and you can just see a couple of wind turbines. Some people. I’m sure, would have removed them, but to me they’re part of the view. Whether I like them or not is irrelevant. The wider view from Ward’s Stone also includes the M6 motorway and Heysham nuclear power stations, both of which I’d describe as greater blots on the landscape – and both of which have appeared in my photos on occasion.
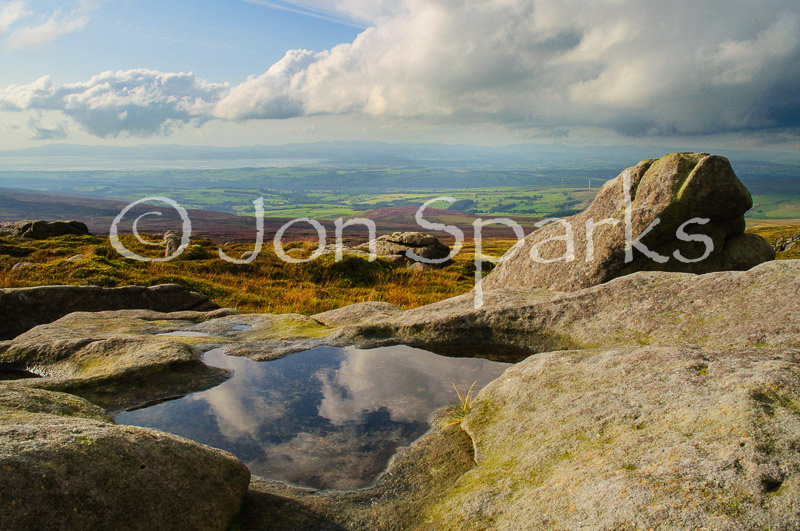 However, I quite regularly create composite images – sometimes merging several frames to create a panorama, more often combining bracketed exposures to extend the dynamic range (though with the greater DR of cameras like the Nikon D800 and D600, this is more rarely a necessity). And I am of course aware that no photograph is an exact duplicate of what the eye saw. Take a photo of a waterfall. Take several, in fact, at different shutter speeds. Whether 10secs or 1/1000th sec, they will look very different, but no exposure time will give a result exactly the way it looked to the eye. In some senses we manipulate photographs all the time, and there is no way round it – which is why I’ve referred to substantive manipulation.
It seems to me that one of the issues surrounding the manipulation of landscape photos is very close to the much more frequently discussed issues around the portrayal of people, – and in particular, women – in editorial, packaging and advertising. It’s not just that the industry favours ‘size zero’ (which I guess is size 6 or 8 in real terms) models. Make-up, lighting, and Photoshop wizardry (lots of Photoshop wizardry) all conspire to present an idealised and sometimes impossible image of ‘womanhood’.
And one of the things I worry about is the presentation of landscapes in the same idealised way. I worry that it compromises our ability to see the real landscape for what it is. One consequence may be that we fail to appreciate, and therefore to cherish, the ordinary, slightly scruffy, scraps and tatters of landscape that surround us – yet, just because they’re right on our doorsteps, these are arguably more precious and more important than the grand set-pieces of the Lake District or The Remarkables where photographers tend to congregate.
I’m not sure I can reach any simple conclusions. I think about the fact that when I go into a library or bookshop I can find books divided into fact, fiction and fantasy. It sometimes seems that would be nice to think we could categorise photos in the same way. But then again, you can’t always trust books either: I recently posted that I’d reshelved ‘It’s Not About the Bike’ under Fiction. (Which I did, metaphorically though not literally).
Instead I’ll leave you with a conundrum – and a confession. This photo (Queenstown Bike Park, Lake Wakatipu and the SS Earnslaw) is a composite. However, the two source images were taken from the same point and very close in time – the metadata tells me they were 77 seconds apart. I actually saw riders on the trail at the same time as I saw the steamer on the lake – they just didn’t quite coincide in the frame. In the original rider image the steamer is just hidden by the trees.
So is this an acceptable elision of reality, showing what I could have seen and very nearly did see? Or is it the thin end of the wedge? What do you think?
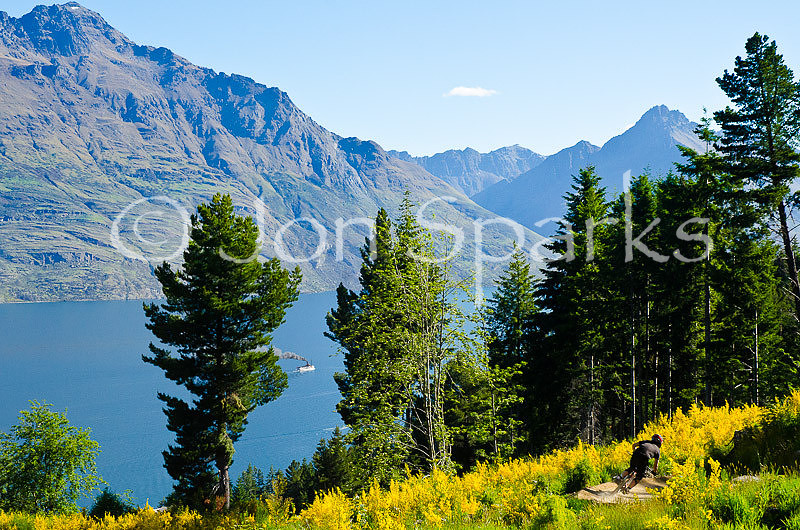
I am delighted to say that I won the Words and Pictures award in the 2012 Awards for Excellence from the Outdoor Writers and Photographers Guild, presented on Saturday October 13th at Durrell Wildlife Park in Jersey.
The award, sponsored by Cicerone Press, was for Leapers and Creepers, which appeared in Privateer magazine. The judges said:
“Jon's entry stood out from the rest – a really interesting article on the Kennett brothers, pioneering mountain bikers of New Zealand. The article is lavishly illustrated with stunning photographs that convey both the beauty of the New Zealand landscape and the technical demands posed by the unspoiled countryside.”
It’s always great to win, but I’m particularly thrilled by this one, for several reasons. I had a hand in the inception of this category some years ago and it means a lot to me.
It was also a thrill just to get the chance to write for Privateer in the first place, because it is such a high-end publication and because it allowed me to use rather more words and pictures than usual – though I hope this award still recognises quality rather than quantity!
It was also a delight to be able to spend a couple of weeks exploring the mountain bike trails of New Zealand. Everyone knows what spectacular landscapes the country has and fortunately there is an outdoor community that does them justice.”
Many people helped to make this trip, and this feature, possible, especially:
The Kennett Brothers – especially Simon and Jonathan, with whom I spent such a memorable day exploring Pureora Forest;
Master of the trails Hoz Barclay, our guide in Pureora;
Avanti Bikes for loan of two excellent bikes;
Tim Ceci and the team at Vertigo Bikes in Queenstown;
Tineke Water for lending me the car to get around North Island.
The Slideshow starts with the shots that were chosen by Privateer editor Tym Manley for inclusion in the feature and then goes on to a few others of my favourites from the trip. If you want to see exactly how they were used, and read the text (this was a Words and Pictures award, after all), you'll have to get hold of a copy of Privateer 9.
]]>
The title does not lie. This is not about photography. But i thought iI'd post it here anyway, as well as on my Facebook page. Read on to the end for a free offer!
I went for a 1hr+ ride on my road bike this morning: I was meant to be thinking about copy I need to write but instead found myself preoccupied with the suggestion that the Government wants to encourage more competitive sport in schools. I see that Sir Steve Redgrave has commented on this – I’d only disagree with the diplomatic ‘slightly’ in his first sentence.
I can testify from my own experience that over-emphasis on competitive sport in schools can be counter-productive and put off as many young people as it encourages.
I went to a fairly traditional grammar school. I guess it gave me a good education in many ways. I still resent having to choose between History and Chemistry while wasting my time on compulsory Latin, but my biggest issue with that school is that it very nearly turned me off sport for life.
The main sport was Rugby, and the head of PE was notorious for his mantra ‘Rugby takes priority’. We used to devise little scenarios with that as the punch-line:
“Sir, my Mum’s just died and the funeral’s this afternoon.”
“No go, boy, Rugby takes priority.”
I’m still not sure how far-fetched this really was…
Anyway, Wednesday afternoons always crystallised into an excruciating few minutes, having changed into Rugby kit, of standing around shivering and waiting to see if you would be picked for a fifteen. I was always one of the last few, and I always prayed not to be picked. despite the inevitable sense of rejection and the disdainful looks from the chosen ones, it was the lesser of two evils. Of course we rejects were usually dismissed to muck around on a basketball court: I don’t think the PE teacher ever told us to ‘fuck off’ but it felt pretty close at times.
Other alternatives, such as cross-country runs, as well as gym classes, were also pretty miserable. I won’t say, as some people do, that my PE teachers were sadists, but to a 12/13/14 year old lacking in physical confidence it definitely sometimes felt that way. What I did feel, and still think was basically correct, was that no-one really cared. If you weren’t good enough to play at least in House matches, no-one was interested in you. Rugby took priority over my (and others’) self-esteem, fitness or engagement in any form of physical activity. There was no safety net for the boys who didn’t show natural aptitude at the limited menu of games. There was no opportunity that I recall to sample a decent range of other activities or to learn that sport might be enjoyable without an element of competition.
It only changed when I went to Cambridge. In fact possibly because it was Cambridge. Not so much because it was a town where everyone cycled (it still is one of the best cycling cities in the UK) but because it was rather claustrophobic and rather too full of braying Brideshead types. I’m sure most if them were lovely really but I guess I had a bit of a chip on my shoulder. Anyway, with a few friends, I took to cycling longer distances to get out of town, see the countryside, and – really quite an important factor – to investigate pubs that weren’t full of students. (I really discovered two things in Cambridge: cycling and real ale).
At the end of our first year one of my friends and I had saved up for a long cycle tour through Wales and the West Country, but for reasons beyond my control this had to be cut short. I used the money to buy a better bike and – to cut a long story short – wasn’t long into my second year before I discovered time-trialling. And then I discovered that I wasn’t bad at it. I represented the University a few times and even won a few medals, usually as third counting rider for a team prize.
I went on racing after I left. I was never a star but I did beat the hour for 25 miles, which was a reasonable benchmark in the days before disc wheels and tri-bars, and got within a whisker of 2hrs for 50. I rode in bunched races too, but usually got dropped fairly early on, often by people whom I could regularly beat when racing against the clock. Time-trials were competitive, of course, but for most of us a big part of it was competing against yourself, trying to beat your personal best time at each distance.
It’s always felt to me like a happy accident that I discovered bike racing, and subsequently rock-climbing; between them bikes and climbing have been very important in my life since then. It was nothing to do with anything that happened in school; it still seems like school did its level best to convince me that sport and I would always be strangers.
I’m sure it’s different at my school now. In fact a few years ago I went back there and photographed boys doing all manner of outdoor activities during weekends in the Lake District. I couldn’t help wondering how my 12-year old self might have responded to those opportunities. We’ll never know; but what I do know is that I had to find out for myself, and at a relatively late stage, that there were sports and activities that I could do, could be not bad at, and ultimately come to love.
I really fear that many kids growing up today will never make that discovery, but it’s more important than ever when we consider issues like juvenile obesity. Elite sport is important and it really can “inspire a generation”. It did and does inspire me: I still remember discovering races like Paris-Roubaix and the Tour de France and following them through the pages of Cycling Weekly.
But there are things far more important than gold medals and the real but temporary euphoria of Olympic success. Elite sport is like the uppermost few bricks of a very large pyramid: it needs a broad base. And widening participation in sport – and physical activity more generally – has such obvious benefits in terms of health and well-being that it really should be one of the highest priorities for any Government. It makes economic sense, too. It undoubtedly reduces the burden on the NHS and I don't think it’s totally fanciful to suggest it could reduce crime and anti-social behaviour too.
The way to achieve this is not by focusing on competition, by branding some kids as winners and others as losers. I was one of the losers and it could very easily have stuck with me for life. The aim must be to give every child the chance to experience as many different forms of physical activity as possible, to find the ones they can do and can enjoy. This won’t hurt competitive sport. Frankly, if more kids are fit and active and trying different things, competitive sport can take care of itself.
Of course, it’s not just about kids. There are many adults who would benefit from being more active. I’m sure many would like to try new things but need more encouragement and need to feel they won’t be laughed at (this probably applies even more strongly to women and girls).
And it’s not just about what Government can do. You have to applaud Sky for putting money, not just into the elite cycling programme (and what a triumph that has been!) but also into the grassroots, with the Skyrides programme. Yes, it’s given the brand name massive exposure, but it has also encouraged a lot of people into cycling, and that’s a win for everyone.
And it’s also about what we can do as individuals. Which is why I’ve already offered, if any of my Facebook friends or blog followers would like free advice about getting into cycling/mountain-biking, or taking it a bit further, please get in touch. And if you live within reasonable reach of my main stamping grounds (Lancashire, the Lakes and Yorkshire Dales) and would like an introductory ride – as gentle or as challenging as you want it to be – then please get in touch.
]]>Of course I like sunshine and warmth as much as the next man or woman, but we haven’t been getting much of either in the UK lately. Which maybe makes this a good time to reflect on the old maxim;
“There is no such thing as bad weather, only inappropriate clothing”.
This is attributed to John Ruskin, so please complain to him if you are one of the people so badly hit by flooding in places like Hebden Bridge recently. I think there is such a thing as bad weather, but most of what we moan about is really not that bad at all.
Anyway, I’m tempted to recast Ruskin’s saying:
“There is no such thing as bad weather, only inflexible photographers”. Grey, cloudy days may not be much cop for grand landscape photography, but their soft light can be just fine for portraits and ideal for macro close-up stuff. If it’s not windy then soft light is ideal for shooting flowers. I believe photographers who specialise in gardens are usually pretty happy to get a dull day, as long as it’s not actually raining, as the colours of flowers and foliage can be well appreciated without harsh shadows.
Anyway, to try and make the point, here’s a small selection of images taken on ‘dull’, and mostly wet, days.

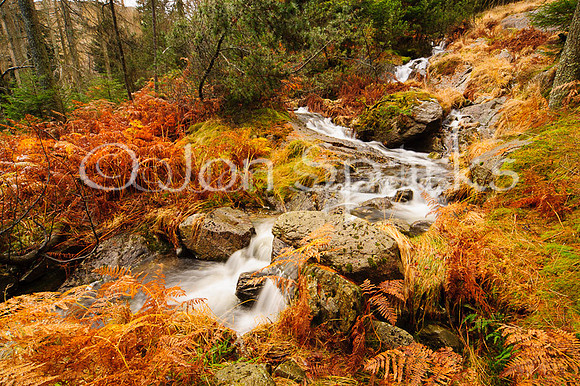


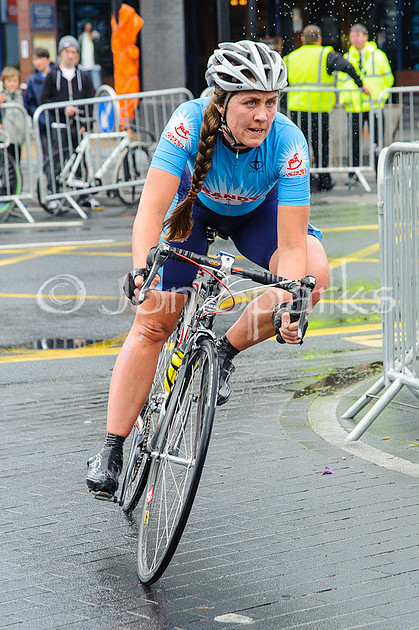
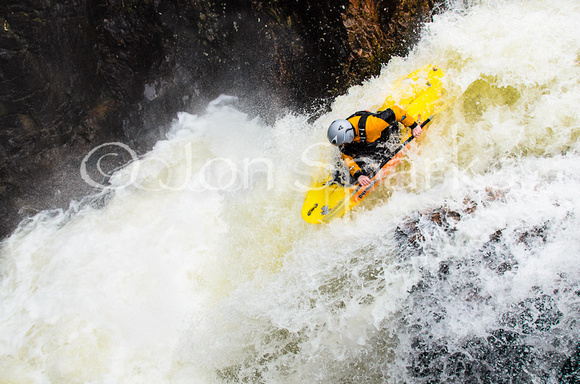
In case you’d wondered why I’ve made no new entries for a while; a big part of the reasons for this is that my Dad died in late May. And just as we were beginning to get over that, we put his flat on the market and, amazingly, found a buyer right away. This is good news, of course, but has meant a lot of work in clearing it – all while trying to keep up with deadlines.
]]>That’s not to say I’ve never received any gear for free, but it’s been things like camera backpacks – and I’ve got a review of one of those coming up soon.
However as a writer covering travel and outdoor subjects, I do get a fair amount of supported travel/accommodation. The quid pro quo is that the providers get a decent mention in the article or book that results. Of course there are ethical issues here – what if the accommodation isn’t up to the standard it should be?
I’ve actually faced that very question with a hotel in Helsinki. Normally standards in Finnish hotels are very high but this one didn’t measure up. Maybe they’d just put me in one of their worst rooms – but that is a daft thing to do when you know the guest is writing about you. Anyway, I consulted with the FInnish Tourist Board, who’d arranged it, and agreed that I couldn’t in good conscience give that hotel any publicity. I gave them plenty of detail about what was wrong and they agreed to take it up with the hotel.
Which brings me to my recent (well, November/December last) trip to New Zealand. This has now borne fruit in the form of a big feature in Privateer magazine – and what a joy it’s been to have over 4000 words to play with instead of the more usual 1200–1500. However, I actually started out with nearer 6000 words. Privateer’s editor, Tym Manley, decided to focus on the epic back-country exploration I’d shared with the Kennett Brothers and Hoz Barclay in Pureora Forest, which meant that some of the places I’d been and people who’d helped didn’t get quite as much coverage as I would have liked. So this is one way of saying thanks and giving those people a bit more exposure.
Avant, Avanti
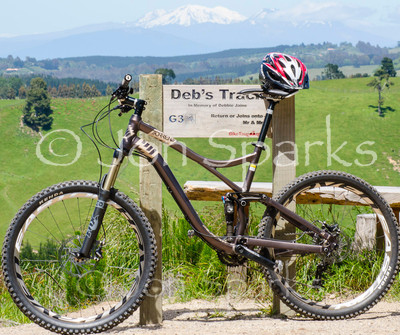
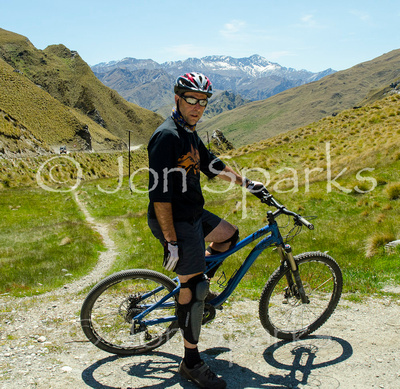 Thanks to the generosity of the people at Avanti Bikes in Auckland I had a great bike to ride during my trip to NZ – in fact two bikes: one for North Island (the brown one) and another for South Island (Queenstown). That's the blue one. Apart from a different rear tyre and a dropper seat-post on the Queenstown bike, they were essentially the same, and all comments from now on apply generally.
The bike(s) in question is/are the Avanti Torrent 3. My first ride was a less-than-pleasant tussle with Auckland’s feral highways, which reminded me that the great Josie Dew described New Zealand’s drivers as the worst she'd ever encountered. However, as soon as I got the Torrent onto the sandy trails at Woodhill MTB Park, I felt instantly at home on it. The Torrent is a beautifully balanced ride; it climbs and descends well. It was happy on the downhills of Queenstown Bike Park and also on the wilder side of things at the Pack Track in Skippers Canyon. OK, Skippers isn't that technical, but Vertigo Bikes give their clients full-on downhill bikes for it.
I’m not a professional bike reviewer so for anyone looking for detailed run-down on the Torrent, here’s a review from Australian Mountain Bike magazine. British reviews are a bit thin on the ground as the brand is only just finding its way into the UK market.
Vertigo
I’ve already mentioned Skippers Canyon Pack Track. I was able to ride here thanks to Vertigo Bikes of Queenstown, who run regular guided trips during the season. Special thanks to Vertigo boss Tim Ceci and guide Mike Aubrey.
Tim Ceci explained that Skippers Road is officially the most dangerous in New Zealand. Born in the Gold Rush, which began in 1865, it took seven years to build; two years after it opened, the gold ran out. Today its main users are rafting companies accessing the Shotover River. It's also the “easy” option for a guided bike descent. Though technically trivial, it’s a long descent with loose surfaces, and massive drops on the right. Overshooting a bend could be fatal.
Across the canyon, the Pack Track (used by miners before the road was completed), is relatively safe, albeit more technical. Of course you could say it's still a packaged adventure, with transport to the Saddle, a guide to tell you what comes next, and (on the full Vertigo package) full-dress downhill bikes. I was perfectly happy riding it on the Avanti Torrent and felt distinctly surprised, even smug, to find that the Queenstown Mountain Bike Club map rates it Gr5 (on a 1–6 scale). But the grade hardly matters. Skippers Pack Track is just a darn gorgeous descent. You want flow? Here it is.
You can ride it without a guide, naturally, but unless you want to tackle the road back up, you do need transport, and the road is off-limits to rental cars. You could also book Queenstown’s Bike Taxi, or join in one of the QMBC's social races. The record is about six and a half minutes, including climbing over a couple of stiles (cyclo-cross skills would help here). For me, going with Vertigo (and thereby gaining several models for the photos) was ideal. I’m pleased to say Privateer went double-page with this shot of Mike and three clients cruising down the Pack Track.
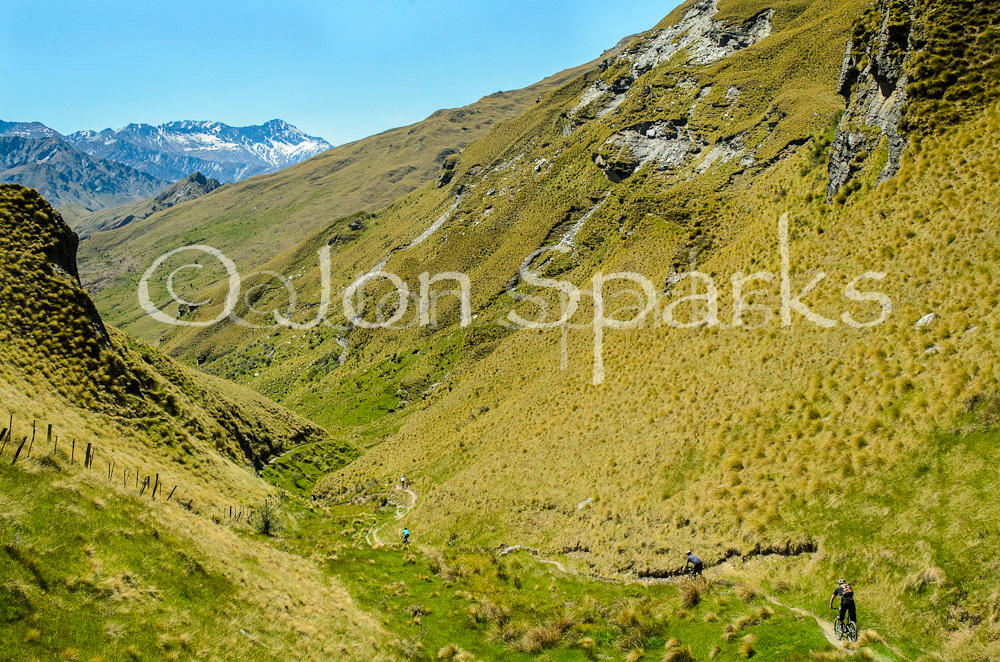
I commented a while back on the launch of the Nikon 1 cameras. What I didn’t really anticipate at the time was that I would end up owning one!
It would be more strictly true to say that I co-own one of them as I share it with my partner. Bernie is no slouch as a photographer – in fact she has a formal qualification (A-Level) which is one up on me! – but is usually happy to let me lug the bigger cameras around. For several years she used, and was pretty happy with, a Canon Powershot Pro but it was pretty slow – OK for landscape and nature shots but not for any sort of action – and I didn’t like the early-implementation electronic viewfinder – well, it is a 2004 camera!
As documented in this blog, I’ve been looking for some time for a lighter camera which I could carry on road bike rides and other times when I didn’t want to lug an SLR but didn’t want to go completely naked either. Though Bernie’s Canon was still working perfectly, we thought we’d look for something we could share.
Our first attempt resulted in the purchase of an Olympus XZ-1. This had garnered a lot of good reviews and had an impressive spec. for a compact, with a fast and sharp 28-112mm lens being a big plus point. However it quickly became clear that this camera was not going to work out for us, the main reason being that it does not have a viewfinder.
I’ve talked about this before. I’ve nothing against screen viewing in principle, and will fairly frequently use Live View on my DSLRs when I want ultra-precise focusing, but that’s for careful work on a tripod when I can shade the screen if necessary. The Olympus has a good screen but it’s still impossible to see it clearly in bright light. I know you can get screen shades and loupes but that rather defeats the object of carrying a compact.
The XZ-1 sealed its own fate on our first trip to Menorca, in September last year as guest of Walk Menorca. Incidentally my report of this has just been published. Lovely island, great walking, but lots of sunshine – fantastic for everything except seeing the screen on the XZ-1! I was shooting merrily with my NIkon D7000, but Bernie was struggling with the Olympus. It could take good shots* but it was impossible to see clearly enough to frame them properly.
*(I say “good shots” but I also have to say that image quality, even in good light and at base ISO, does not bear comparison with a DSLR, and I doubt it would stack up for my professional magazine work.)
 With this in mind, soon after getting back from Menorca, we put the XZ-1 up for sale and started looking for alternatives. As we were both now clear in our minds that it had to have a viewfinder, this narrowed the field considerably and we started looking again at the Nikon 1 – the J1 model has screen-only viewing but the V1 has an electronic viewfinder. And the net result is: we bought one! (from the lovely people at Wilkinson Cameras in Preston).
We have the V1 camera with the usual 10–30mm lens (equivalent to approx 27–81mm). I don’t intend to write a full review – there are plenty of those out there already – but here are a few first impressions on salient points. Much of this was hammered out in a week's intensive use on a second trip to Menorca – this time mountain biking.
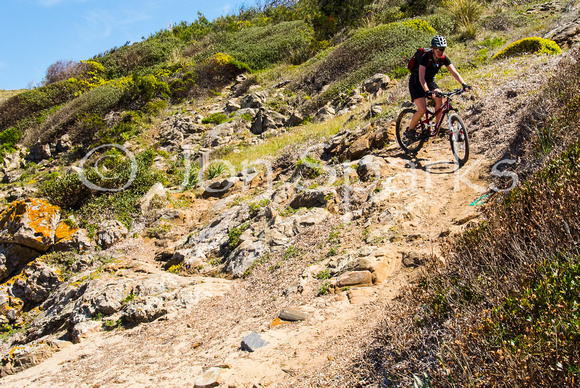
Handling
Overall a nice camera to hold; big enough to get both hands on it, with left hand under the lens in classic support position. Yes, there’s VR, but it still pays to support the camera properly. However, and let’s get this in right at the start, there is one big flaw; the mode dial on the rear of the camera is far too easily knocked out of position. As often as not, when lifting the camera out of a pouch, it ends up on the wrong setting and we find ourselves shooting a movie or burst when we wanted to take proper photos. This dial really should have a lock button, or at the very least be much more securely click-stopped. It’s not a deal-breaker, as we’re getting in the habit of checking it every time, but it is a seriously poor bit of design.
More camera control than I’d really like is done through menus, discouraging the use of Manual mode or regular switching between modes. On the whole, though, this is a niggle rather than a major problem. It is, fortunately, easy and quick to alter apertures when in Aperture Priority, Shutter-speeds in Shutter-priority, and to engage program shift when in Program mode. Pity it’s not equally easy to tweak the ISO settings.
 Viewing
The V1 switches automatically from screen to viewfinder as you raise it to your eye. This eye-start feature works flawlessly in our experience, though I’d prefer to have the option to turn the screen off altogether when not in use, as it clearly drains the battery (see under ‘Performance’, below).
The screen is a good one, if not quite up to the latest SLR, and I’d have no hesitation in using it when appropriate, e.g. shooting on a tripod or at high or low levels where it’s awkward to use the viewfinder. However, the electronic viewfinder was central to our decision to buy this camera, so it is a relief to find that it is as bright and clear out in the field as it seemed in the shop.
My one gripe in relation to viewing is that when you are shooting in Single frame release mode, the image you’ve just taken is automatically displayed immediately afterwards, meaning that you can’t see what’s happening in front of you. This is fine when you’re shooting landscapes but not for action. Obviously we could shoot in Continuous mode instead, but this isn’t always the answer. On my SLRs, naturally, the review image only appears on the screen so I have a continuous viewfinder view – but there’s still an option to turn off image review altogether. The V1 needs this and it could be addressed through a firmware update.
Manual focus is clunky and not user-friendly but the AF is very good and I don’t imagine MF will get used much, if at all.
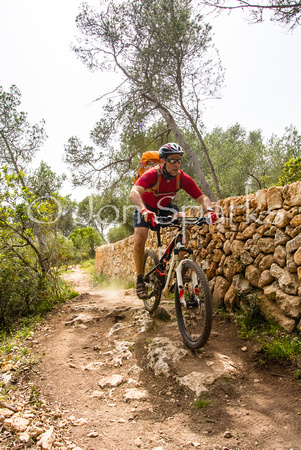 Performance
Apart from the ‘blocking’ effect of image review that I’ve just mentioned, the V1 is very quick in use. The allegedly revolutionary autofocus system certainly seems to be both very fast and very accurate and the response to the shutter button also shows no discernible delay.
The one downside is that battery life is a bit on the short side. The V1 uses the same EN–EL15 batteries as my D7000, which turned out to be just as well as it ran out of juice after 5 days of discontinuous use on Menorca. The D7000, meanwhile, which had taken twice as many shots, still showed 63% battery power. Remember I said I wanted to be able to turn the screen off? This is why.
Image quality
In the end, the acid test is the pictures, and the V1 measures up pretty well. Overall image quality is noticeably better than the Olympus XZ-1, or the Nikon Coolpix P7100 which I worked on last year; hardly surprising as the sensor is at least twice the size while retaining the same number of pixels. Up to around ISO 800 I’d see it as suitable for magazine full-page reproduction, though probably not for double-page spreads. Dynamic range is not as good as my DSLRs but I never expected it would be.
Overall impressions
We’re still getting to know the V1 and will certainly continue to explore its strengths and weaknesses. But we’re both very clear that – unlike the Olympus XZ-1 – it’s a keeper.
]]>One of these concerns the use of the self-timer for action shots. I was riding with my partner Bernie so most of the time we were photographing each other, but we did want to try and get a shot of us both riding together. My first thought was to use the Nikon ML-L3 remote control which I had with me but it wouldn't play ball and I didn't have a spare battery (can't think of everything!). Fortunately, however, my Nikon D7000 has some extra options up its sleeve when it comes to using the self-timer.
First, you can set the delay to 2, 5, 10 or 20 secs. I often use the 2sec delay as a way of minimising vibration when shooting on a tripod. All Nikon SLRs have these options and I guess most other makers' cameras do too. But the D7000 has some extra options which models lower down the range* don't share. You can set the camera up to take multiple shots after the delay (any number from 1–9), and also set the interval between shots (options are 0.5, 1, 2 or 3 secs). All this through Custom Setting c3 if you're also a D7000 user.
In the sequence below, the camera was set up on a dry-stone wall (there are lots of those in Menorca!); the delay was 20 secs and the interval between shots 1 sec. The three shots shown are the best out of nine, and clearly the middle one of the three is the best. Of course if I’d been able to control the timing exactly, I might have liked to shoot, say, a third of a second later, but for a memento of the trip it’s more than acceptable.
Not being able to control the timing exactly is always going to be a limitation of shooting with the self-timer. I’d always rather be behind the camera so I can see what’s in frame and pick my moment to shoot, but when that’s not possible, the self-timer can be a lot better than nothing.
I used it several times during my trip to New Zealand last year (for more on this see the latest edition of Privateer magazine, due in shops on the 18th of May). For instance, this shot was taken at Wairakei MTB Park near Taupo. I had a couple of hours riding time between shooting the Contact Huka mountain bike challenge event and meeting up with NZ MTB gurus, the Kennett Brothers. After a pretty solid climb I emerged at the top of the hill to this superb view over Lake Taupo to a snowy Mt Ruapehu. I waited a while hoping some other riders would show up but ran out of time. The shot was too good to miss entirely, so I looked for somewhere to set the camera. The only real option was on top of a trail sign. Because I was able to roll straight from there onto the descending trail I set the delay to 5 secs and the interval between shots to 0.5 secs. Number of shots was 9. The shot you see here is about the best from three sequences I attempted. Interestingly, in the following sequence, I got another shot where I’m in almost exactly the same position.
A couple of days later, following a long day out in Pureora Forest with Jonathan and Simon Kennett and Hoz Barclay, I had another couple of hours to ride the fine trails at Whakarewarewa, just outside Rotorua. It was fairly early on a Tuesday morning so it’s hardly surprising there were’t too many riders around, though I got a few shots of other people on one of the easier trails.
For the shot you see here I had nowhere to put the camera except propping it on top of my backpack at the side of the trail (by the way I’ll post a review of said backpack soon). Because I had to push up and get on the bike before rolling down, I set the delay to the full 20 secs. Again, interval was 0.5 and no of shots was 9. It took a couple of goes to get my timing even vaguely right and in the end I took four runs.
Lessons learned are that it’s important to think about the delay – anything from 2 to 20 secs can work according to circumstances – and that it nearly always takes more than one attempt to get the timing right. Even then it’s never going to be a substitute for shooting normally, but it’s a good fall-back and I’m very glad the camera gives me these options.
Incidentally, an alternative which may work for many is to shoot a movie instead, and then extract a still frame afterwards. Obviously the quality won’t be as high (the HD movie image is only 2 megapixels, after all) but it would be fine for many purposes. However, the ideal shutter speed for shooting stills of biking and other fast action is much higher than the ideal for shooting a movie – if the main priority is move quality then set a slower shutter speed and accept that still frames will look a bit blurry; if the main priority is to get a good still frame then set a speed of 1/500 or faster (assuming you have the option in your camera’s movie settings).
*(The D5100 does allow multiple shots but only at fixed 3 sec intervals; the new D3200 has a 4 sec interval. I'm not sure what the logic of such long intervals is.)
]]>I hate this.
Why? Because the "Rule of Thirds" is dangerous nonsense.
Am I overstating my case here? 'Dangerous'? I don't think so. The Principle of thirds is a perfectly acceptable way to frame a picture and can work well for some subjects, although even this is based on a simplistic misreading of the classical compositional principle of the Golden Section.
What is both dangerous and nonsensical is to tout it around as a Rule, and especially when it’s presented as the only rule.
I’ve said plenty about this in an earlier post (it appears more recent than it is because I've only just imported it from my old blog). I just want to add that building the “Rule of Thirds “ – ROT for short – into a camera like this is just another way to sap the initiative and individuality of the photographer.
Sony isn’t the first to do this but this is one of the first cases I know of in an SLR or SLR-like camera. It’s particularly sad because Sony’s SLT cameras are genuinely innovative, and they have a decent viewfinder which enables photographers to make their own decisions.
Of course photographers using these cameras have the choice not to use this particular mode, and I hope they will. But still it sends a message that there’s a ‘right’ way to frame every shot. And that's wrong.
]]>Ansel Adams is revered by many as the greatest ever landscape photographer. I don’t know if I’d go that far – at some point these things get a bit silly. Was Pablo Casals a greater musician than Jimi Hendrix? (Answers on a postcard, and send them to someone else, please!)
What I can say is that Adams has been a big influence on me, especially in the early part of my career. I’m an admirer, not a slavish disciple, but I do believe he said more wise things about photography than almost anyone else. And one of the wisest things he ever said was this: ‘There are no rules for good photographs, there are only good photographs.’
Which came to mind recently when I was reading a camera manual to help someone who was struggling with their camera (it might be unfair to name the maker), and came across some advice for taking ‘good pictures’. Including the old chestnut: position the subject at the intersection of thirds.
Ah, the dear old ‘Rule of Thirds’–only in my view it’s not dear but dire. I’d venture to suggest that this ‘Rule’ has killed more potentially interesting photos, and probably crushed more photographers’ enthusiasm, than anything else.
It's not that you can't ever take good photos using it, but it gets in the way at least as often as it helps. My advice about the ‘Rule of Thirds’ is very simple: forget it.
In fact, if it wasn't so frequently quoted all over the place, I wouldn’t even have mentioned it.
OK, I can guess what's coming next: if it's so bad, why is it so frequently cited? Actually, it beats me, because I see lots of photographers talk about it who clearly do not slavishly follow it in their own work. I think it's just become a standard knee-jerk reaction whenever anyone asks about composition.
No doubt I'll have more to say on this soon, but meanwhile here's a pic that definitely doesn't conform to the ROT.
Yesterday I made my annual visit to Focus on Imaging at the NEC. Thank you, Virgin Trains, for a smooth and on-time journey both ways. I was persuaded once to drive to the NEC – never again.
One of the biggest draws at the show was, of course, the Nikon D800. So much so, in fact, that Nikon had to institute a queueing system for all those punters eager to get hands-on with the one and only example available. Frankly, I couldn’t be bothered. We already know what the camera looks like, and I’ll be getting one as soon as they are available so I can work on the Expanded Guide. (BTW my Guide to the Nikon Coolpix P7100 is due out in May.)
I did, however, attend a Nikon presentation about the camera. It was interesting that Nikon’s representative was at pains to point out that the D800 is not a direct replacement for the D700 and is not a “baby brother” to the D4 in the way that the D700 was to the D3. I still think (see earlier posts) that that is the camera I want. He was also careful to emphasise that the D800 is squarely aimed at photographers who are currently using ‘medium format’ kit (Hasselblad, Mamiya, etc). For these users it should offer faster shooting and better low-light performance, a wider lens range AND a much lower price.
For other users, the huge files which the D800 produces (250MB TIFFS!) mean many people will need to upgrade their computer systems to handle them. And to get the full benefit of its undoubtedly amazing imaging quality, people will need to use the very best lenses and impeccable technique – which will frequently mean using a decent tripod.
All this smacks of Nikon damping down demand for the D800 – pre-orders have apparently been phenomenal. I suspect they have something else up their sleeve and would quite like some people to wait. Is this going to be the real D700 replacement – the camera I’m looking for?
Well, time will tell, and I look forward to reporting further on the D800 when I do get my grubby mitts on it.
Meanwhile there was lots more to see at Focus and one of the first places I headed was the Fujifilm stand to look at the new XPro1. And all I can say is… oh dear.
Why? Because I want one! This is the most appealing mirrorless/compact system camera I’ve seen so far. Rugged build quality, superb ‘hybrid’ viewfinder, easy manual controls, and judging by the samples on display, fabulous image quality as well. The only problem – all the lenses so far are primes and to get a basic three-lens outfit I wouldn’t see much change from £3000. But if one of my Premium Bonds came up tomorrow…
It was perhaps unfair to go from that straight to the Canon stand for a look at their “large-sensor compact”, the G1x. After the XPro1 it felt cheap and plasticky. I don’t think it’s that bad really, just that the Fuji is so well made that most other cameras would feel a bit naff in comparison. (Though I’ve always felt that at any level, Canon’s cameras aren’t quite as solid-feeling or as good-looking as their Nikon equivalents.) The G1x also has a rudimentary and fairly useless optical viewfinder – like the Nikon Coolpix P7100 which I reviewed recently, it feels more like a gesture towards the retention of a viewfinder than anything you’d really want to use day in day out.
I’ve already recorded that during the show I signed up to Zenfolio, which is the new host of this blog and, before very long, my main website too. Other products which caught my eye included the Green Clean system of cleaning products. I’m hoping the distributors will let me have some samples for review soon.
No visit to Focus would be complete without catching up with the legendary Ray Fitchett on Sigma’s stand. All being well, he’ll be lending me both their latest SLR and their new 180mm macro lens to try. Watch this space!
And finally, I never seem to be able to visit without stressing the debit card in some way. Well, there are always bargains on offer! Last year it was Nikon’s SB-700 flash (which is excellent); this year it was a new tripod. I’m trying to remember how many years ago it was, on one of my first visits to Focus, that I bought a Manfrotto CarbonOne tripod and magnesium alloy head. Quite possibly a decade… It’s been up hill and down dale with me ever since and so it’s no wonder that it is showing a few signs of age. So it was with little hesitation that I plumped for the equivalent model from today’s range: a 190CX3 with 460MG head. And it came in cheaper than the original! Result.
]]>
|
| Mills at Tampere, Finland |
In some senses that’s neither here nor there; the point is that preparing images for any professional library means giving them some very close scrutiny. This includes examining the entire image at 100% magnification to check for any dust spots or other issues. This is boring but necessary – it’s certainly better than having images rejected by Alamy’s quality control.
|
| Glasson Dock, Lancashire |
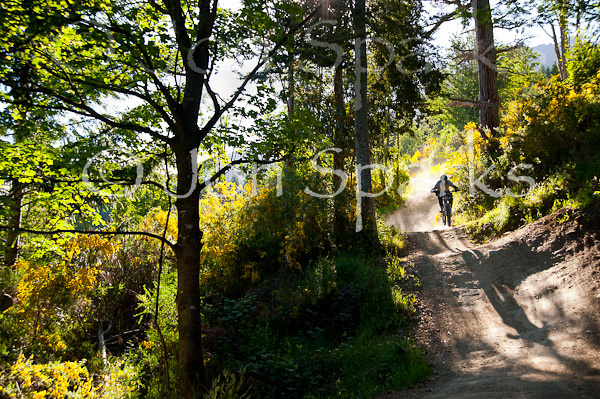
|
| Queenstown Bike Park, New Zealand |
|
| Town Croft Wood – a bit closer to home! |
(NPhoto Issue 1 has been out for a while now and Issue 2 is due very shortly – interested to know what people think. You'll see my ugly mug on the contents pages but I don't think my contribution is directly credited anywhere – well, off the record, it's most of the 'Nikopedia' section.)
More importantly, however, today is the shortest day and I wanted to wish everyone a great festive season and all the best in photography and life more generally for the coming year.
Action = frustration
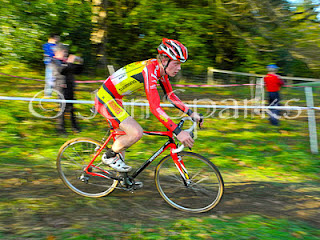 There is an option to pre-focus at a specific point, but unlike an SLR neither of the P7100’s viewing systems is good enough to see the rider snapping into focus. You’d have to pick a reference spot and shoot by eye when the rider hit the mark. Of course, action is demanding stuff to shoot and cycling action is tougher than most. Absolute speeds may be low compared to some other sports but you can be very close to the action.
Happy on a tripod

|
| Evening, Farleton Fell |
And the P7100 in a sentence? It's a great compact – but it's still a compact.
|
|
Good results at night – but only when I shot in Manual mode and used RAW format; Night Landscape mode was nowhere near as good. |
I won the Outdoor Feature category for “On the Beaten Track,” published in Cycle magazine. This was an exploration of issues relating to mountain bikes and erosion. This was an award for writing, but here's one of my images which accompanied the feature. The judges said it was: “a great example of good, old-fashioned journalism; a timely question, strong research, balanced arguments, though-provoking quotes and a light, personal touch.” The full article is available from the CTC website.
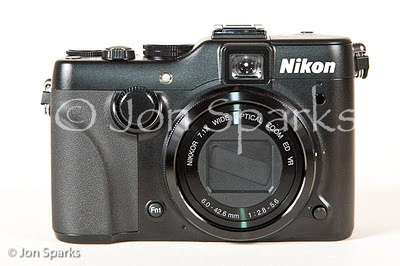
No Nikon 1 shots yet so here's a DSLR shot
from a recent trip to Menorca
Before the announcement I was pretty sceptical as leaks and rumours had already revealed (correctly) that the Nikon 1 would use a smaller sensor than existing Compact System cameras like Sony NEX-series, Panasonic G-series and Olympus Pen. However, having begun to digest the details of the new system, I’m warming to it, at least in theory.
As I’ve made clear in previous entries, I’ve yet to be totally convinced by any of the existing Compact System cameras. The cameras themselves may be smaller and lighter than a DSLR but once you start using a range of lenses this advantage is less clear-cut. And so far none of them appear to have any other significant advantage over SLRs – in fact, in areas like speed of operation and ability to directly control key functions, they seem like a step back.
The Nikon 1 system (it really is a system, with two camera bodies, four lenses and a range of accessories available at launch) looks like it should beat the CSCs on weight and bulk, and if you believe the publicity, will actually beat all existing cameras in shooting and focusing speed. Whether this really translates into an ability to capture fast action in the real world remains to be seen, but it does suggest that Nikon has managed to Think Different (to borrow an Apple slogan of a few years ago). If nothing else it should breathe some new life into a slightly stagnating camera market.
As for the sensor, well, it’s certainly small, at 13.2 x 8.8 mm. This is less than half the size of the sensors used in most enthusiast DSLRs – but it’s also more than double the size of those used in even the best compact cameras. And, very sensibly, Nikon have not tried to pack daft numbers of pixels in there: it’s a realistic 10 megapixels. Frankly even this is more than most people really need (I love the way people’s jaws drop when you point out that an HD TV screen is less than 2 megapixels).
All of which makes me very interested in these cameras. However, I can see certain aspects with which I may have issues. The most obvious is that there’s no ‘one-touch’ access to the proper shooting modes (Manual, Aperture Priority and Shutter Priority) and it’s not clear how users will adjust aperture and/or shutter-speed in these modes. How easy and responsive it is to use for proper photography remains to be seen.
Much of this will become clearer once reliable commentators like dpreview and Thom Hogan have got their hands on these cameras. In the meanwhile, here’s just a little basic info on the new system:
Camera bodies: J1 and V1 have much in common including the new sensor (Nikon is calling it ‘CX’). The more expensive V1 has an electronic viewfinder while the J1 relies on the screen alone for viewing. The V1 also has a better dust-removal system, probably reflecting an assumption that V1 users will change lenses more often. They’re stated to have exceptionally fast autofocus and image processing, allowing shooting rates of up to 60 fps. I’m still wondering what practical value this (the shooting rate not the AF) will have, but it sounds impressive.
Accessories include a suitably tiny flashgun (no idea yet whether existing Nikon Speedlights will be usable with the Nikon 1), a GPS receiver and an adapter for Nikkor SLR lenses. Plus some pointless (n)ever-ready cases and so on.
Lenses: Four lenses available at launch:
10mm f/2.8 (EFL 27mm)
10-30mm f/3.5-5.6 (EFL 27–81mm)
30-110mm f/3.8-5.6 (EFL 81–297mm)
10-100mm f/4.5-5.6 (EFL 27–270mm)
One comment: they need something wider than 27mm in the range ASAP.
Oh, and the 10-100mm lens is interesting because it has a powered zoom for fast, smooth and quiet zooming when shooting movie clips. This is one of the bugbears of shooting video with normal DSLR lenses.
At this point I can’t resist quoting what I wrote in the Nikon DSLR System Guide, published 18 months ago:
“It’s also a safe bet that someone – if not Nikon, then an independent such as Sigma – will soon be producing lenses specifically with video shooting in mind. These will feature a massive range (maybe 18–300mm), plus powered zoom or some other means to make zooming smoother.”
In fact no-one has yet produced such a lens for DSLRs (yet) but I’m sure a lot of DSLR video shooters are crying out for it and the Nikon 1 may be a pointer.
And finally: some interesting comments here from a couple of people whose views are always worth listening to: Seb Rogers and Thom Hogan.
Just out of interest, I dug out my partner's old Canon PowerShot Pro1. This was reviewed on dpreview.com in April 2004, so it's hardly surprising that image quality doesn't measure up, though I was surprised just how grainy the images were at 400 ISO, even when processed carefully in the latest Lightroom, with its excellent noise reduction. But that's barely relevant, as I never expected them to be of good enough quality for anything more than Web use or maybe very small prints. I was more interested in how the weight and handling qualities felt, so I slipped it into a small pouch and we set off on a road bike ride over the hills of the Forest of Bowland.
Now, when you're cycling for pleasure (but want to get a few shots anyway) it's especially important not to annoy your companions by keeping them waiting too much, or even asking them to ride a stretch of road more than once. Ego, I needed to be able to turn up the power, ride on ahead, stop and hoick out the camera and fire off a few shots as the peloton caught and passed me. Well, the riding wasn't too bad and the camera felt reasonably light even though its all-up weight of 640g is nudging into Compact System territory, and not that far short of a small SLR with a light lens.
However, the hoicking out did not go so smoothly. The problem is that this camera has a retractable lens, which extends when you power on and retracts when you switch off. Leaving it powered on means the lens stays in the extended position and to me it looks rather vulnerable to damage in the process of un-stowing and restowing in its case. With an SLR and its more solid lens, I'd happily leave it switched on when stowing away, making it instantly ready to shoot as I un-stow it next time. With its extending lens, power-on time on the PowerShot Pro is probably really only a second or so, but it feels like an age. I'm used to having that time to frame the shot, and it's very significant when someone's barrelling down the road towards you.
There were a lot of other handling issues, too, but some are just different ways of doing things which I could get used to in time. I do like the fact that you zoom in/out as on an SLR using a ring around the lens, rather than pushing buttons. Again, it's what I'm used to – but every experience I've had with cameras that use buttons to zoom convinces me that the way I'm used to is also the right way.
Anyway, I hardly need to go on. In digital camera terms, it's a dinosaur. If I was buying a compact camera today it would be a very different beast.
More to the point, the weight and bulk gave me insight into what it would be like riding with a compact system camera like the ones I've looked at in Part 2. And here, though there is a saving, it's not all that significant compared to the lightest SLRs. I'm beginning to think that – for my needs – Compact System Cameras, at least as they stand at the moment, fall between two stools. There are shortcomings in performance compared to SLRs, in areas like focusing speed, and I'm really not sure I'm prepared to accept these compromises in exchange for relatively minor weight savings.
Which leaves me with two alternative options. One is to go the compact route, with the advantages of getting a genuinely pocketable camera. One I wouldn’t mind getting my hands on is the Panasonic Lumix LX-5. This has the attractions of a 24mm equivalent lens with f/2 maximum aperture (at the wide end; it’s still a pretty handy f/3.3 at its 90mm longest). 24mm on a compact is rare but in a non-interchangeable-lens camera I’d regard it as essential. And a weight of just 233g does sound very enticing.
But there’s another option. My usual ‘go-to’ site for price checks, Warehouse Express, has the LX-5 at £363.99. For virtually the same money (£359) I could get a Nikon D3100 body. That would be a weight saving of over 300g compared to my D7000. It’s heavier than a Compact System Camera –but not by that much.
Even an entry-level SLR like the D3100 is an infinitely more versatile camera than any compact. Image quality is better at all levels but streets ahead at ISO 1600 and 3200. These are completely usable speeds on modern SLRs, more marginal on most of the Compact System Cameras, and ‘Web only’ on any compact I’ve looked at. It would have access to all my existing lenses and provide an extra backup to my D700 and D7000. And I’m already pretty familiar with it – I did write a book on it, after all!
Hmmmmmmmmmmmmmmmmmmm…...
|
| Schatzalp, Switzerland: nothing wrong with AF performance here! |
Of course the Nikkor has some big advantages: there’s that constant f/2.8 aperture for a start, making the viewfinder image twice as bright at the wider end of the range and four times as bright at 200mm. It’s great for shallow depth of field shots and makes it much easier to use really fast shutter speeds when shooting action.
|
| Åland Islands, Finland: this one shot has more than paid for the lens! |
The Nikkor is also a better lens for full-on action because its autofocus is a lot faster – though there are several ways around this, like prefocusing. In fact the Sigma lens has no built-in motor and so can’t autofocus at all unless there’s a motor in the camera body. This means it’s manual focus only with various Nikons including, currently, the D3100 and D5100, though it works happily with my D7000.
|
| Wadi Rum, Jordan |
The biggest drawback of all with the Sigma lens is that it only covers the smaller sensor of DX cameras, not the FX (or full-frame) of my D700. But then again, that’s why it’s possible to make it so small and light.
Since then I’ve heard of some more blatant examples from colleagues in the Outdoor Writers and Photographers Guild. Chris Townsend reports seeing a picture taken in the Pyrenees used to illustrate a feature on the Alps – and when he raised it with the editor he got the brush-off, being told ‘it looks better that way’. Hmmm, let’s see, if you were a magazine doing a feature on Mel Gibson would you use a picture of Russell Crowe because ‘it looks better that way’?*
Paddy Dillon points out that there’s a book on ‘Best Irish Walks’ but the photo on the cover is of the Langdale Pikes – which, just in case you didn’t know, are in England. He even gave a link to check it out. In this case it’s probably a mistake rather than deliberate, but it’s a pretty awful mistake.
To me, and I don’t think I’m alone, publishers who commit mistakes (including deliberate mistakes) like these are shooting themselves in the foot. I’d never buy a Baltic Guide with a fjord on the cover or an Irish Walks Guide with an English scene on the front, because I’d be saying to myself, ‘if they can’t get the cover picture right, what else have they got wrong?’ And thereby, of course, they’re hurting the poor old author, who may have had no say at all in the cover picture. It can damage their reputation as well as their royalty income.
Flippin’ heck
 There’s another thing designers and publishers do which drives me crazy. Sorry, I should say, some designers and publishers; the majority of those I’ve worked with have never inflicted this particular indignity on me. I’m talking about the all-too-common practice of ‘flipping’ pictures – reversing them left to right, in other words.
Back in the “good” old days of film, this could happen by mistake, if a careless scanner operator mounted a transparency the wrong way round. With digital images there’s no way I can think of for it to happen inadvertently; it takes a specific Photoshop command. Somebody has to do it deliberately, and I wish they wouldn't.
It’s so obvious to me that this is wrong that I find it hard to grasp that I might need to explain it. But it’s not just a prima donna thing about the integrity of my artistic vision or whatever. It offends me just as much when it happens to other people’s photos.
 I appreciate that part of my objection is on the philosophical level and that other people may not care so much, but I think there are lots of more practical reasons why flipping photos is nearly always a bad idea. (We might make an exception, or at least not get so worked up, for completely generic images). Here are just a few of them.
Photos of places. To me it’s completely disrespectful to the real mountains/landscape to print their images wrong way round. But such mucking around with geography can have real practical consequences when photos are used – as they often are, especially in outdoor magazines and books – as a guide to where to go. Come to think of it, let’s not bother about getting lefts and rights correct in our route descriptions either.
Photos of people. People are asymmetrical. Flipping the image misrepresents the person. Text. Text crops up in far more photos than you might think, from signs in the background to logos on clothing. I’m sure sreppohgarC and suahgreB won’t be totally thrilled, but more important (to me anyway) it just looks stupid.
Bikes. I shoot bikes quite a lot. BIkes have chainrings, gears and so on on the right. Disc brakes, if they have them, are on the left. There are other sorts of asymmetry too (Cannondale’s Lefty fork, for example). And yes, I have seen a photo of mine, with bikes in, flipped. It looked cringe-makingly, teeth-wincingly wrong. And most bikes have makers’ names on too; I don’t suppose eladnonnaC or egnarO would be exactly delighted.
I could go on. Oh boy, could I go on. But I think you know where I’m coming from by now. I do understand why designers might want to do this. We read L–R and this can affect the way we look at a spread – although it’s not genetically hard-wired as some people have stupidly claimed. Don’t they know that lots of cultures read R–L?
And most of the time I have a lot of respect for designers. I’ve done a bit of page layout myself (and I’ll be doing more from now on as I’ve just taken on the editorship of the OWPG’s journal Outdoor Focus). I know how much difference good design can make. But flipping pictures – especially pictures of specific people, places or products – is not good design.
*Names picked from thin air purely for purposes of illustration. Anyone who wishes to discuss whether Russell really is better-looking than Mel, please do so elsewhere.
I’ve been involved with a number of cases where images have been used inappropriately. For example, anyone who looks at the new edition of my Baltic Cruising book may wonder why there is a picture of a Norwegian fjord on the front.
I did too, when my complimentary copy arrived – this was the first I'd seen of the cover. Unlike nearly all the photos inside, the cover shot was not supplied by me. It came from an agency, and on their website was correctly captioned as Geirangerfjord. But as you know, Norway’s famous fjords are on the west coast and nowhere near the Baltic. In fact Norway doesn’t have a coastline on the Baltic at all. The book does give some space to Oslo, as many cruises to the Baltic also call there, but that's still a very long way from Geirangerfjord.
This mistake is embarrassing because my name is on the cover and some people seeing it might think I am som
 ehow responsible for the totally inappropriate picture.
It's also misleading to readers because a Baltic cruise is primarily about visiting cities like Stockholm, Helsinki, Tallinn, Rīga, Gdansk and St Petersburg (photo left). And I’m doubly annoyed because I could have supplied many pictures of exciting locations in the Baltic, many of them far better (IMHO) than what is frankly a fairly dull picture of Geirangerfjord.
I should perhaps make clear that the mistake happened at Thomas Cook publishing, and the book packaging company who worked with me on the meat of the book were also out of the loop as far as the cover went. Apparently procedures will be changed so it shouldn't happen again, but this new edition of the book is likely to remain in circulation for at least another couple of years and I will wince every time I see it.
Coincidentally, another "Baltic balls-up" also involves one of my images. This picture of a bike beside a dirt road was taken on the Åland Islands. This sold through Corbis so all the information I had at the time was that it had sold to a UK publisher... but imagine my surprise to find it turning up on the cover of a book called "Go Slow Britain". And yes, I was sad enough to check and the library image did have correct location information attached.
What can you do?
In fact the page even describes it as "New Speedlight SB-800". To the best of my knowledge it was introduced in 2003. New? I don't think so.
Come on, Nikon. If we can't rely on a manufacturer's official website to be up to date on which products are current, what are we supposed to do?
Seb highlights some specific issues, including megapixel overload – he observes that image quality from the 10-megapixel cameras in his test is clearly better than form the 12 or 14-MP cameras. He also mentions the fact that response to the shutter button is still lamentably slow on most of the cameras.
I don't know if this shutter-lag can be blamed on the inflated megapixel numbers; probably not. But there's no doubt that other aspects of most cameras' operation are slower than they should be precisely because the camera is having to process excessively large image files. I'm talking about things like cameras taking a second or two to display a review image after you've taken a shot, about cameras locking up completely for many seconds after shooting a short burst of images, and so on.
The end result of all these is that not only may the camera take half a second or whatever to respond after you press the shutter button; there will be times when it doesn't respond at all and you lose the shot completely.
Does this feel like progress? It didn't happen with film. Cheaper cameras might take a second to wind the film on but the delay would be completely consistent, and shutter lag was rarely on the same levels as it is with many digital compacts even now. The only 'lockup' would be if the battery dies (and that's the same with digital) or at then end of the film.
Are compact camera buyers simply accepting these major failings as inevitable? Or is this why the compact camera is haemorrhaging market share? And why is there no (apparent) demand for what we really want, which is a 6-megapixel camera with rapid shutter response, excellent high ISO and dynamic range performance, and good continuous shooting abilities. Oh, and a decent lens going to 24mm equivalent.
Now I'd fork out for one of those.
Take a look at 6 Megapixel. It's not new but the basic arguments are still pretty valid.
 Continuing the theme of looking for the best ‘pocket’ camera… I began with the statement that there is no such thing as a perfect camera. For me this specific search has only underlined the inescapable fact that there will always be compromises. The question is, therefore, which compromises am I prepared to accept? And which, if any, of the cameras I’ve been looking at would be fast and versatile enough to capture all of the shots accompanying this blog?
Last time I examined one of the most respected of current compacts, the Canon Powershot G12. Without ruling it out entirely, there are big deficiencies – compared to my usual SLRs – in relation to lens range (can’t go wider than 28mm-equivalent), all-round operational speed and a poor optical viewfinder. Can we do better?
As the G12 review on dpreview.com observed, this category of relatively substantial and highly-specced compacts is now facing serious competition from the new breed of compact system cameras. There are also a few (a very few!) non-interchangeable lens cameras around which have SLR-size sensors in a compact size body. I’ve had my hands on a few of these and I thought it would be quite interesting to see how they stack up for the fairly specific areas of use where I would really like something smaller than an SLR (basically when I’m out biking, climbing, or not really planning photography at all but want a ‘just in case’ camera).
I’ve already in recent posts mused about my reaction to a number of compact system cameras and large-sensor compacts; I don’t want to repeat myself (too much) so I’m going to be as brief as possible about those cameras in particular. I’ve also been discussing these issues with my colleague Chiz Dakin, who’s been facing a similar choice. Hers is perhaps more urgent, as she needs to replace her current ‘bike and climb’ camera, a Canon EOS 450D, and was interested in my opinion on the latest EOS 600D as I’ve just been doing a book on it.
Anyway, to the nitty-gritty, in no particular order.
 Sigma DP1x
I had one of these on loan for a couple of weeks thanks to Sigma’s Ray Fitchett. It didn’t get quite as much use as it might have done as it coincided with an assignment in Fort William, the UK’s Outdoor Capital, and I was shooting quite a lot of action such as mountain biking and kayaking. And I did decide very early on that it’s not really an action camera.
This is due partly to its screen-only viewing, which I am convinced does not work as well for action as a proper viewfinder. It’s also a camera which takes quite a leisurely approach to shooting. Initial shutter response is OK but it takes its time processing images thereafter. Shooting large numbers of images in quick succession is a no-no.
In fairness I don’t think this is what the camera is designed for. And I should say I do like the concept, summed up by Sigma as “pack(ing) the essence of an SLR into the body of a compact.” Key to this is its large sensor, 20.7 x 13.8mm, larger than the Four-Thirds category, and getting close to the 23.6 x 15.8mm of my Nikon D7000. To really put it into perspective, it’s about 7 times the size of the sensor in the Canon G12. It also uses Sigma’s unique Foveon sensor technology which – they claim – offers special benefits in image quality. I didn’t find the images superior to my Nikons but maybe I didn’t really spend long enough with the camera to get the best out of it.
Conclusion: as a ‘bike and climb’ camera, not for me. As a ‘just in case’ camera, would be well worth considering but I can’t afford £600 solely for a ‘just in case’ camera.
Fujifilm Finepix X100
See earlier blog for some general comments on this. As a ‘bike and climb’ camera, it’s too slow (notice the totally static nature of the image gallery on its own website?) and the fixed 35mm-equivalent lens isn’t wide enough (the DP1x is 28mm-equiv). But it’s a beautiful thing and I’d love one as a ‘just in case’ camera – although not enough to justify spending £1000 (which I haven’t got) on it.
There are a few other ‘large-sensor’ compacts around, like the Leica X1 and the seriously weird Ricoh GXR, but as I haven’t got hands-on with them I shan’t comment. Anyone interested should take a look at the makers’ own sites and also the consistently excellent dpreview.com.
As another of the most authoritative commentators around, Thom Hogan, points out, building an optical finder into a compact camera is not a trivial matter. It can be done, and the Finepix X100 shows just how well it can be done, but it comes at a price.
Which leads us on to the current hot category of mirrorless interchangeable lens cameras, also known as compact system cameras (CSCs). (I’m sad to see that the EVIL acronym (Electronic Viewfinder Interchangeable Lens) has failed to catch on). It has to be said that once you stick a zoom lens on, these cameras aren’t really pocketable, but there’s still a big saving in weight and bulk compared to more traditional DSLRs.
I’ve already looked at a couple of these in a recent post so I’ll pass over them briefly.
Sony NEX-5
With an APS-C size sensor in a tiny body, it scores highly on image quality but I’m less than impressed with handling and balance, especially as I’d want to shoot action. Frankly I’d suggest that the body is just too small, and not just because I have biggish hands but because filling almost the entire back of the camera with a screen leaves very little room for proper control buttons. I really wouldn’t fancy operating one of these with gloves on, which is a big failing for an ‘outdoor’ camera.
 Panasonic Lumix DMC-G10
Four-thirds size sensor is significantly smaller than APS-C so has more work to do on image quality (but much bigger than most compacts). It’s bigger than the NEX-5 (but only until you attach a lens) and has a decent electronic viewfinder as an alternative to the screen. And unlike the latest Lumix DMC-G3 it doesn’t have a touch-sensitive rear screen.
As Chiz commented “I wonder how the touch-screen copes with being sat half way up a snow-gully with spindrift tumbling down”. I think I know the answer to that – and I’m sure I know exactly how well I would cope with trying to operate it while wearing winter gloves! Would it survive being hurled down the icy gully in frustration? Touch-screen on an outdoor camera? No thanks!
Back to the more practically-specced G10, which Panasonic calls “the world's lightest interchangeable lens camera with a viewfinder”. An attractive claim, and its body weight of 388g is not much more than half that of my Nikon D7000. I’m not sold yet, but this is a camera I wouldn’t mind spending more time with.
Samsung NX10
I include this hesitantly as I have not handled one at all, and Samsung seems to have a pretty low profile as a camera maker, but it does look remarkably interesting. As dpreview said, “It's the smallest interchangeable lens APS-C camera we've ever tested”. And they liked it quite a lot. I must admit I’m also drawn to it because it looks more like a traditional SLR than any of the others I’ve looked at. It looks like Samsung have (hurrah) opted not to throw the baby out with the bathwater.
Focusing is reasonably fast; it’s limited with moving subjects but this appears to be true of all the non-SLR cameras I’ve looked at, and access to key controls like ISO seems to be pretty quick. They certainly want you to think it’s quick, as the camera page on Samsung’s site features a couple of cycling images. Cycling, as I know well, is not easy to photograph.
And a body weight of 353g, or an all-up weight of 499g with a slimline 30mm lens, means it’s roughly half the weight of my D7000. Interesting. I would definitely like a chance to get to know this camera a little better.
Conclusions
I said this was all about compromise, and all the cameras I’ve looked at involve major compromises. There are several that haven't completely ruled themselves out but at the same time none have convincingly shouldered their way to the front of the pack. However, I would very much like the opportunity to evaluate the Panasonic, and especially the Samsung, in some depth. Without this, and also with the background awareness that both Nikon and Canon are still lurking in the wings, it looks as if my credit card can
 rest easy for just a little while longer.
 There’s no such thing as a perfect camera.
 OK, let that sink in. There’s no camera that does all jobs equally well. The most that any of us can reasonably expect is that a camera will do all we ask of it in a particular set of circumstances. And it follows logically that we cannot judge any camera without being as clear as possible about what we would like to do with it, and how we like to work.
 Let’s take a specific example. I get to play with lots of cameras; this currently includes each new digital SLR that Nikon releases.
However, the two main cameras that I own and use regularly are the Nikon D700 and D7000. Please check out these links, and also my earlier blog entry about the D7000, if you’re not familiar with their specifications.
Anyway, both of these are excellent SLRs and I’m pretty happy with either for most shooting. I’ll go with the D700 and its larger sensor for low light shooting, or when I want to get the most from with my wide-angle lens. I’m more likely to pick the D7000 for shooting wildlife or certain kinds of action because its smaller sensor makes my longer lenses effectively longer still; using my 300mm lens gives the same result as a 450mm lens would on the D700.
I’m also likely to prefer the D7000 when I want to travel light, especially as I can also use lighter lenses which don’t cover the bigger frame area of the D700. However, it’s still a relatively chunky camera; it’s certainly not going to slip into any normal pocket.
I’d dearly love a pocketable camera for biking, climbing and as a ‘just in case’ camera when I’m not really out to take photos at all. And of course people will say, what’s the problem? There are hundreds of compact cameras out there that will slip into a pocket.
Well, yes, there are. But.
In the section on cameras in our forthcoming book, Outdoor Photography, (which has just gone to press), Chiz Dakin and I identify a few key factors when considering a compact camera. They may not be deal-breakers for everyone, but we certainly think they should at least be taken into account. I’ll summarise briefly here: for more detail see the book (due date 15th Aug; it will be available as an ebook as well as hard copy).
1: RAW Shooting.
It’s second nature to me to shoot RAW and I’d have no hesitation in ruling out any camera that can’t do this.
2: Lens range.
Many compacts still go no wider than about 35mm equivalent; a fair number go to 28mm, a few reach 24 or 25mm. I can tolerate 28mm (an 18mm lens on my D7000 is 27mm-equivalent), but would prefer interchangeable lenses so I’d at least have the option to go wider.
3: Sensor size. (i.e. physical dimensions, NOT number of megapixels)
Typical compacts have much smaller sensors than SLRs. If the lens is good they’ll probably still produce decent results at moderate ISO ratings but start to struggle at higher speeds (typically 800 and above), and can’t match a big sensor for dynamic range, which is really important for a lot of outdoor shooting.
4: Speed of response.
This used to be a major weakness of compacts in general compared to SLRs. They've got much better but still aren't quite as speedy all-round.
5. Viewfinder.
I want one! I’ve sketched out my feelings about screen-only cameras in a recent blog, and I don’t think this is just a prejudice that I would overcome if I spent more time actually shooting by screen. (I actually do spend quite a bit of time in Live View, e.g. when shooting macro subjects, so I know something about the failings of even the best screens in bright sunlight).
With these factors in mind, let’s look at what’s generally regarded as one of the best conventional compacts, Canon’s Powershot G12. This is a 10-megapixel camera like the previous G11: refreshingly, Canon actually reduced the megapixel count over the G10, which I cheered about in a blog last year. This is a good move for all round image quality, especially from a smaller sensor like the G12’s 1/1.7" CCD; Canon claims it gives the G11/G12 a two-stop advantage in low-light  shooting.
Running through the tick-list:
1: RAW Shooting. Yes, and supported by Adobe Lightroom (otherwise it would be no good to me)
2: Lens range. 28–140mm equivalent, quite comparable to the 18–105 lens I use regularly on my Nikon D7000.
3: Sensor size. 1/1.7" is fairly large by typical compact standards but still less than one tenth the imaging area of the APS-C sensor in my D7000. (For more on sensor sizes see here). As expected, this limits its performance especially at high ISO ratings. The test on the excellent dpreview site gives me a chance to compare outcomes at any ISO rating directly with the D7000 (and a host of other cameras). By 1600 ISO the difference is very clear – but the G12 beats many other cameras with more megapixels.
4: Speed of response. As dpreview observes, the G12 has a rapid shutter response, though not quite up to the best DSLRs. For critical action photography this could be a problem, though I probably wouldn’t envisage using it for really serious action shoots. More of an issue would be its generally slow behaviour in other respects, such as taking about 1.5 secs to show a review image after shooting. (On my D7000 the delay is barely noticeable).
5. Viewfinder. Ah. The G12 does have an optical finder, but it’s not great. Low magnification, only approximate framing and a bit dim except in bright sunlight. Of course bright sunlight is where shooting with the screen is most difficult, so there’s some balance there, but it’s still something I’d have to take seriously.
So, overall, not a bad result, and I’m sure the G12 will satisfy many users who don’t need the option to fit an ultra-wide lens or to shoot high-speed action. But at the same time it’s less pocketable than many compact cameras; in fact, in size and weight terms it’s more like some of the smaller compact system cameras.
Including lens the G12 weighs in at 355g. That’s light compared to my Nikon D7000 (just over double that for the body alone) but you can get a Sony NEX-5 with the same size sensor as the D7000 that’s just 287g (body only). The 16mm ‘pancake’ lens takes the Sony to 354g, and gives a wider view (24mm equivalent), albeit non-zoomable.
Conclusion? Well, the G12 doesn’t do badly. If somebody gave me one I’m sure I’d use it regularly on bike rides and when climbing and I’m sure I’d get some excellent results. But if it’s my own money I’m spending, the G12 is nearly £400. It’s the same price, in fact as a Nikon D3100 body.
A D3100 with 18–55mm lens would be only a little more expensive, and would give me much faster shooting, better quality especially in low light, and a proper viewfinder. But even this combination, which is about as light as it gets in conventional SLR terms, still weighs in at around 660g and definitely isn’t pocketable.
I might as well save my money and stick with the D7000 and 18-105 lens that I already have. By now I seem to be going around in circles, but the G12 isn’t the only alternative to a conventional SLR. More on this very soon...
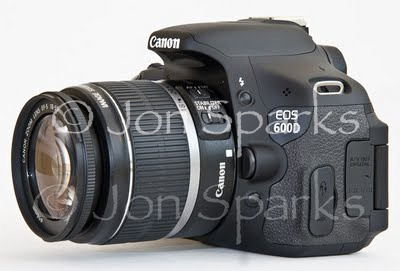
As I mentioned the other day, I’ve spent the last couple of months working intensively first with the Canon EOS 600D and then the Nikon D5100, preparing Expanded Guides to both of them. This came about purely by chance, thanks to the vagaries of camera manufacturer's product cycles, plus Ammonite having a small hiatus in authorship of the Canon books.
These cameras are direct competitors, both positioned one step up from the entry point of their ranges. It's been fascinating to have such a direct comparison, and also to have a chance to really get to know a Canon after 20 years as a Nikon user, the last seven with a range of digital SLRs.
Well, if you’re expecting any grand statements, let alone a Road-to-Damascus moment where I realise I need to change to Canon… don’t bother reading any further. In fact my firmest conclusion is that neither of these cameras is ideal for me. Let me enlarge on that briefly before looking at them side-by-side.
I could list various ‘pro’ features that these cameras lack, suggest that the maximum shooting rate isn’t fast enough for serious action, and so on, but for me the biggest frustration about these cameras is the fact that, in the name of making things simpler, they make some basic operations more complicated. This is mostly down to the fact that they only have one command dial and only one screen. Both my day-to-day DSLRs, the Nikon D700 and D7000, have two command dials and a secondary LCD on the top plate which is used for shooting settings.
The lack of a second command dial is most obvious when shooting in Manual mode. I know that the D5100 and 600D probably aren’t aimed at photographers who’ll use Manual all that much, but I’m talking about my personal reaction here. Though it also occurs to me, if you make Manual harder to use, people will use it less. And then someone marketing twerp'll say “see, there’s no demand for it”.
Using Manual on the the D700 and D7000 (and higher Canon models too), one dial controls shutter speed and one controls aperture. Direct. Simple, Fast. Intuitive. On the the D5100 and 600D the single command dial controls shutter speed; you have to press another button before you can use the same dial to change the aperture. It’s not that hard once you get used to it, but it just isn’t as slick, and you definitely can’t adjust aperture and shutter speed simultaneously.
Changing settings on a dedicated LCD is instant, whereas on both my ‘test’ cameras you have to press an extra button just to get to a screen where you can change things, and then scroll around that screen to get to the specific setting you want. Again it slows things down and to me would seem to discourage users from getting involved with the full range of options that the the D5100 and 600D both, very capably, provide.
The other specific issue I’d mention is changing ISO. The EOS 600D does have a dedicated ISO button, but it only takes you to a menu-style screen rather than one-touch ISO adjustment with the command dial. You certainly can’t set ISO with the camera to your eye. The D5100 doesn’t even have an ISO button, unless you re-program the Fn button to act as one. I’d certainly do this if I were using the camera long-term (in fact I’ve already posted it back).
This is regrettable because being able to change the ISO at will is one of the greatest advantages of digital over the (good?) old days of film. With film, once you’d loaded Velvia or whatever, you only had two fundamental camera controls, shutter and aperture. With digital you have a third leg to the tripod, ISO. Anything, however slight, that discourages people from making full use of all three controls is to be regretted.
Anyway, enough of my gripes about common failings of both cameras. What about how they fare when they go head to head?
Starting with first impressions: the Nikon is better-looking. I don’t think it’s all down to that smiley red flash on the hand grip either. I just prefer the slightly less rounded styling.
More importantly, the Nikon feels better in the hand. It definitely has a more solid feel to it, though that’s not because it’s heavier; in fact according to makers’ own figures the D5100 is 10 grams lighter. The D5100’s hand-grip is more positive too (at least for my hands, which are on the large side). Personally I prefer Nikon’s conventionally-shaped but well-sized and positive control buttons to Canon’s odd-shaped cluster on the back of the camera. I think design has got the better of function here.
In use, both are very competent cameras which can deliver excellent results in most conditions. Most of the time there’s very little to choose between them. If you want to drill down to the very last minutia then take a look at the reviews on the always-excellent dpreview: the EOS 600D is here and the Nikon D5100 is here.
Looking at the photos I took with the two cameras there’s still little to differentiate them. I don’t think there’s a killer feature that would make anyone switch from one brand to the other. However, there are some operational specifics that might swing it for you in the (unlikely?) event that you’re a discerning buyer who knows a good deal about photography but isn’t tied to either system by existing lenses. In no particular order:
The EOS 600D has a depth of field preview button; the D5100 doesn’t. On 35mm cameras this would have been a big difference; on digital it’s less significant because you can assess depth of field either through image playback or through Live View (see below). Still, point to Slytherin.
Sticking with depth of field, the EOS 600D has Canon’s A-DEP mode, which aims to set both focusing distance and aperture to ensure everything appears sharp. It’s a nice feature, especially for landscapes, but it’s more limited than they would like to admit. it assesses the depth of field required by using the 9 focus points. If there are nearer or more distant objects which don’t happen to line up with any of the focus points these will not be taken into account, and in the average landscape shot it’s very possible for there to be stuff in the frame at closer distances than any of the focus points are covering. Half a point to Slytherin.
On the other hand, the D5100 has a new HDR (high dynamic range) mode. This works by combining two separate shots with different exposures, one for the shadows and one for the highlights. And it does work; I took several shots with it that would have been impossible in a single exposure any other way. It still has limitations – only two source images, maximum exposure difference 3Ev – but still, a handy innovation on occasion. Point to Gryffindor.
If you’ve been reading my previous posts you’ll know I’ve gone from being a Live View sceptic to using it by choice for certain subjects. Both cameras have clear, bright, articulating screens which are a real benefit when using Live View. Both have the hinge on the left side, unlike the earlier Nikon D5000 which had it at the bottom – a fundamentally dumb thing to do when Live View is often at its best with the camera on a tripod (and movie shooting even more so). But there are some pretty big differences in the way Live View operates.
The Canon gives you an immediate and very clear depth of field preview in Live View – just press the button. The Nikon also gives you a preview but it works in a much quirkier and less intuitive way – I’ve already mentioned this in a previous post. Canon’s ‘final image simulation’ puts its nose in front.
However, the Nikon has much better autofocus in Live View (and movie shooting). It’s still not great for moving subjects and for really fast action you can forget it – but it’s well ahead of the Canon. For Live View overall, call it a dead heat. For movies, because of its superior autofocus, the D5100 surges ahead – but if you’re really serious about shooting movies with a DSLR, get a D7000.
OK, those are the main things that come to mind. Anything else? The D5100 has an extensive Retouch menu and also a new Effects position on the mode dial which includes options like Color sketch and Selective color. To me these are gimmicks pure and simple, and if I wanted to mess my photos about I’d do it in Photoshop anyway – but if you want to do this sort of thing in-camera, the Nikon has far more to offer. Point to Gryffindor? Nope, this is my House Cup, and I’m not wasting points on this stuff.
The Nikon also has a wider set of Scene modes. Both cameras have Portrait, Landscape, Close up, Sports and Night portrait, but Nikon also has Child, Night landscape, Party/indoor, Beach/snow, Sunset, Dusk/dawn, Pet portrait, Candlelight, Blossom, Autumn colours and Food. I’d love to know how much use these modes (hidden behind the SCENE positron on the mode dial) actually get from the average owner, but still, point to Gryffindor. On the other hand, Canon’s Creative Auto mode offers a flexibility (and therefore a potential learning experience) that none of Nikon’s Auto and Scene modes can quite manage. Point and a half to Slytherin.
Finally, the EOS 600D has one excellent feature, even though I’m willing to bet at least 95% of owners will never use it: wireless flash control. This is slightly ironic, as it was Nikon who pioneered wireless flash, but you have to step up to the D7000 or higher (or the D90, still listed though slightly greying at the temples) to be able to use the built-in flash as a commander unit in a wireless setup. The D5100 can work within a wireless setup but only if it’s physically connected to a commander-capable Speedlight. The EOS 600D even has an ‘Easy Wireless mode’, though it didn’t seem noticeably easier than standard wireless operation. Still, big fat point to Slytherin.
OK, totting up the points time. On the operational features that I’ve actually scored, I see that Slytherin – sorry, Canon – comes out ahead. However, I think the Nikon’s better feel in the hand and tidier control layout might even things up. Anyway, it’s a pretty close-run thing overall and anyone who’s in the market for this kind of camera should be pretty pleased with either.
But, in the best reality show traditions, “there can only be one winner”. And the tie-break question is: what abbreviation do they use for Shutter Priority mode? Nikon’s is S. Canon’s is Tv. They’ve been doing it for donkey’s years but it is and always has been indefensibly daft.
Nikon win.
*I suppose I should have mentioned that the 600D has a higher megapixel number, but how many times to I have to say that really means nothing?
Last time I talked about the pros and cons – as I see them – of the viewfinder and Live View when shooting with a DSLR, and suggested circumstances where one or the other wins out.
Well, making the best of the existing DSLR design is one thing, but I did conclude that it’s a fudge. Can we do better? What’s the future for camera design? I’m not an industry insider and I don’t know what the boffins may have up their sleeves. But I do have four decades of experience with a lot of different cameras and I do recognise that the basic design of the SLR is not the final word.
The SLR was and is a brilliant concept. It’s one of the outstanding design and engineering achievements of the 20th century. But in the 21st century, is there a way to keep the best features of the SLR while shedding some of its limitations?
I think there is and I think there are some cameras around right now which at least begin to point the way. But I also think that the industry may be heading up one or two blind alleys, or short-term detours, in swapping the inherent limitations of the SLR design for the equally inescapable limitations of screen-only viewing.
I’ve no problem at all with the basic concept of the mirrorless camera. The mirror is arguably the fundamental weakness of the SLR design. First, the mirror box creates a large void at the heart of the camera, inevitably increasing bulk, especially the depth of the camera (just compare even the most compact SLRs with, say, a Panasonic Lumix G10). This creates a few problems for lens designers.
The reflex mirror has other issues. However well-damped, it’s noisy and creates vibrations. The need for the mirror to flip up and down for each shot must limit shooting speed (it’s impressive that the best SLRs can shoot as fast as they do; the Nikon D3s can shoot full-frame images at 9 frames per second). And we’ve already mentioned that it creates an inherent risk of inaccuracy in the focusing system.
However.
I’ve tried large-sensor compacts like Sigma’s DP2, and I’ve had brief hands-on sessions with new-generation mirrorless system cameras like the Sony NEX-5. And though these encounters have been brief compared to my experience of SLRs, they’ve been enough to strengthen me in one conviction:
Eye-level viewing is better.
Put it another way: I would never want to be reliant on a camera with screen-only viewing. There are several handling issues which, as far as I can see, are fundamental to the use of the screen and can’t be overcome by technology. Handling is more awkward whatever lens you use, and this goes from being a minor issue with wide-angle lenses to being virtually impossible with serious telephoto glass.
So, while there is a place for cameras like the Sony NEX-5 – and it’s great to see more of a focus on sensor size than on megapixel numbers – they will never replace cameras with eye-level viewing for serious users who want intuitive handling with a wide range of lenses. Which is why I feel that, for the long-term future of system cameras, screen-only viewing is a dead-end. In my more provocative moods I’d even say it was a dead-end for all cameras.
But if eye-level viewing is essential, where does that leave us? I’ve used cameras with 35mm-compact-style direct-vision viewfinders, like the rather lovely Mamiya 7 which I had for several years. Shooting with the 43mm wide-angle lens required a separate viewfinder which slotted in to the camera’s hot-shoe for framing the shot – BUT if I needed to focus precisely (rather than relying on the distance scale plus depth of field) I still had to use the camera’s main viewfinder. Great camera for landscapes, not so good for anything else. Don’t want to go back there!
What we want is eye-level viewing with 100% frame coverage, no noisy mirror, no concerns about focusing accuracy – and that SLR sense of being directly connected to what’s in front of the lens. And I don’t think we’re all that far off.
Obviously this wish-list means we’ll need some sort of electronic viewfinder; these used to be awful but they keep getting better. All the required technology probably already exists but hasn’t yet made it to market in a single camera, at least in a totally convincing form. But there are a couple of cameras out there right now which may point the way.
One is Fujifilm’s Finepix X100. I had a brief play with this; it's a thing of beauty, and I was very impressed with the quality of its ‘hybrid’ viewfinder. What hybrid means is that it’s switchable from direct-vision to electronic viewing, both clear and bright. Even in direct-vision mode you have access to a lot of useful ‘heads-up’ displays. However, it’s not a camera I’ll be buying. At nearly a grand for a fixed-lens camera it’s far from affordable – even if I hadn’t read some serious criticisms of some of its functionality on the dpreview site. Nevertheless, it’s one of the best electronic viewfinders I’ve seen – though no doubt that’s helped considerably by looking through an f/2 lens! The EVF is now very close to being as good as a top-notch reflex finder in nearly all conditions.
The other ‘interesting’ camera, or rather cameras, is Sony’s SLT series. Again I’ve only had brief hands-on contact with the SLT-A55, but I found a lot to like about it. Although it looks a lot like a conventional SLR, and has the excellent handling qualities that go with it, it is different. The mirror is translucent, reflecting about 30% of light up to a focusing sensor in the base of the pentaprism, where normal SLRs have them. The remaining 70% of light goes straight on through to the image sensor, which provides a Live View feed either to the rear screen or to a very crisp and clear EVF, which is what enables it to handle like a standard SLR.
The mirror doesn’t move at all in normal shooting (though it can be raised to allow cleaning of the low-pass filter). This makes the camera quieter and less subject to vibration. It also means there’s no interruption in focusing; the focus sensor is operational the whole time. This gives the camera a real advantage for tracking moving subjects.
Although the A-55 doesn't have the build quality or some of the other features you’d expect in a pro camera (and Sony only brands it ‘intermediate’), it does shoot at an impressive 10fps – though not indefinitely, as writing data to the memory card becomes a bottleneck. This speed and full-time focus tracking has prompted a few professional sports photographers to switch to Sony.
Again, it’s not a camera that I’ll be buying. I haven’t been overly impressed with the build quality or the firmware (menus and control interface) of other Sony DSLRs I’ve used, and as I don’t shoot superfast action all that often its particular advantages don’t come close to a compelling reason to ditch my Nikon cameras and lenses. But I do think anyone currently in the market for a system camera and not constrained by existing investment in lenses and accessories should take a long look at the SLT models.
More importantly, I think this is a real signpost to the future, showing one possible way to retain the essential (for me) eye-level viewing while still exploiting the undeniable benefits of Live View. And this is really only Sony’s first attempt at this type of camera. The next generation of SLTs may be very interesting indeed. It’s a challenge that Nikon and Canon are going to have to meet, and I hope they do so soon.
First, apologies for such a long gap since my last blog post. Variety of reasons, including deep immersion in two Expanded Guides in quick succession (and I’ll come back to that soon, since they’ve given me a direct comparison of two major DSLR contenders). But you don’t need me bleating on about how busy I’ve been. I’ve also been trying to beef up my presence on Facebook and Twitter. But never mind that, let’s just get back to business.
One of the issues that has been very obvious working with the latest DSLRs is the tension that now exists between using the traditional viewfinder and using the LCD screen. I’ve been thinking quite a lot about this and what it may mean for the future of camera design. But let’s start at the beginning.
I cut my teeth on traditional 35mm SLRs, starting with a Zenith E that was probably assembled from spare parts lying around in a Russian tractor factory. Sorry, that’s unfair, it might look like a total clunker today but at the time it really felt like a ‘grown-up’ camera – and I still reckon that Helios lens wasn’t a bad performer. I went on through Yashicas and Contaxes before settling on Nikon 20 years ago in the shape of the classic FM2 – the apotheosis of the all-mechanical SLR. In fact I still have an FM2 at the back of the cupboard, though these days it only gets used on workshops for demonstrating a few things (it’s quite handy being able to open the back!). What all these cameras have in common is reflex viewing. And this is something they share with all the digital SLRs I’ve owned (Nikon D70, D2x, D700 and D7000) and the dozens that I’ve used.
Reflex viewing is often described as ‘through the lens’ viewing but this isn’t strictly true. On an SLR you don’t look through the lens. You actually view the image projected by the lens onto the focusing screen. You can see this screen if you take the lens off your DSLR and look up into the base of the pentaprism. The proof, if you like, that you aren’t simply looking through the lens (as if through a window) is that your eye never has to refocus on objects at different distances; the camera and lens do that instead.
Nevertheless, reflex viewing does feel very much like looking through a window, giving a sense of direct connection to the world. And this is the way that I’ve been used to working, with nearly every camera I’ve used for (OMG) almost four decades… ‘Through the lens’ (aka ‘eye-level’) viewing feels right and natural to me. And then the first digital cameras started appearing. Digital SLRs like the classic Nikon D1 (still, and possibly forever, the most significant digital camera ever made) of course relied on reflex viewing but we soon became accustomed to seeing people with digital compacts using the screen to frame their shots instead. In the early days this was making the best of a bad job; the screens were small and poor quality, but the viewfinders were usually even worse.
Now, of course, most digital compacts have much bigger and better screens and there isn’t room for a viewfinder at all. In fact there’s a whole generation of digital camera users for whom screen viewing is entirely the norm; they don’t miss the viewfinder at all. In fact if they trade up to a DSLR they have to get used to the completely new experience of raising the camera to their eye.
Yes, I know, most DSLRs now have Live View. But this wasn’t always true. Taking NIkon, for example (that being the range I know best), the first SLRs to have Live View were the D3 and D300, launched in August 2007 – less than four years ago. The D60 (Jan 08) and even the D3000 (Aug 09) didn’t have it; only since the arrival of the D3100 (late 2010) is it present across the entire range. When I first saw SLRs with Live View, I didn’t get it. To my nasty suspicious mind, this feature was merely pandering to people who’d got used to screen viewing on compact cameras and couldn’t adapt to ‘proper’ cameras.
However, because I had to write about every feature of these cameras, I couldn’t just ignore Live View, and once I started using it I began to see some genuine advantages. I think it’s worth listing the main ones.
1: 100% viewing.
It’s a lamentable fact that the majority of DSLR viewfinders do not show you 100% of the image. It’s much more usual to have around 95% linear coverage, meaning you only see 90% of the picture area. This may be a hangover from film days, when commercial printing often cropped the edges of the image (and slide mounts masked it slightly), but in digital SLRs there’s no such excuse. However, equipping every camera with a 100% viewfinder would add significantly to bulk, weight and cost. I wouldn’t like to state as a fact that every camera with Live View has 100% image coverage, but every DSLR that I’ve handled does. This means that, as far as framing is concerned, Live View on most cameras delivers ‘what you see is what you get’ and the viewfinder doesn’t.
2: Impeccable focusing.
In ‘normal’ use, i.e. using the viewfinder, DSLRs focus using sensors in the plane of the focusing screen, so they’re reliant on the image relayed by the reflex mirror. This is fine as long as the mirror is perfectly aligned and the image sensor is exactly where it should be. (So that light from the lens has to travel exactly the same distance to the image sensor, when the mirror flips up, as it did to the focusing sensor beforehand). The trouble is, there are lots of reports of cameras with some small misalignment somewhere – just enough to throw off the accuracy of focusing by a tiny amount. It’s usually not enough to be noticeable but can become evident at those times when there’s least margin for error, i.e. using extreme long lenses or in extreme close-up work. Live View focusing, on the other hand, works directly off the main image sensor so there’s no possibility of any such mismatch. In most cases you can also position the focus point exactly where you want it, so you can focus on exactly the right part of the subject – right down to a single eyelash if you’re so inclined. Of course, when you’re talking about this level of precision, any movement in either the camera or the subject is going to wipe it out, so this mostly applies to static subjects and a camera on a tripod. (It’s also the case that Live View focusing is a lot slower, but we’re focusing on its strengths here).
3: Depth of field preview.
Of course many SLRs have a traditional depth of field preview, whereby you press a button and the lens stops down to the actual shooting aperture. And we all know the limitations of this; it darkens the image, making it increasingly hard to assess what’s truly sharp and what isn’t quite pin.
Well, Live View, on some cameras at least, offers an alternative. You’ll have to check exactly how it applies on your DSLR. Let’s take the two cameras I’ve been working with recently. The Nikon D5100 stops down when you enter Live View, setting the lens at whatever aperture was dialled in beforehand. However, if you turn the dial to change the aperture while you’re in LV, it doesn’t update immediately, only when you take a shot.
Got that? Say you’ve set f/11 before entering LV. You look at the LV image, decide you need more depth of field and change the setting to f/22. The screen view doesn't change right away, but when you take the shot it’s taken at f/22 and when LV resumes you’re now viewing at f/22. You’ve got to say this is a quirk in Nikon’s delivery of Live View, and you’ve got to say that in this case Canon’s implementation is more logical, as – at least on the EOS 600D I’ve recently been using – LV updates continually to reflect changes in aperture, providing a full-time, genuinely live, depth of field preview. In fact Canon touts its ‘Final Image Simulation’ as giving you an accurate preview on brightness and colour balance too. Points to Canon on that count (for my overall verdict on the two cameras, watch this space).
OK, that’s at least three big reasons why Live View might be preferable over the viewfinder, in some circumstances anyway. But there are also some very significant downsides.
1: Handling.
The ‘praying mantis’ posture is now characteristic of compact camera users. The problem is, holding the camera away from you is inherently less stable than holding it to your eye. This is true with lightweight compacts and even more so with heavier, bulkier SLRs. This greatly increases the incidence of camera shake. Yes, we now have the wonders of Image Stabilisation/Vibration Reduction or whatever the other makers call it, but in a lot of cases this extra tech is doing little more than cancel out the extra wobbliness due to a less stable way of holding the camera. In other words, it takes us (more or less) back to square one.
2: Speed.
On SLRs Live View is significantly slower than viewfinder shooting, for at least two main reasons. One is that focusing off the main sensor, though accurate, is also much slower than using a dedicated focusing sensor. The second is that – at best – the shutter has to close to end Live View and then open again to take the shot. This inevitably means a delay; you can hear it. If you use a continuous shooting mode, the mirror usually stays up between shots. This means that neither the screen nor the viewfinder is any use, so how do you follow a moving subject? The clear upshot of this is that Live View is seriously hamstrung when it comes to shooting moving subjects.
3: Visibility.
Screens have got better, but even the best of them are hard to see clearly in bright sunlight. You can get screen shades and even viewing loupes which at least partly alleviate this problem, but it’s extra clutter and extra faff. They’re a very good idea if you’re doing, say, sustained macro shooting on a tripod within a limited area, but less so if you’re moving around a lot and even less convenient if you’re switching regularly between Live View and viewfinder shooting.
4. Connection.
Live View gives you a different kind of view. I know that I observed early on that the viewfinder doesn’t deliver a genuine through the lens view; you are looking at the focusing screen. However, it feels direct; it feels connected to the world. By putting the camera right up to your eye it takes over your visual field and, in a strange way, almost disappears. When you use the screen, holding the camera out in front of you, it can seem more like a barrier between you and the world. To me, the Live View view is ultimately more detached and less immediate than the reflex view.
I’m aware that this last point is more subjective, but the other three are clear objective limitations to the usefulness of Live View on a digital SLR. It’s possible, in fact probable, that technology will improve matters on at least the speed and visibility counts, but there’s not going to be much that can be done about handling. The benefits of larger sensors in SLRs (and other system cameras) are undeniable, but they also mean that lenses are always going to be physically a certain size. With longer lenses in particular, handling in Live View is fundamentally unwieldy. This is not just an SLR thing. I’ve tried one of Sony’s NEX cameras (mirrorless, full-time Live View) with an 80-200mm lens and it was barely the right side of completely impractical. I am pretty certain that 200mm is about the limit for Live View handling, other than on a tripod.
So… we have three pretty big positives for Live View, and three pretty big negatives against it, plus a fourth on a more personal level. Which is why I opened this piece by referring to a tension between using the viewfinder and using the screen.
So how do we resolve this? Right now, assuming we are committed SLR users, the answer is that we use each approach when it’s most appropriate.
Viewfinder:
whenever speed is important, whether it’s a need for the focusing system to track moving subjects or just our own ability to react quickly;
whenever we’re using longer and/or heavier lenses, except on a tripod;
whenever we’re concerned about camera-shake, i.e. hand-holding at slower shutter speeds;
whenever we want that intimate sense of filling our personal field of view with the image.
Live View:
whenever we want to frame a shot carefully (probably on a tripod) using 100% of the image area. (This will not apply with pro-spec DSLRs which give 100% coverage in the viewfinder too);
whenever we want ultra-precise focusing on static subjects;
whenever we want a clear and readable depth of field preview.
This is certainly where I’m at right now. I still regard viewfinder shooting as normal but I’ve long ceased looking on Live View as a mere gimmick and I now use it routinely in situations where it shines, especially for macro photography.
But this is a compromise, isn’t it? We now have cameras with two fundamentally different, and arguably incompatible viewing systems, shoe-horned into one body. This can’t be the best of all possible worlds. What might the answer be and what are camera makers doing about it? Well, that’s what I’ll turn to in the next thrilling installment.
Up to now Aperture has been rather overshadowed by Adobe Lightroom though both apps do broadly the same job. Here's what I'm saying about them in the forthcoming 2nd edition of Outdoor Photography...
"Both programmes integrate their organising (Library) and editing (Develop) functions so that you can move seamlessly from viewing a page of thumbnails to tweaking the colours of one or two of them. Essentially both programs show you a preview of the image, which changes to reflect the adjustments you’re making. However, they don’t create a new file then and there, but merely record the adjustments you’ve made. As and when you need to export a JPEG for the web or send a TIFF to a high-end publisher, the adjustments are applied to the exported file.
"Once you get your head round it, it’s hard to imagine working any other way. There’s no interruption to the workflow: you just move smoothly from Library to Develop and back again. And because you don’t create JPEG or TIFF versions until you need them, it saves on hard disk space too. In fact these apps can export directly to the web (and they now integrate with sites like Facebook and Flickr) so you can post images online without leaving a JPEG copy on your own system at all.
"Actually, iPhoto works in a similar way, though its editing tools are far less sophisticated."
I've been using Lightroom for several years now. I originally chose it over Aperture mainly because it ran faster on the Mac I was using then. I've run later versions of Aperture in demo mode and they run fine. I think any Mac with an Intel processor should handle it just fine. And you will need an Intel Mac because you have to update the OS to use the App Store. Snow Leopard version 10.6.6 to be precise. Snow Leopard doesn't run on pre-Intel Macs.
Given that I'm already using Lightroom for nearly all my photo handling and editing work, I don't see myself changing to Aperture, but for any photographer who's not already committed to Lightroom it makes a lot of sense to look at Aperture. I think above all it should appeal to anyone currently using iPhoto or Photoshop Elements and finding them just a bit limiting.
And if you're still using Photoshop AND a separate cataloguing app, it really is time to save yourself the hassle–and the disk space!
If you're not using a Mac then Aperture's no good to you but I wonder if it will put pressure on the pricing of Lightroom, so keep your eyes open.
 It's dangerous to say 'Finished' till the Send button has been well and truly pressed, but I do believe my half of the work on Outdoor Photography (new edition) for Cicerone Press is now complete. The text is complete and correctly formatted, all the captions have been inserted at the right spots and all the picture files numbered accordingly.I’m just waiting to see if there are any last minute corrections from my co-author Chiz Dakin, and then we can say it’s a wrap.
Obviously it will be some time before you can actually read the book, either in print or as an e-book; it now has to be edited and designed and believe me, those are not trivial pursuits. Watch this space for updates.
I started out with the idea that it would be possible to hang everything on the framework of the original Outdoor Photography and just add in new bits here and there to allow for the fact that digital was in its infancy when the first book appeared. Of course it’s not been like that at all. Although core ideas about what photography is have not changed that much, the technology does have a pretty fundamental effect on the way we approach it. And the outdoors has changed too. I don’t believe I’d even heard of kite-surfing last time, let alone photographed it.
So the new book will be bigger and better, with not only a lot of content specific to digital photography but a lot more solid stuff related to specific sports and activities too. Thanks to Jonathan Williams at Cicerone for an excellent editorial steer in the early stages and of course to Chiz for lots of hard work, good ideas and great photos.
And now it’s time for a pint.
PS I’ve just agreed to run a couple of workshops on Introduction to Digital Outdoor Photography at the Keswick Mountain Festival, under the auspices of NASOP, The National Academy for Sport & Outdoor Photography. Dates probably 18th and 20th of May. Again, more details will follow.
]]>
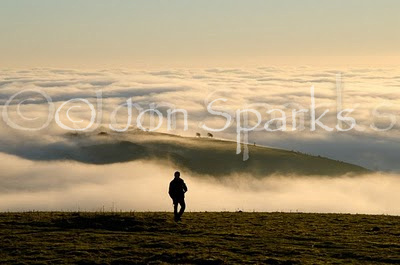
Landscape photography is a nice, slow, contemplative business, isn't it? Well, maybe... sometimes. And then again there are times like last night. I'd spent much of the day delivering greetings cards and postcards to outlets across Cumbria. I'd had clear skies for most of the day but drove into thick fog between Ulverston and Barrow. The fog was clearly spreading as I made my way down to Kents Bank for the last drop of the day, but I had a hunch that I'd get above it on Hampsfell, and I was right. If you don't know Hampsfell, you should; it's one of the lovely limestone ridges around the southern fringe of the Lake District, with wide views over Morecambe Bay in one direction and the high Lakeland fells in the other. I had a walk there in Car-Free Cumbria (hard to get now, contact me if you'd like a copy).
Yesterday I parked near the golf club for the quickest access and within a couple of minutes walking I was starting to emerge above the clouds. But here's the thing. It was almost 3.30 and I knew sunset would be at 4.30 (a few minutes later than almanac time because I was a couple of hundred metres above sea level). I had just an hour and there were photo opportunities in every direction.
Clearly it was going to pay to be fairly quick and decisive with my shooting decisions. I knew that I only had to turn the Mode Dial on my Nikon D7000 to U1 and all the basic settings would be what I want for landscape; I'd then only need to adjust aperture or shutter speed and maybe ISO. The basic problem still remained: every time I stopped to take a shot at Point A I was losing the chance to take a shot at Point B.
Decisions, decisions. The sun was getting low and its acute angle meant the light was changing quickly, and the fog level was fluctuating too. When the light and/or weather is really spectacular there's a fundamental tension between the shots that you can see right in front of you and the (potentially even better?) opportunities that might be waiting just over the hill.
I spent about twenty minutes on Fell End, not right on top but moving around the shoulders of the hill where the ground is steeper. I even took a few shots of someone playing golf (I know, I know, but the light was amazing). In that time the fog dropped a little and the continuation ridge to the south appeared for a few minutes (the only name on the map is Wart Barrow). I even got lucky enough to get a couple of shots with a walker in the foreground.
All the time, though, I knew I wanted to get to the top of Hampsfell proper – about a kilometre to the north – before the sun went down. Not because of summit fever but because I knew from previous visits that it has some lovely limestone outcrops and great views over the Vale of Cartmel to the Coniston Fells. By about ten to four I knew I had to move, and fairly quickly to, to get there in time. I took this at a brisk walk, but couldn't resist stopping for a few quick shots along the way (posing sheep above the clouds, that sort of thing).
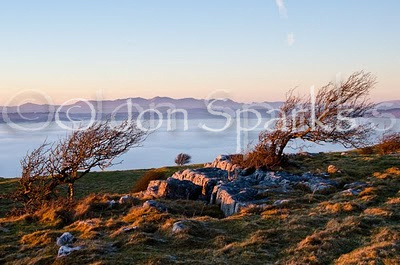
By the time I got to the limestone edges it was 4.15. This didn't leave me much time at all to find the best position. The second photo here was taken (according to metadata) at 16.19.35. Within a few more minutes the light on the foreground was losing its edge as the sun almost touched the cloud layer. As it was turning the clouds pink I thought there might be one more shot and I could see a nice lone tree that might make a nice foreground for it–but I had to run to get there before the sun went down.
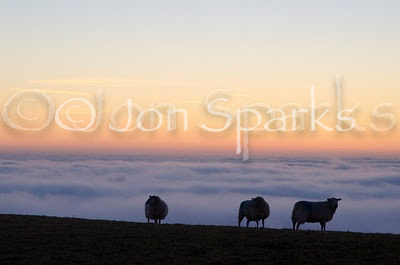
And that seemed like it was it. Except that as I walked back over Fell End the mist began to creep up and over the ridge and I got a whole series of new shots. And then the only problem was finding my way back down when suddenly visibility was down to 30 or 40 metres.
Moral of the story? I had an hour of the sort of light and conditions that landscape photographers dream of. In that time I got probably 12–15 shots that are real 'keepers', plus minor variants. To me that's a pretty good rate of return. But it was only possible because I was familiar with the camera and had most of the settings sorted in advance. It also helped a lot that I'd been to the location several times before and had a good idea where to head for. And finally, it helped that I wasn't overburdened with gear and could move pretty fast. I think tripods are a great thing and every photographer should have one. But you also have to know when to leave them behind.
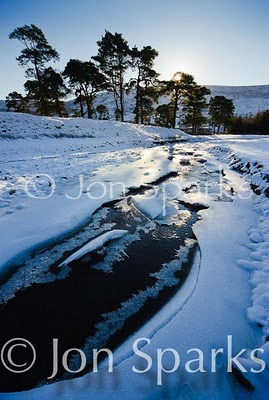
PhotoRadar is suggesting that a replacement for the Nikon D700 is likely to be released in February or March. Possibly to be called D800, and then again, possibly not.
As I’ve been using a D700 since soon after its launch I naturally take an interest in these things. It’s not that I’m desperate to replace my existing D700 (which was serviced just before Christmas), but there are some potential improvements that would make me sit up and take notice. I think it’s a given that it will have ‘Full HD’ video, so I’m not even going to comment on that.
I notice PhotoRadar leads with the suggestion that the new camera will have a 24 megapixel sensor. Groan. This is most definitely not one of my desiderata. Exactly what will that achieve apart from making it more expensive? If you're one of the tiny minority who actually needs 24mp you'll have a D3x already. 16mp – for parity with the D7000 – would be plenty; it would be nice to be able to prepare images for Alamy without up-sizing. But otherwise, 12mp is fine. I'd rather see the focus on improved dynamic range than the 99% pointless pursuit of too many pixels.
Conclusion: don’t want to pay over the odds for inflated pixel count. Rather have better dynamic range/high ISO performance on a sensor between 12 and 16 MP.
Another suggestion on PhotoRadar is that the “D800” will have an articulated LCD a la D5000. My gut reaction is that this would make me much less likely to buy the new camera. I’ve used a D5000 extensively and for me the articulating screen was mildly beneficial when shooting video (which I do occasionally) and a right royal pain in the butt the rest of the time. The “D800” screen would have to be a much better implementation that the D5000’s but even so… A fold-out screen will inevitably add weight and bulk. That’s one negative. But it’s also exposed and fragile in use; bad news for the outdoor photographer. Either you leave it in the open position, where it’s vulnerable to damage (because there’s no screen protector), or you fold it away every time, which leaves you less ready to shoot.
This was more of a pain on the D5000 because more of the controls had to be accessed on screen. A camera like the D700 (and presumably the “D800”) uses buttons and dials much more to change settings, so there’s less need to see the screen before shooting. But I do like instant image review (especially the histogram) so I would want the screen to be readily visible. I’ve used other DSLRs with fold-out screens, e.g. Sony a350, which possibly had a better system (just about the only thing I did like better on the Sony though) but still am not convinced about overall cost-benefit analysis of folding screens for still photography (sorry, I mean ‘photography’). Maybe I should come back to this topic.
Conclusion: a folding screen on the “D800” would be a negative for me.
Having downgraded a couple of items on the PhotoRadar wishlist, what’s on mine?
Dual card slots–dual SD a la D7000 is fine by me. The halfway house on the D300s (1 Compact Flash, 1 SD slot) is just mildly annoying. I know people who have lots of CF cards may find it a nuisance, but SD cards are pretty cheap these days.
Remember that stuff called film? A 4Gb memory card will hold around 200 RAW files from a 16megapixel DSLR. 200 shots is the equivalent of say 6 rolls of 35mm, and my memory is that Velvia film + processing didn’t leave much change from a tenner a roll, i.e. £60. You can get two SanDisk Extreme 4GB cards for that at Warehouse Express.
Dual slots allow instant backup. You couldn’t get that with film (yes, you could shoot duplicate images, at least for non-moving subjects, but if anything happened to the film they were both gone).
SD slot(s) would also allow us to use Eye-Fi cards. I don’t use one myself (yet) but it would be pretty handy when I’m doing product shots or other macro stuff at home. An alternative, which might be be better still, would be an inexpensive WiFi gizmo no bigger than the GP-1.
I’d also like to see significant improvements to autofocus operation in normal shooting (I’m less bothered about Live View). Most of all I’d like a wider spread of focus points. These currently cover less of the frame on Nikon’s full-frame (FX) cameras than on the DX format models. But ultimately I’d like the AF to be able to work anywhere within the frame, as it can in Live View).
Another thing I’d really like to see would be “smart bracketing”. This is where the camera reads the brightness range of the scene and, if it can’t encompass it in one shot, brackets exposures accordingly. For me the point would generally be to be able to merge those frames to a High Dynamic Range image in post-processing, but it should also integrate with an Auto HDR function in-camera to produce JPEG images from the Retouch Menu.
Give me all of those for £2000 and I probably would trade in my existing D700. If they could make it smaller, lighter and tougher too, that would be even better ;–)
